


| Amicus | |
| Order Creation in Smart Docket | |
| See Also Submit feedback on this topic | |
| Modules & Other Devices > Other Devices > PDA > Smart Docket > Order Creation in Smart Docket |
Glossary Item Box
After Logging in,
The Choose Table screen, all the areas and tables within the area will be displayed. This example has Inside and Outside areas.
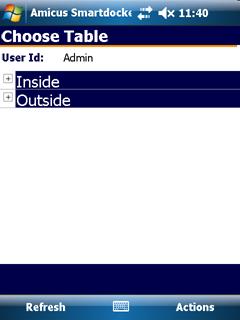
Figure : Choose Table—area group screen
To add an order to a table:
-
Select an area from the Choose Table screen to display further choices.
The choices available to users depend on how the areas have been created. After selecting an area either area sub-groups or tables will be displayed.
-
Select further areas until the tables screen is displayed.
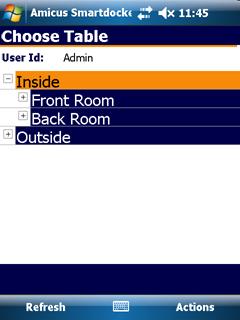
Figure : Choose Table—area sub-group screen
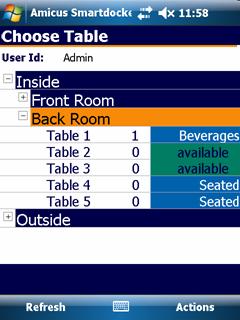
Figure : Table Screen
The area and table names are displayed, Figure shows the tables for the Inside >Back Room> areas. Tables will be green (closed) before an order has been placed and blue (open) after an order has been placed, until the order is finalised.
Choose Table screen elements
These options will appear on the Choose Table screens.
Refresh — Refreshes the screen.
 — Select to display a virtual keyboard.
Actions — Select to display a menu containing the following options:
-
Options — Select to display the Options screen.
-
Show — A menu containing the following options:
-
Order Value — Displays the Choose Table screen with a total order value for each table.
-
Current Course — Displays the Choose Table screen with a current course for each table.
-
Refresh Configuration — Refreshes the table service configuration.
-
Send Queue — Sends the queued orders, when the PDA is connected to the network.
-
Exit Application — Closes SmartDocket.
-
Logout — Logs off the current user, closes the Choose Table screen, and returns to the login screen.
-
Select a table to display the Choose Menu Item to Add screen.
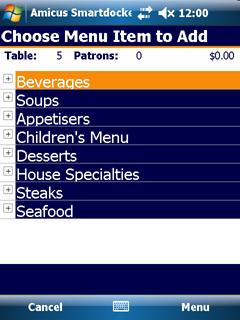
Figure : Choose Menu item to Add screen
An order is created by selecting items or options from a category. Once a category is selected further sub-categories, items or options are displayed for selection. Selected items are added to the order where the item description, quantity, order status, price and total are displayed.
Choose Menu Item to Add Screen Elements
Table — The number of the current table.
Patrons — The number of diners at the current table.
Order Total — Displays the total of this order to date. This field will be updated when any change is made to the order.
Category List — The categories can be accessed by clicking the + buttons next to the category name. The categories shown are top level categories such as Beverages, Seafood, Steaks etc.
Cancel — Closes the Choose Menu Item to Add screen and returns to Choose Table screen.
Menu — Select to display the Quick Add menu containing the following options:
-
Always — Select to automatically enable the Quick Add when an item is selected.
-
Available — Select to enable Quick Add using a context menu.
-
Never — Select to disable the Quick Add option.