Add a New Category
From Amicus
| Amicus | |
| Add a New Category | |
| See Also Submit feedback on this topic | |
| Modules & Other Devices > Modules > Hospitality Module > Meal Order (Core) > Menu > Meal Order Categories > Add a New Category |
Glossary Item Box
In order to add a category to your table service screen, you first need to be on the Menu Items Options Groups screen (shown below). Once you are on this screen click on the Add button.
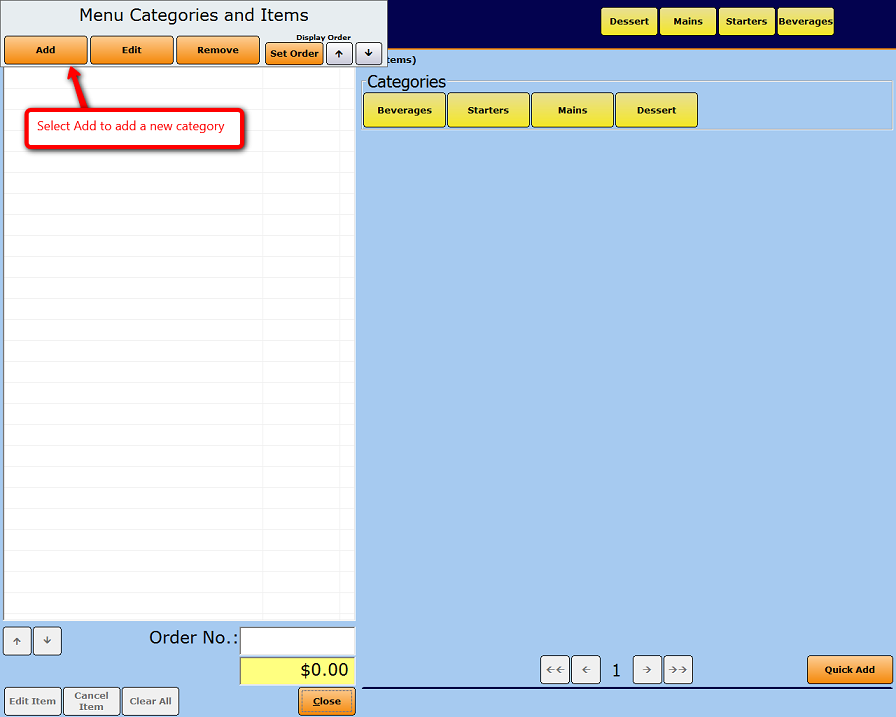
Add
Select the Add button to display the New or Existing dialog, shown in Figure 13. This dialog allows the creation or selection of an existing category, as the new top level category.
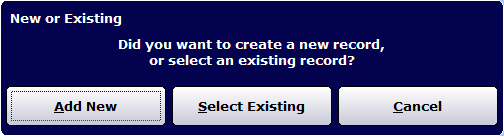
Figure : New or Existing dialog
Add New
New categories can be created by selecting the Add New button.

Figure : Select Category
You will be prompted to Select Menu Item to add a menu item or Category to add a category. Select the Category option to display the Add/Edit Categories dialog.

Figure : Add/Edit Categories dialog
The details of the new category can be entered on this screen.
Name—The name of the new category. This is a mandatory field.
Parent—The parent field is yellow because it is automatically populated with the category information. In this example there is no parent so ‘<TOP LEVEL>’ is automatically put into the parent field.
Printer—The printer that prints the orders for items in this category. This value can be changed using the Select button or cleared using the Clear button.
Printers can be configured to suit your business; areas can be matched by categories, for example:
-
All food category orders can be sent to the Kitchen printers.
-
For a large business each course can be configured to print at a different printer. For example, Entree orders can be printed to the First Kitchen printer, Mains to the Second Kitchen printer and so on.
-
For a small business all orders can be printed to one kitchen printer. They will be printed in course order.
-
All beverage categories to the Bar printer.
-
In addition, area coordinated printing enables all the category orders to be sent to the area coordinator as well as the relevant areas.
Exclude this category from area coordination prints—Check this check box to exclude the selected category from prints received by the area coordinator.
Courses—Each category needs to be associated with a course. There are several buttons that help with managing courses:
Add—Select this button to display the Select Course dialog.
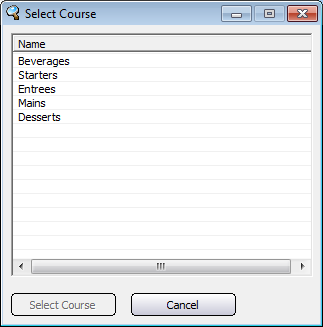
Figure : Select Course dialog
Select Course—Select a course and then click the Select Course button to add the course to the courses list in the Add/Edit Categories dialog. Multiple courses can be added to a category. The first course added will be the default course unless this setting is changed.
Remove—Select a course and click the Remove button to remove the course.
Make Default—Select a course and click the Default button to indicate whether the selected course will be added by default or not.
![]() —Indicates that this option is not chosen by default.
—Indicates that this option is not chosen by default.
![]() —Indicates that this option is chosen by default.
—Indicates that this option is chosen by default.
These buttons appear at the bottom of the Add/Edit Categories dialog.
Save—Saves the current data for the selected settings and closes the Add/Edit Categories dialog.
Apply—Applies the current data for the selected settings and leaves the Add/Edit Categories dialog open.
Close—Closes the Add/Edit Categories dialog. If changes have been made to the information a confirmation dialog will be displayed asking the user to save the changes.