


| Amicus | |
| Add and Edit Locations | |
| See Also Submit feedback on this topic | |
| Modules & Other Devices > Modules > Bookings Module > Add and Edit Locations |
Glossary Item Box
The Add/Edit Location screen allows you to configure locations where resources are located. This helps you to manage each of your resources and helps make bookings easier to process. To access the Add/Edit Location screen click on Booking Module from the Amicus Toolbar and then click on Add/Edit Location. This will then open up the following screen.
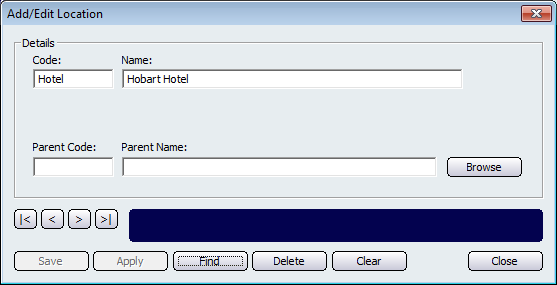
From this screen you can add locations that will then be allocated to resources. In this example the Code is 'Hotel' and the Name is 'Hobart Hotel'. This information is then used on the Add/Edit Resource screen to allocate a resource to a location. The location information is then listed on the Manage Bookings screen to indicate the location of the resource.
The Parent Code and the Parent Name fields are used when there are sibling locations located within the parent location. Clicking on the Browse button will bring up the Please Select a Location screen which lists all of the locations that exist in your database.
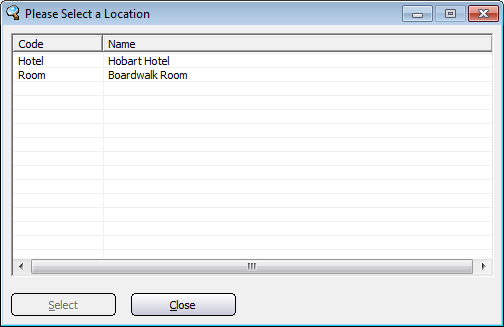
To select the location, click on it and then click on the Select button. This will then populate the Add/Edit Location screen with the selected location.
Other buttons that are available on the Add/Edit Location screen include: < and >, allow you to respectively scroll forwards and backwards through the items on the screen one record at a time. To quickly find the first or last items record, click either the |< or >| key respectively. These buttons appear at the bottom of all Add/Edit dialog tabs providing access to all products, customers, suppliers, etc. ',event)">Navigational Arrows, Save, Apply, Find, Delete, Clear, and Close.