


| Amicus | |
| Manage Custom Fields | |
| Submit feedback on this topic | |
| Configuration and Maintenance > Manage Custom Fields |
Glossary Item Box
An outstanding feature of NBS Amicus is its capability to store any extra, specialized information that you need to keep track of. It does this by allowing you to create custom fields of your own in which to store individual pieces of information. Any custom fields that you create are unique to your NBS Amicus system. For example, you might have a business need to maintain additional information about customers, products or suppliers.
To create custom fields, or to manage ones that you have previously set up, click File on the Toolbar followed by Maintenance, and then click Manage Custom Fields to display the following screen:
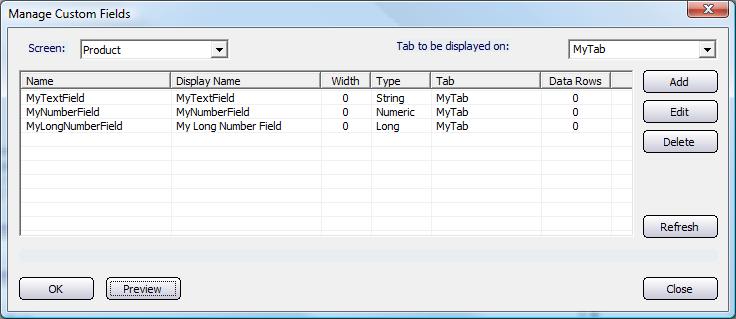
Figure : Custom fields within NBS Amicus allow you to store additional information
From the Screen drop down list box, select the type of information for which you want to create one or more custom fields. The available options are Customer, Product or Supplier. Alternatively, select the type of information from the Screen drop down list box for which you have previously set up custom fields.
In the Tab to be displayed on drop down list box, select the name of an existing Tab within NBS Amicus, or alternatively, type in the name of a brand new Tab. The details of any existing custom fields will be displayed in the tabular section of the screen. These details include the custom field’s Name, its Display Name, its Width and Type, the Tab on which this field appears, and Data Rows (this field contains a positive value if data is currently stored in this custom field – in fact, the higher the value the more information that has been stored using this custom field).
Click the Preview button to see how any custom fields, which have been set up, appear on the nominated Tab.
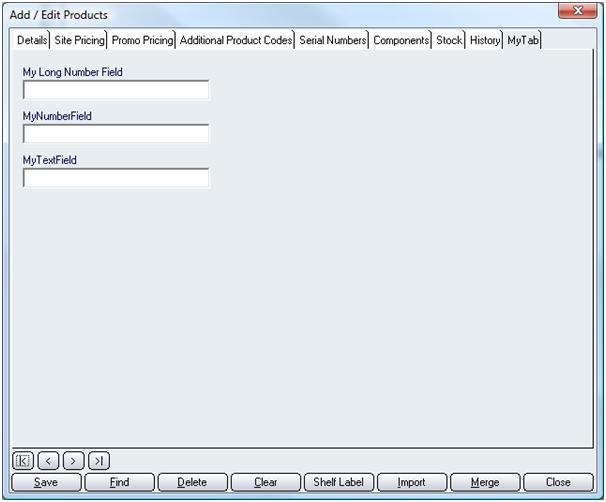
Figure : Sample Tab
On the Manage Custom Fields dialogue click Add to add a custom field, Edit to edit a custom field or Delete to remove a field.
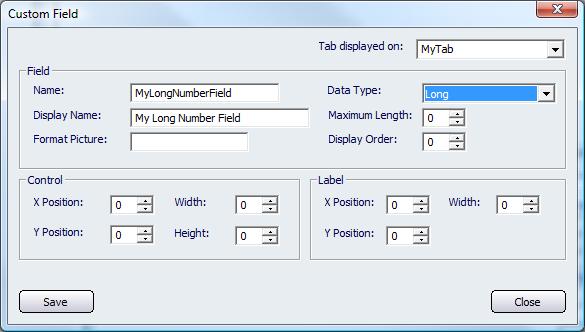
Figure : Use this screen to define the characteristics of a custom field
If you are adding a new custom field, all of the fields, apart from the Tab displayed on field will be blank (as shown above). The empty fields are now ready to accept the details relating to the new custom field that you are creating. If you are editing an existing custom field, the fields shown on this screen will contain any details that have been previously entered. To change the contents of those fields, simply enter in any new details as required.
In the Field section of the screen, Name refers to the name of the custom field as it will be known internally by NBS Amicus. For example, if you were setting up a numeric field in which to store the value of a property you might decide to give it a Name of “value”. Display Name refers to the name that you will see on the screen that is associated with this custom field. In the example just given, you might set up the Display Name to be “Value of Property”.
From the Data Type drop down list box, nominate the type of custom field you are setting up, with the options being Long (used to store large numeric values), Numeric (to store everyday numbers) or String (to store characters of information). Maximum Length specifies the maximum size (length) of the custom field, for example, type in the number 7 to designate a numeric custom field which is 7 digits long. The Format Picture field is used to format the appearance of the data stored within the custom field. For example, with a custom field that’s used to store a number, you can use the Format Picture field to indicate the number of decimal places to be used; whether or not a dollar sign ($) appears at the start of the number; and so on. The number entered into the Display Order field dictates cursor movement between the different custom fields on the screen.
The fields in the Control section of this screen are used to set up the appearance and location of the custom field (control) on the screen on which it appears. The X Position and Y Position fields respectively refer to the custom field’s x and y coordinates on the screen, that is, how far from the side of the screen and how far down from the top of the screen that the custom field is positioned. The Width and Height fields respectively refer to how wide and how high the custom field appears on the screen.
In a similar way, the three fields - X Position, Y Position and Width – in the Label section of the screen are used to control the location and appearance of the label (caption) which is associated with this particular custom field.
Save to save the record, Close to exit.