


| Amicus | |
| Add and Edit Customer Groups | |
| See Also Submit feedback on this topic | |
| Key Areas > Customers > Customer Maintenance > Add and Edit Customer Groups |
Glossary Item Box
The Add/Edit Customer Groups screen allows you to create groups that will contain customers that you would like to group together. This allows you more control when managing the customers in your Amicus database. To access the Add/Edit Customer Groups screen click on Customers from the Amicus Toolbar and then click on Add/Edit Customer Groups. Alternatively, you can access the Customer Group screen from the Details Tab on the Add/Edit Customers screen. Once you do this the following screen will appear.
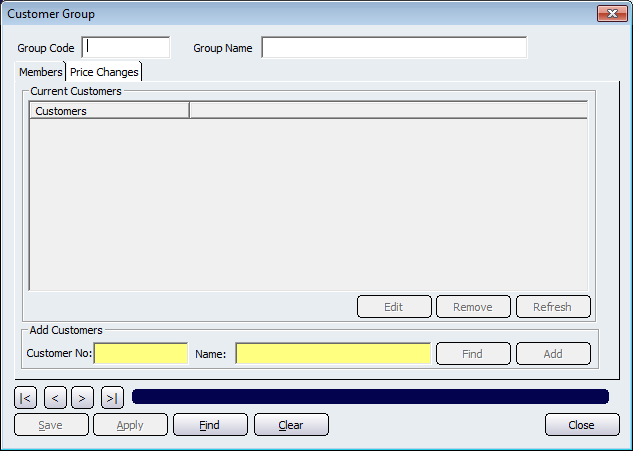
If a customer group has already been created then click on the Find button that is location on the bottom of the screen (in between the Apply and Clear buttons). If no records have been created then to add a new group click in the Group Code field and enter a group code. To give the group a name click in the Group Name field. Once you have done this click on the Apply button to save the record. This will then allow you to add customers to the group.
There are two ways in which you can add customers to a group. The first way is to click on the Find button that is located in the Add Customers section of the screen. This will open up a dialogue that lists all of your customers. Select the customer you would like to add to the group and then click on the Select button. This will then populate the Customer No and Name fields with the customer that you selected. Click on the Add button to add the customer into the group. Alternatively, you can add a customer to a group from the Details Tab on the Add/Edit Customers screen. Below is an example of a Customer Group screen that is populated.
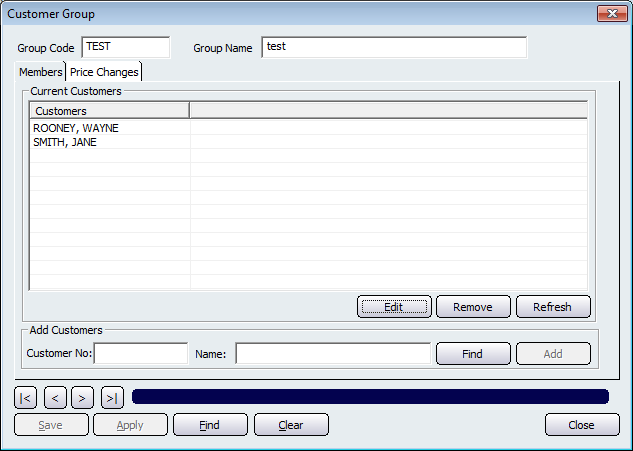
To edit a customers details, click on the customer that you want to edit and then click on the Edit button. Doing this will bring up the Add/Edit Customer Details Tab with the selected customers details populated. To remove a customer from the group, select the customer and then click on the Remove button. Clicking on the Refresh button will reload the screen.
The other tab on the Customer Groups screen is the Price Changes tab. Clicking on this tab will change to the following screen.
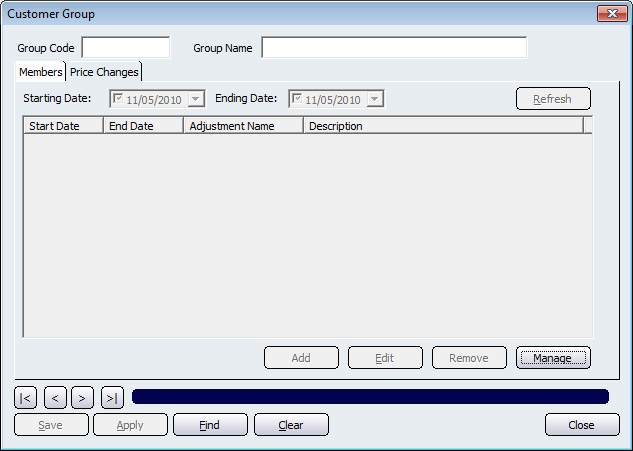
The two filters that are availible from this screen is Starting Date and Ending Date. Clicking on the Refresh button will reload the current screen with the records that match the filters that you have set.
The fields within this screen are: Start Date, End Date, Adjustment Name, and the Description of the adjustment type. The other buttons on this screen are: Add, Edit, Remove. Clicking on the Manage button will open up the Price Change Management screen.
Other buttons that perform actions on the Customer Group screens include: < and >, allow you to respectively scroll forwards and backwards through the items on the screen one record at a time. To quickly find the first or last items record, click either the |< or >| key respectively. These buttons appear at the bottom of all Add/Edit dialog tabs providing access to all products, customers, suppliers, etc. ',event)">Navigational Arrows, Apply, Find, Clear, and Close.
See Also
Amicus Administration User GuideDetails Tab