Add a Sub Category
From Amicus
| Amicus | |
| Add a Sub Category | |
| See Also Submit feedback on this topic | |
| Modules & Other Devices > Modules > Hospitality Module > Meal Order (Core) > Menu > Subcategories_and_Items > Add a Sub Category |
Glossary Item Box
In order to add a sub-category to your table service screen, you first need to be on the Menu Items Options Groups screen (shown below). Once you are on this screen click on the Add button. 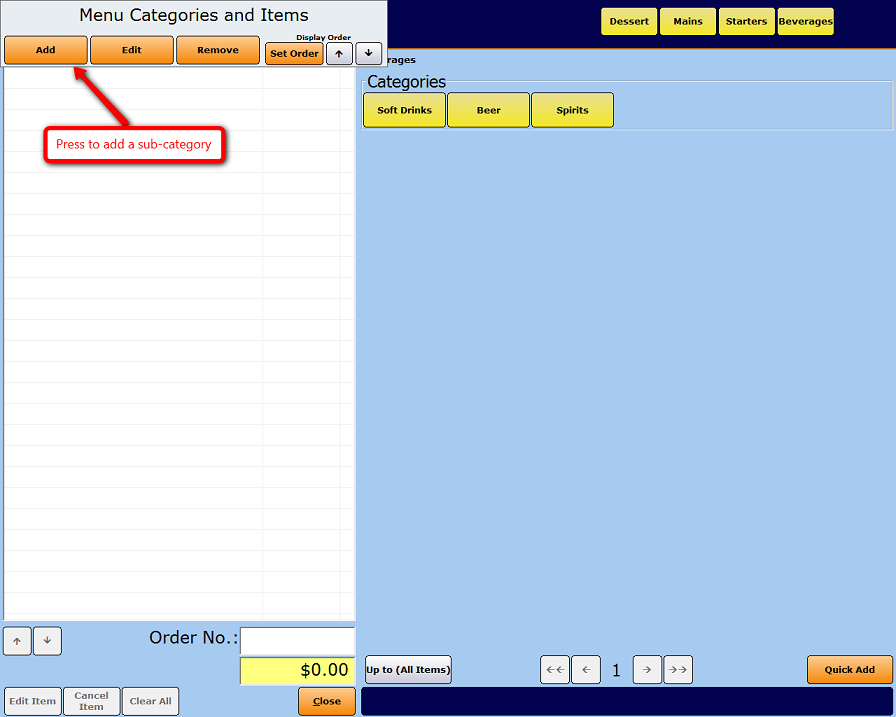
Add
Select the category to add a sub-category or item, then select the Add button on the Menu Categories and Items dialog. A New or Existing dialog will be displayed asking you whether a new category or item is being created or if an existing category or item should be shown at this level.
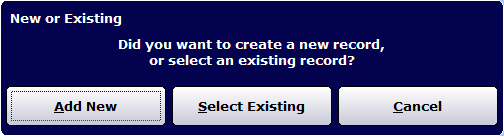
Figure : New or Existing dialog
Add New
If a new category or menu item needs to be created then select the Add New button. A Menu Item or Category dialog will be displayed asking you whether a subcategory or menu item is being created.

Figure : Menu Item or Category dialog
Category
If a new category is needed select the Category button and an Add/Edit Categories dialog will be displayed.
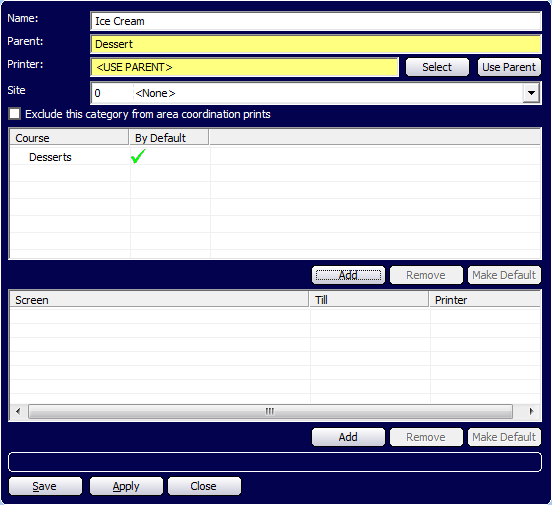
Figure : Add/Edit Sub Category Dialog
The details of the new category can be entered into this dialog in the same way as adding the parent category however the sub-category will have a parent.
Name—The name of the new category. This is a mandatory field.
Parent—The parent category field is yellow because it is automatically populated with the Parent category information.
Printer—The printer that prints the orders for items in this category. This value can be changed using the Select button or cleared using the Clear button.
Exclude this category from area coordination prints—Check this check box to exclude the selected category from the coordinated areas.
Courses—Each category needs to be associated with a course. There are several buttons that help with managing courses:
-
Add—Select this button to display the Select Course dialog.
-
Select Course—Select one of the courses and select the Select Course button to add the course to the courses list in the Add/Edit dialog. Multiple courses can be added to a category. The first course added will be the default course unless this setting is changed.
-
Remove—Select one of the courses and select the Remove button to remove the course.
-
Make Default—Select one of the courses and select the Default button to indicate whether the selected course will be added by default or not.
![]() —Indicates that this option is not chosen by default.
—Indicates that this option is not chosen by default.
![]() —Indicates that this option is chosen by default.
—Indicates that this option is chosen by default.
These buttons appear at the bottom of the Add/Edit Categories dialog.
Save—Saves the current data for the selected settings and closes the Add/Edit Categories dialog.
Apply—Applies the current data for the selected settings and leaves the Add/Edit dialog open.
Close—Closes the Add/Edit Categories dialog. If changes have been made to the information a confirmation dialog will appear asking whether you want to save the changes.
Menu Item
Menu items are linked to products in NBS Amicus.
To add a new menu item select Menu Item from the Menu Item or Category dialog to display the Menu Items dialog.
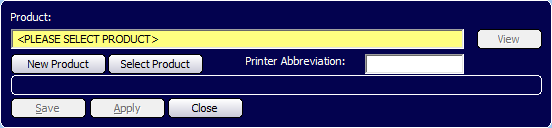
Figure : New Menu Items dialog
The details of the new menu item can be entered into this dialog.
Product—This is the NBS Amicus product used in this menu item and is a mandatory field. The products can be existing products or new products can be added. There are several buttons that help with managing products:
-
New Product—Displays the Add/Edit Products Details tab to allow you to enter a new product into your database.
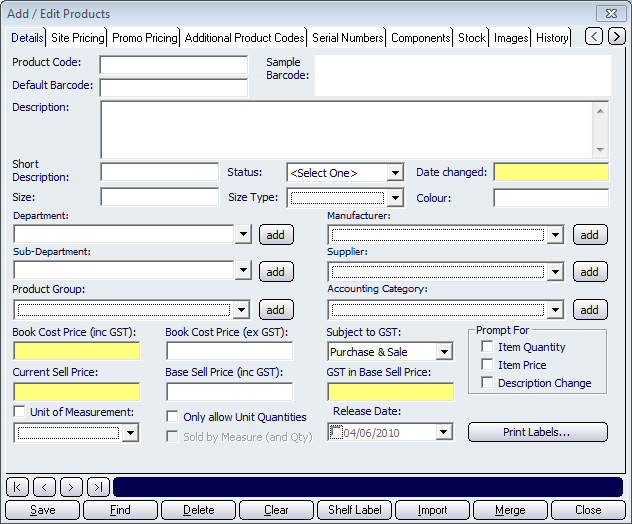
Figure : Add/Edit Products dialog
Once you have added the necessary product information select the Save button on the Add/Edit Products dialog to add the name and price information of the NBS Amicus product to the Menu Items dialog. Refer to Add/Edit Products for more information.
-
Select Product—A list of all products in NBS Amicus will be displayed in the Select Product dialog.
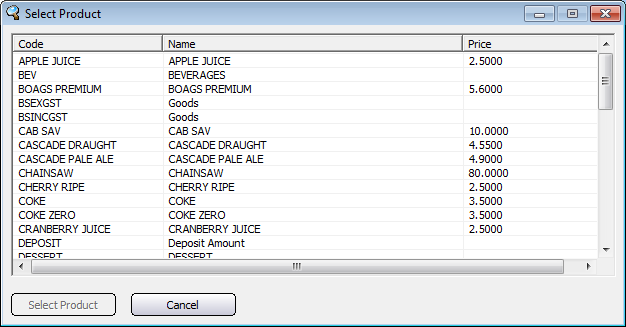
Figure : Select Product dialog
Select one of these products and then click on Select Product to add it to the Menu Items dialog. The name and price information of the selected product will then be added to the screen..
-
View—Displays the Add/Edit Products dialog with details of the selected product so that they can be edited.
Printer Abbreviation—This is the text that will display on the printer when this menu item is printed. If this is left blank then the product name will be used.
Save—Saves the current data for the selected settings and closes the Menu Items dialog.
Apply—Applies the current data for the selected settings and leaves the Menu Items dialog open.
Close—Closes the Menu Items dialog. If changes have been made to the information a confirmation dialog will appear asking whether you want to save the changes.