

| Amicus | |
| How to enter sale payment details | |
| See Also Submit feedback on this topic | |
| Key Areas > Sales > Common Tasks > Finalise A Sale Using Advanced Functionality > How to enter sale payment details |
Glossary Item Box
Introduction
After a payment type is selected, the next step in finalising a sale is to enter the payment details. The details to be entered for a sale payment depend upon the selected payment type and its current configuration.
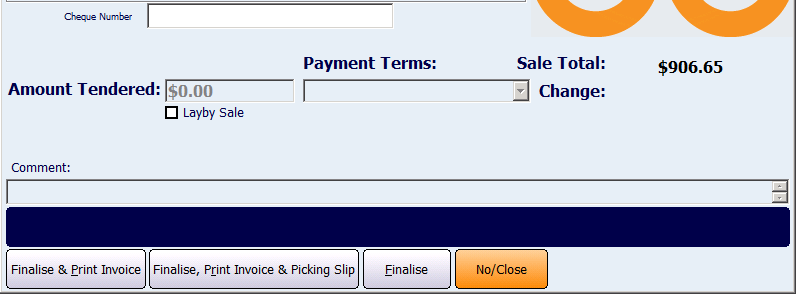
To provide an example, the Amount Tendered value (Refer Figure below) is by default mandatory for the Cash Payment Type. However, it is possible to configure the Cash Payment Type in a manner that the Amount Tendered value need not be entered.
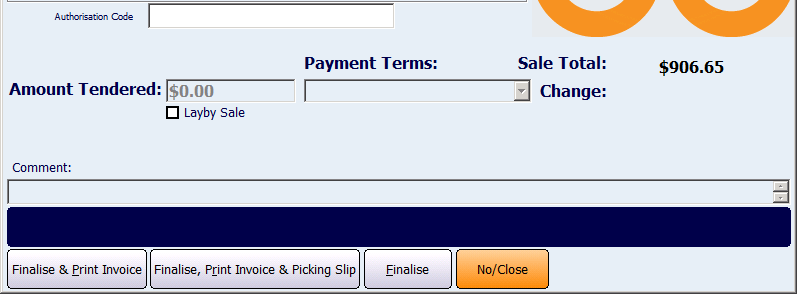
Besides Amount Tendered, there are other values that can be entered as a part of sale payment details. Examples of these values are Cheque Number, Authorisation Code & Payment Terms. Each of these values are normally associated with a specific payment type.
As mentioned in the previous section the AMICUS POS ships with standard or pre-defined payment types . It is possible to change the behaviour of these payment types as well as to create new payment types.
How To Use This Functionality
The following information may be required to be entered as Sale Payment Details before a sale is finalised.
-
Amount Tendered (Normally associated with Cash Payment Type)
-
Cheque Number (Normally associated with Cheque Payment Type)
- Authorisation Code (Normally associated with Card Payment Type)
- Payment Terms (Normally associated with Account Payment Type)
-
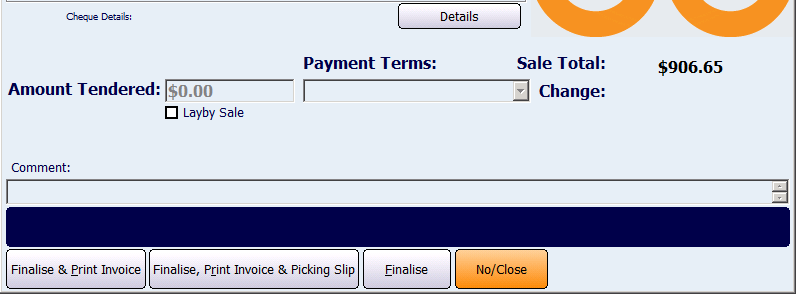
Cheque Details
-
Amount Tendered

Figure : Sale Total, Amount Tendered and Change
-
Refer to Finalise A Sale Using Basic Functionality for a detailed explanation of entering amount tendered in Touch Screen & Fast Sale / Invoice Sale mode.
-
Cheque Number

-
Touch Screen Mode
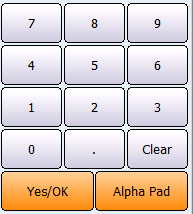
Punch in the cheque number from the on screen numeric keypad using either the mouse or touch screen.
-
Fast Sale/Invoice Sale Mode
Use the keyboard to type in the cheque number
-
Authorisation Code

-
Touch Screen Mode
Enter the authorisation code from the on screen numeric keypad using either the mouse or touch screen.
-
Fast Sale/Invoice Sale Mode
Use the keyboard to type in the authorisation code
-
Payment Terms

-
Touch Screen Mode
Select a payment terms from the Payment Terms drop down list using either the mouse or touch screen.
-
Fast Sale/Invoice Sale Mode
Select a payment terms from the Payment Terms drop down list using the mouse.
-
Cheque Details

-
Applicable for both Touch Screen & Fast/Sale or Invoice Sale Mode
Click on the Details button (Figure ) to display the Detailed Cheque Dialog and enter the following details.
-
Drawer
-
Branch
-
Bank
-
Cheque No.
Configuration Requirements
-
Amount Tendered can be entered for a payment type only if the required tendered option is enabled. Refer to How To Enable Amount Tendered For A Payment Type to know more.
-
Cheque Number can be entered for a payment type only if the payment type in question is configured to accept a cheque number. Refer to How To Enable Cheque Number For A Payment Type to know more.
-
Authorisation Code can be entered for a payment type only if the payment type in question is configured to accept an authorisation code. Refer to How To Enable Authorisation Code For A Payment Type to know more.
-
Payment Terms can be entered for a payment type only if the payment terms option is enabled. Refer to How To Enable Payment Terms For A Payment Type to know more.
-
It is mandatory to enter a bank name when the Detailed Cheque payment type is selected. Please define the names of banks before using this dialog. Refer to Creating A Bank for more information.
Additional Preferences
-
It is possible to make the Cheque Number either optional or mandatory in case payment is received by cheque. Refer to Configuring Payment Types - Cheque number to know more.
-
It is possible to make the Authorisation Code either optional or mandatory in case payment is received by card. Refer to Configuring Payment Types - Authorisation Code to know more.
-
It is possible to make payment terms either optional or mandatory. Refer to Configuring Payment Types - Payment Terms to know more.
Make A Basic
Sale Make A Sale Using Advanced
Functionality
Finalise A Sale Using Basic
Functionality
Finalise A Sale Using
Advanced Functionality
Selecting A Payment Type
Selecting
Method Of Finalising A Sale
Splitting A Payment
Configuring Payment Types
Creating
A User-Defined Payment Type
