


| Amicus | |
| Editing Areas and Tables | |
| See Also Submit feedback on this topic | |
| Modules & Other Devices > Modules > Hospitality Module > Meal Order Table Service > Areas > Editing Areas and Tables |
Glossary Item Box
Amicus allows you to edit previously created areas and tables so that they can be changed and updated when necessary. To access the Areas and Tables screen, click on Meal Order Module from the Amicus Toolbar and then click on Add/Edit Areas. Doing this will bring up the Areas and Tables screen.
Editing Areas
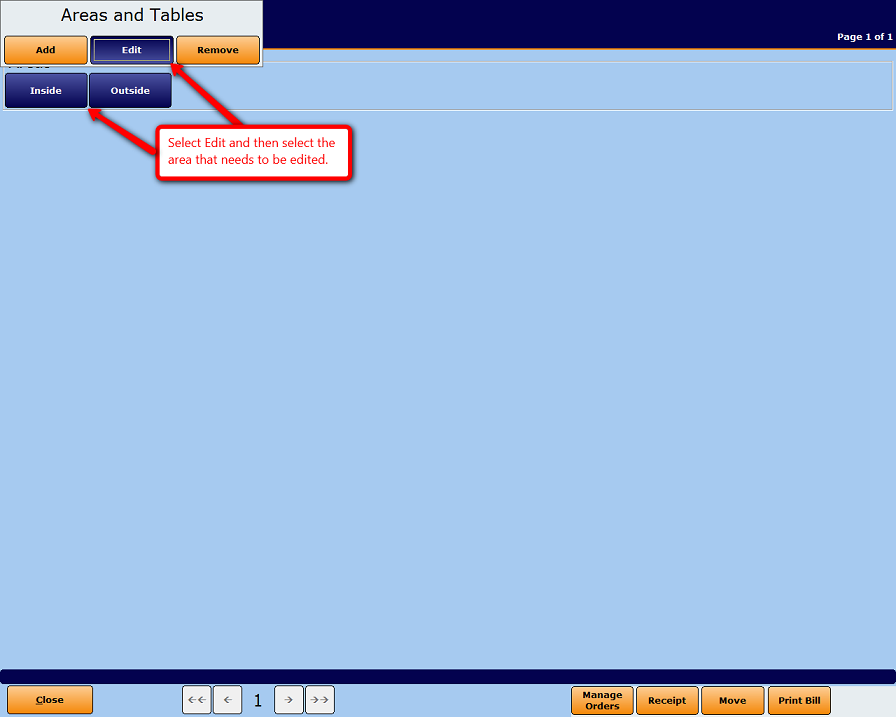
To edit an area click on the Add button (when the Add button has been activated it will turn blue) on the Areas and Tables screen and then click on the Area that is going to be edited. Below is a screen shot that demonstrates how to do this.
This will then open up the Add/Edit Areas screen whereby you can edit the properties of the selected area.
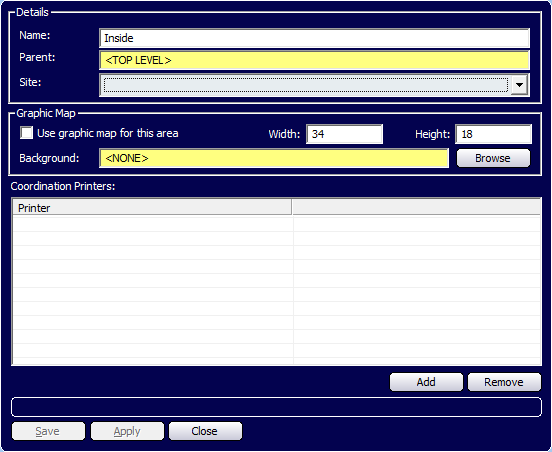
Buttons that perform actions on the Add/Edit Areas screen includes: Save, Apply, and Close.
Editing Tables
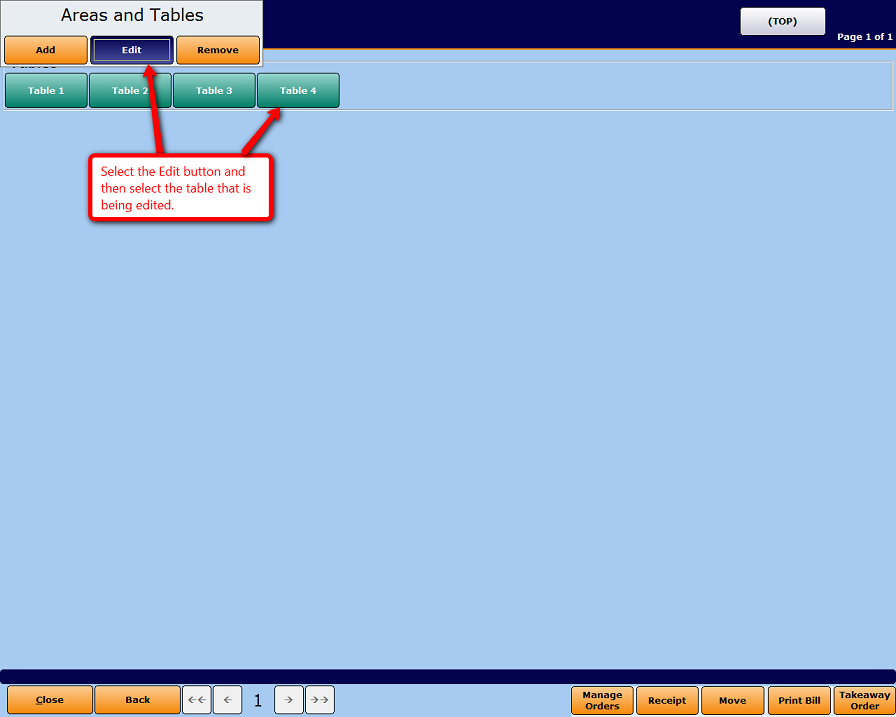
To edit a table click on the Add button (when the Add button has been activated it will turn blue) on the Areas and Tables screen and then click on the table that needs to be edited (ensure that the screen is showing your tables). Below is a screen shot that demonstrates how to do this.
This will then open up the Add/Edit Tables screen where you can change the properties of the table that has been selected.
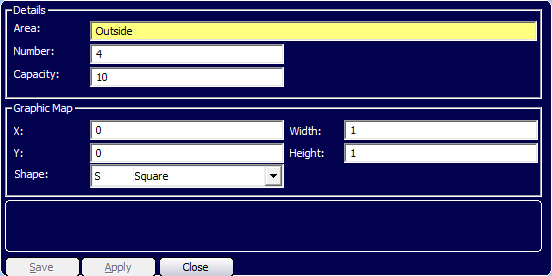
Buttons that perform actions on the Add/Edit Tables screen include: Save, Apply, and Close.
Pressing the Edit button again while it is selected will deselect it. The button will then change from being blue (active) to orange (not active).
Once you have completed editing your areas or tables, click on the Close button to exit the Areas and Tables screen.