


| Amicus | |
| Generic Import | |
| See Also Submit feedback on this topic | |
| Configuration and Maintenance > Importing Information > Generic Import |
Glossary Item Box
NBS Amicus allows you to import a range of table information, including Customers, Products, Suppliers and Stocktakes. All of which are stored in ASCII text files, with tab, comma, tilde(~), or other defined character separators between data fields. Available tables include; Base Price, Customer, Department, Manufacturer, Product, Stock Item Entry, Stock Receipt, Stock Take, Stock Take Item Entry, Sub-Department, Supplier, Supplier Order and Supplier Order Item.
If the data you wish to import is not already in one of these file formats, you can quickly and easily create an ASCII text file by opening the data file that you want to import in Microsoft Excel, then select Save As from the File menu and choose either Text (tab delimited).txt or CSV (comma delimited).txt as the file type.
To import customer information into NBS Amicus, select File Import from the File menu and then select Customer Details. This will open the File Import Wizard.
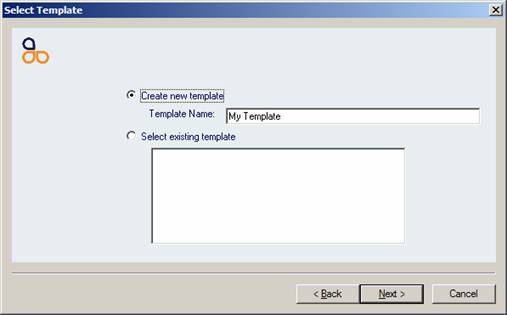
Figure : The opening screen of the File Import Wizard
The File Import Wizard allows you to save file import templates, so next time you need to import customer information from this source you will be able to short cut the process. If this is the first time you have imported data from this source enter a Template Name in the Create new template field. It is recommended that the template name refer back to the data source to make future imports from this source easier.
If you have previously imported data from this source, select the appropriate file import template from the list of existing templates in the Select existing template field. If you select an existing template, the options you selected previously, such as separator values, field mappings and assigned values will be pre-selected for you. You may change any of these settings during the import process.
Controls available on each dialogue include; Back, Next and Cancel.
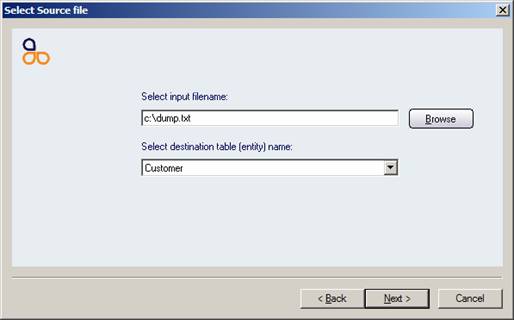
Figure : The Select Source file window of the File Import Wizard
Step two in the File Import Wizard is the Select Source file window where you need to select the source file to import the data from. Clicking on Browse will open the File Explorer menu for you to search for the file, or if you know the file’s name and location you may simply type this information into the Select input filename field.
Select destination table… from the drop down list of file tables. As this section is discussing how to import a customer, you would.
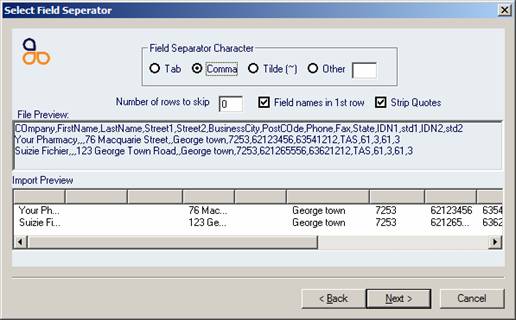
Figure : The Select Field Separator window of the File Import Wizard
This will open the Select Field Separator window of the File Import Wizard. This window allows you to choose the text character that separates the information within your source file. Generally a source file with a .txt file name extension will use either a tab, space or double quotation marks (“) to delimit field names. A source file with a .csv file name extension will use a comma to separate the values and a .dat file name extension will use the tilde (~) character to separate the values. Select the appropriate separator character in the Field Separator Character selection field for your source file.
If this source file contains header row(s) that you wish to skip, select the Number of rows to skip.
If your source file contains the field names in the first row, ensure you select the Field names in 1st row option.
The Strip Quotes option will remove all quotation marks from the source data. This option should not be used where quotation marks are used to separate field values. Quotation marks are generally used to define text fields within source files, however if your source file uses tabs, spaces or commas or some other delimiter to define fields, these quotation marks are not required to specify text.
The Import Preview window will preview the source file information that NBS Amicus will be importing. The Import Preview allows you to test the affects of the options selected in this window. As you select options in this window the preview will automatically update.

Figure : The Match import fields window of the File Import Wizard
The next stage of the File Import Wizard is the Match import fields… window. This window allows you to map each field in your source file to its matching field in the customer data table in NBS Amicus. Where data fields have matching names, the File Import Wizard will automatically map these fields. Note that only data fields in the source file that are matched will be imported.
To map a data field, select the column name by highlighting the row. The field name will display in the Field Name window. Link this source field to a destination field using the Mapped to Field drop down list by selecting the matching field from the list of available fields.
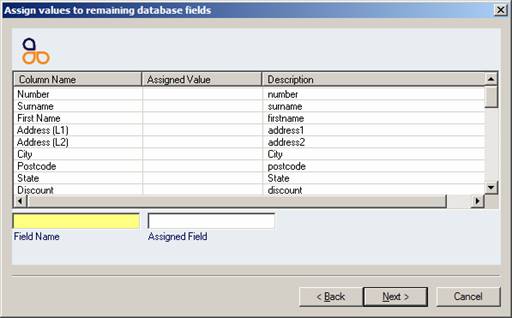
Figure : The Assign values to remaining database fields window of the File Import Wizard
The Assign values to remaining database fields window allows you to assign a fixed value to a specific field for the customer’s whose information you are importing. This is a useful method of applying a credit limit or a customer type to the records that you are importing.
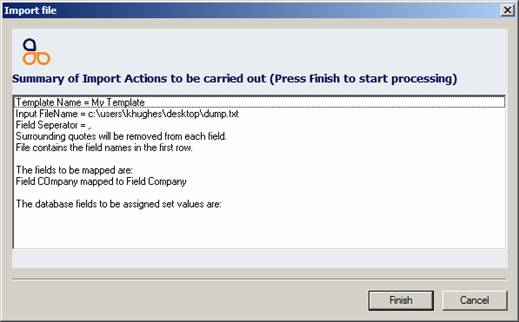
Figure : Summary of import actions to be carried out
The final step of the File Import Wizard is the Summary window. This window provides a summary of the actions that NBS Amicus will undertake to import the data into the customers data table.
Selecting Finish will accept these actions and import the data.
If you do not wish to proceed or have made some error during the import process, click on Cancel to abandon the importation process.