

| Amicus | |
| Viewing the Added Sub-categories or Items | |
| See Also Submit feedback on this topic | |
| Modules & Other Devices > Modules > Hospitality Module > Meal Order (Core) > Menu > Subcategories_and_Items > Viewing the Added Sub-categories or Items |
Glossary Item Box
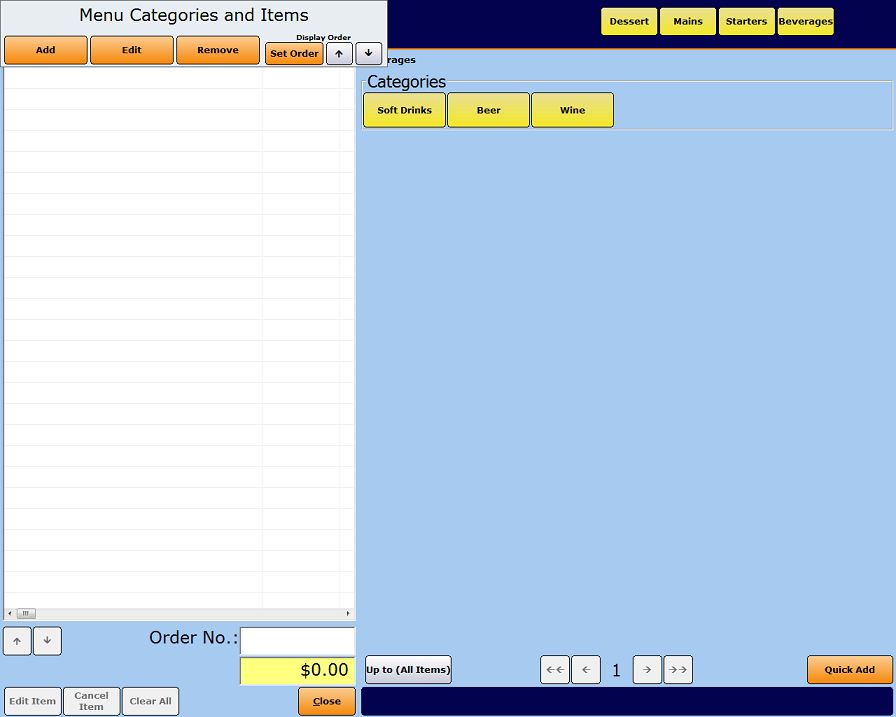
Amicus allows you to add sub-categories within categories so that it is easier to structure and manage your menus. You can access your sub-categories on the Place an Order (Edit) screen. If your categories have a sub category then you can access that sub-category by clicking on its parent category. Once you are looking at the sub-categories their parent category will be displayed in the header.

Figure : Soft Drinks, Beer, and Wine sub-categories within the parent category called Beverages
If the category or one of its subcategories is empty it will not appear in the Place an Order screen. These categories are displayed with (EMPTY) under the name.
Place an Order (Edit) screen buttons
These buttons will appear on the Place an Order (Edit) screen.
Up to ‘Category’—Selecting this button will display the parent category. This button appears on all screens that have parent categories. The text of this button will say Back to ‘Category’ as an example the figure above shows Up to (All Items). Clicking this will bring you up to the highest level categories.
Close—Selecting this button will close the dialog.
Page Navigation—Navigation buttons are active when there are too many categories, items or options to all fit on Place an Order (Edit) screen. These buttons allow the user to go to the first, previous, next and last page.
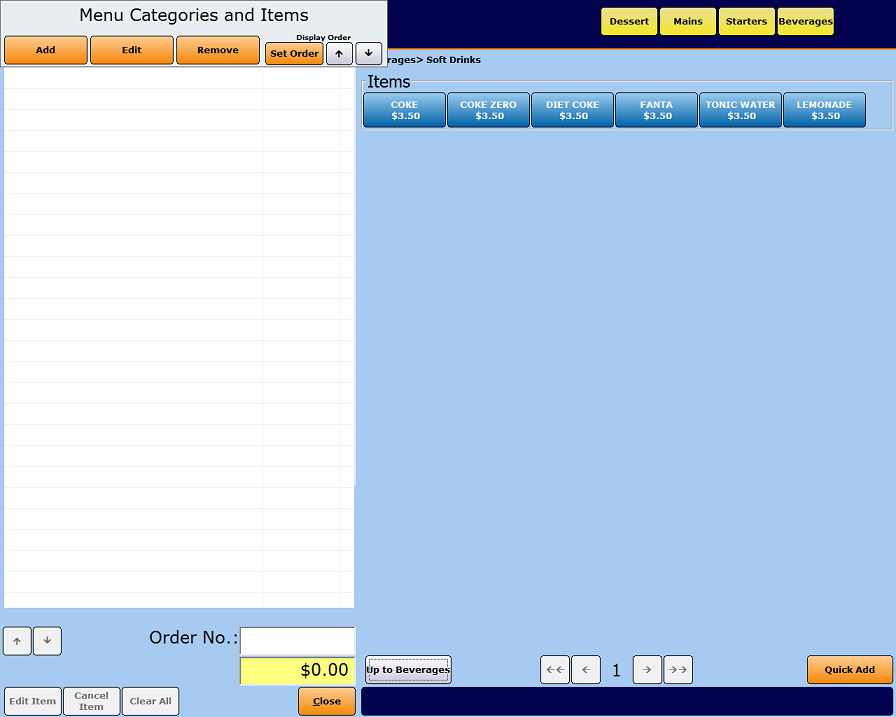
When menu items have been added they are displayed as blue buttons on the Place an Order (Edit) screen, in a group called Items. The parent category will be displayed in the header.

Figure : Items added to the Soft Drinks Category