


| Amicus | |
| How to accept a split payment | |
| See Also Submit feedback on this topic | |
| Key Areas > Sales > Common Tasks > Finalise A Sale Using Advanced Functionality > How to accept a split payment |
Glossary Item Box
Introduction
In this section we will take a look at how the user can optionally accept a customer payment across multiple payment types by using the Split Payment Dialog .
This dialog displays the Total Charge and the Balance (as per figure below). The Total Charge is the bill amount and the Balance amount is the amount that remains to be adjusted or received against a payment type.
Note that in the figure below the Total Charge and the Balance are the same value. This is because no payment has been entered against any payment type.
In order to enter a payment click on a payment type and enter the amount received against the payment type. Continue the process until the entire payment has been received and the Balance figure becomes zero.
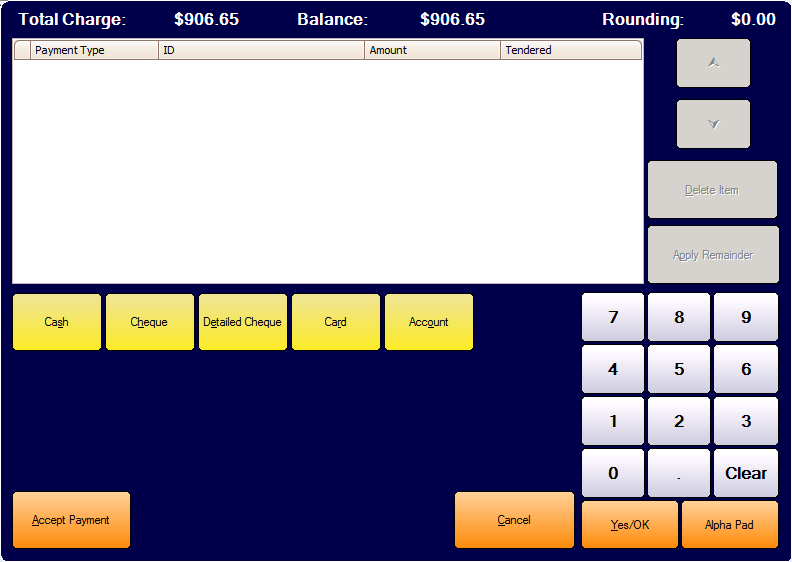
Figure :Split Payment Dialog
How To Use this Functionality
In this section we will take a look at how to split the payment of the above bill amount (as per figure above) across the payment types of Cash, Card, Cheque and On Account.
Step 1 Cash - 240.00
Step 2 Cheque - 300.00
Step 3 Card - 200.00
Step 4 Account - 166.65
Total - 906.65
-
Select the Cash Payment option from the Split Payment Dialog by using the ALT-S keyboard accelerator. The option can also be selected by using the mouse or the Touch Screen (Touch Sales Screen only).
-
Enter the amount to be received in cash and the amount tendered by the customer. The amounts can also be entered from the numeric keypad by using the mouse or Touch Screen (Touch Sales Screen only).
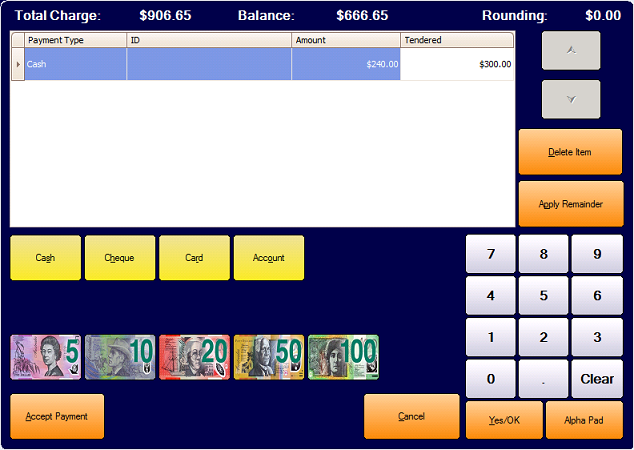
Figure :Step 1 (Enter Cash Amount)
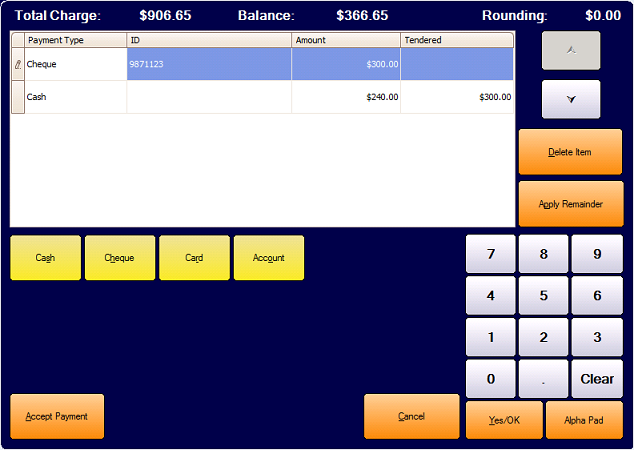
Figure :Step 2 (Enter Cheque Payment Option)
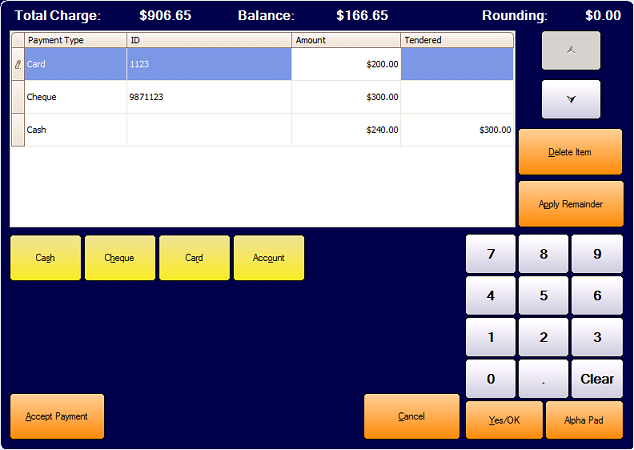
Figure :Step 3 (Enter Card Payment Amount)
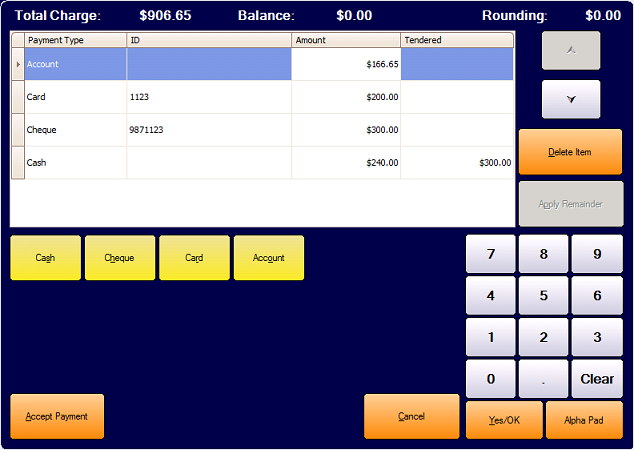
Figure :Step 4 (Enter Account Payment Amount)
-
Complete the Split Payment by clicking on the Accept Payment button. Note that if the Balance Amount is not $0.00 then the Split Payment will not be completed.
Configuration Requirements
-
None
Additional Preferences
-
None