


| Amicus | |
| Repairs Tab | |
| See Also Submit feedback on this topic | |
| Key Areas > Customers > Customer Maintenance > Add and Edit Customers > Repairs Tab |
Glossary Item Box
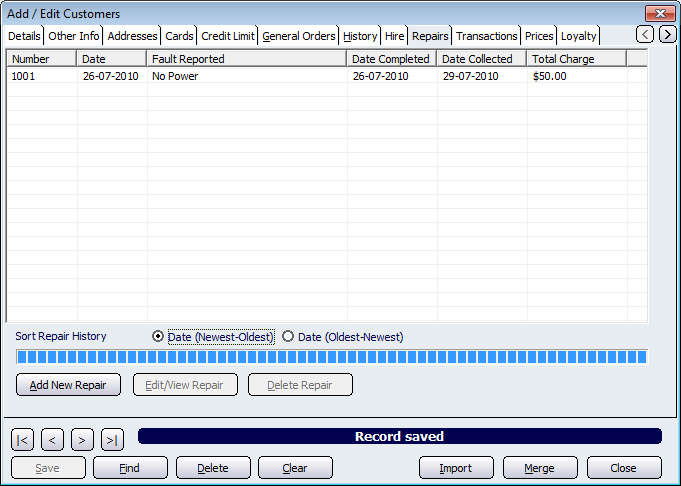
Figure : Repairs information for a customer
NBS Amicus uses the functionality associated with the Repairs tab to keep track of any repairs that are made to your customers equipment.
The Repairs table includes information such as Number, Date, Fault Reported, Date Completed, Date Collected and the Total Charge for the repair work undertaken.
The Sort Repair History section allows you to sort the order in which the repairs are displayed on the screen. Select the Date (Newest-Oldest) box to display the newest repairs first. Conversely, select the Date (Oldest-Newest) to display the oldest repairs first.
Click on the Add New Repair button to add a new repair to the system. Clicking on this button will bring up the Service Request Screen.
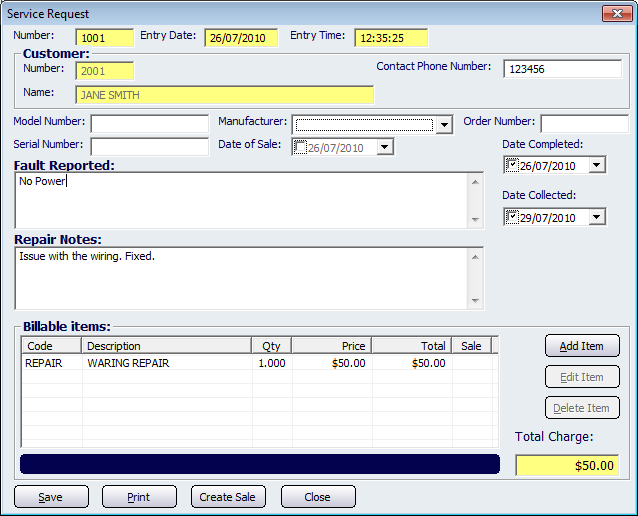
Fill out the screen as required and press the Save button to save the repair into Amicus. Click on the Print button to print out the details of the repair.
The Create Sale button can only be used if the Repair has Billable items associated to it. Click on the Add Item button to bing up the Edit Service Item screen (shown below).
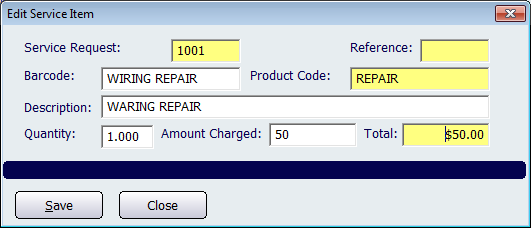
Enter in the required details and click on the Save button to apply the service item to the service request. The Service Request screen will now have a Billable item populated. Clicking on the Create Sale button will open up the sales screen with the billable item populated. Clicking on the Close button will exit the Service Request Screen.
You can edit or view the details of a repair, or delete the details of a repair. To do so, first select the specific repair record from the list of repair records which are displayed, and then click either Edit/View Repair or Delete Repair.
Buttons to perform actions on the displayed dialogue includes; < and >, allow you to respectively scroll forwards and backwards through the items on the screen one record at a time. To quickly find the first or last items record, click either the |< or >| key respectively. These buttons appear at the bottom of all Add/Edit dialog tabs providing access to all products, customers, suppliers, etc. ',event)">Navigational Arrows, Save, Find, Delete, Clear, Import, Merge, Close.