Step 3. Set up your Windows webserver or your iSeries webserver
Prerequisite Steps
Before you start, it will make configuration easier if you ensure that the following has been done:
|
1. |
LANSA for the Web is installed, configured and started on the web server. |
|
|
2. |
The partition you are working with on the web server is enabled for LANSA for the Web, and has been initialised. |
|
|
3. |
The partition you are working with on the web server is enabled for RDMLX. |
|
|
4. |
The VLF (epc870 or later) has been imported into that partition on the web server. |
|
|
5. |
The web server is accessible from your PC. |
|
|
6. |
If the webserver is located on a different machine to your development machine, a network drive has been mapped to the web server and the drive letter used has been recorded. |
|
Run the Web Configuration Assistant
Start the Web Configuration Assistant from the VLF (Framework) --> (Web configuration assistant...) . For more information see Web Configuration Assistant.
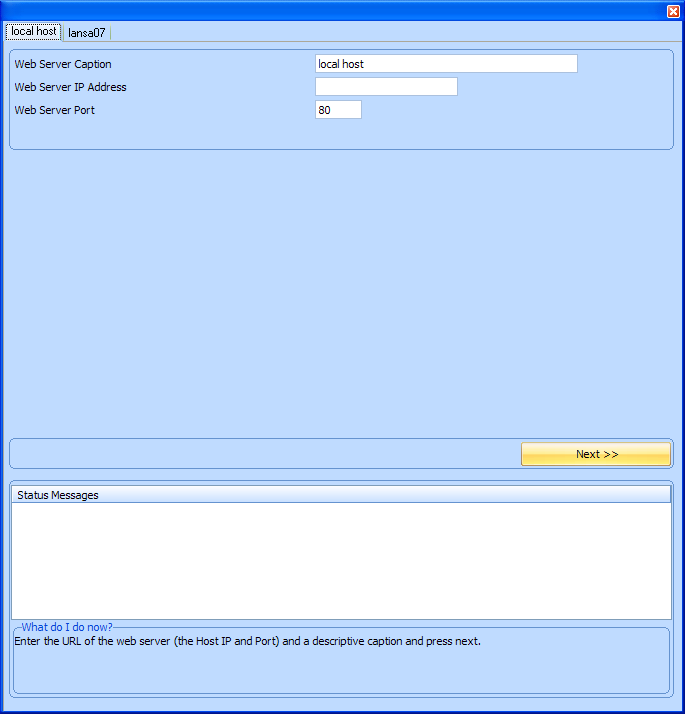
Two tabs are displayed. Each tab can be used to define a web server to the Framework:

Windows Web Server
In one of the tabs, enter the ip address and port used by your windows web server, and a caption describing the webserver.
For example, if the webserver was an IIS webserver on your own PC, and you were using port 80, you could enter:

Press the Next button and follow the instructions.
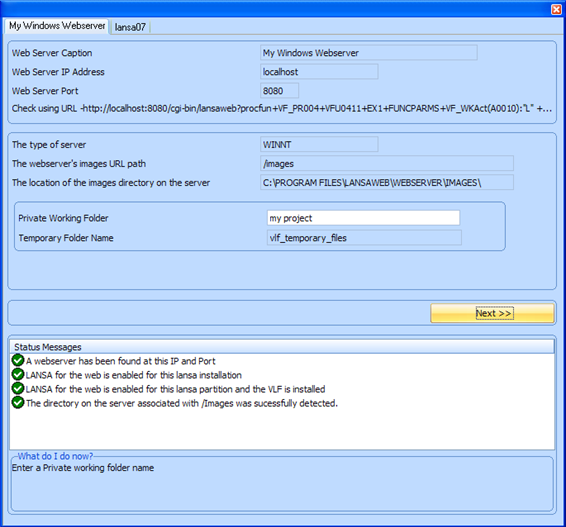
The Web Configuration Assistant will attempt to automatically determine everything it can about your web server, but sometimes it will need to request some information from you:
- It may need to know the location that http://localhost/Images points to
- It will always need to know what Private Working Folder you want to use (if the folder does not exist, the assistant will create it). Enter the value and press next, then Save, then move on to the next tab:

iSeries web server
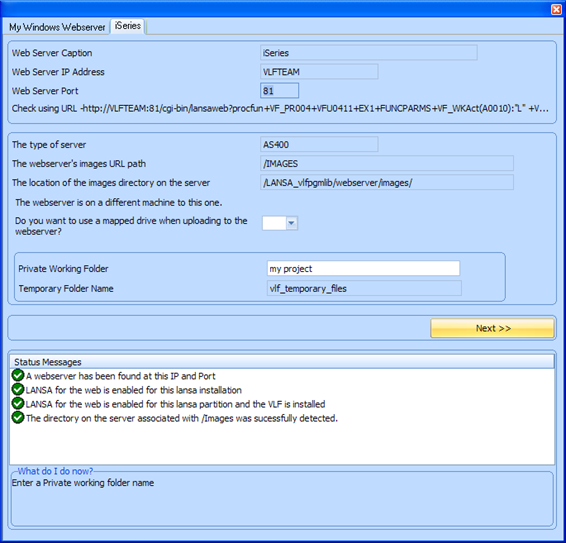
Configure the iSeries web server in the same way.
The main difference is that it will be necessary to specify a mapped drive if you want the VLF to upload your web framework to the web server automatically.
To map a drive to an iSeries that is on your network, go to windows explorer, and choose the option Tools --> Map a network drive.
Choose a drive letter and map it to \\host_ip\IFS, and map it using a different user name - use an iSeries user profile and password (where host_ip is the ip address of the iSeries, or a name that resolves to that ip address).

When you have finished, save and then close the Web Configuration Assistant.