Step 1. Create a Filter for Department Sections
In this step you will make the Department Sections business object visible in the navigation pane and create a filter for it.
You need to do this in preparation for the switching exercise because object switching can only be performed on objects which are visible in the navigation pane.
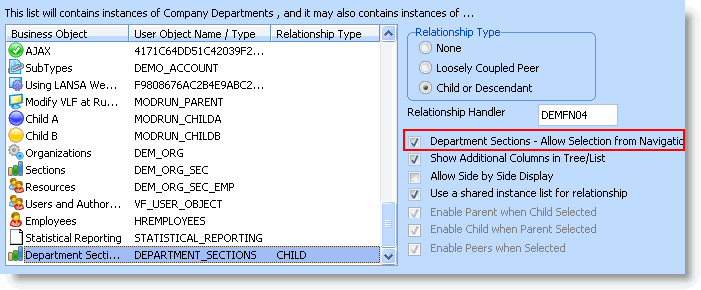
1. In the Framework, display the properties of the Company Departments business object.
2. Display the Instance List / Relationships tab.
3. Select Department Sections in the list on the bottom left.
4. Select the option Department Sections – Allow Selection from Navigation Pane.

5. Close the properties of the Company Departments business object. The Department Sections business object is now visible in the navigation pane.
6. Display the properties of the Department Sections business object.
7. Change the icon for example to  .
.
Next you need to replace the mock-up filter in the Sections business object with a functional filter to populate the instance list:
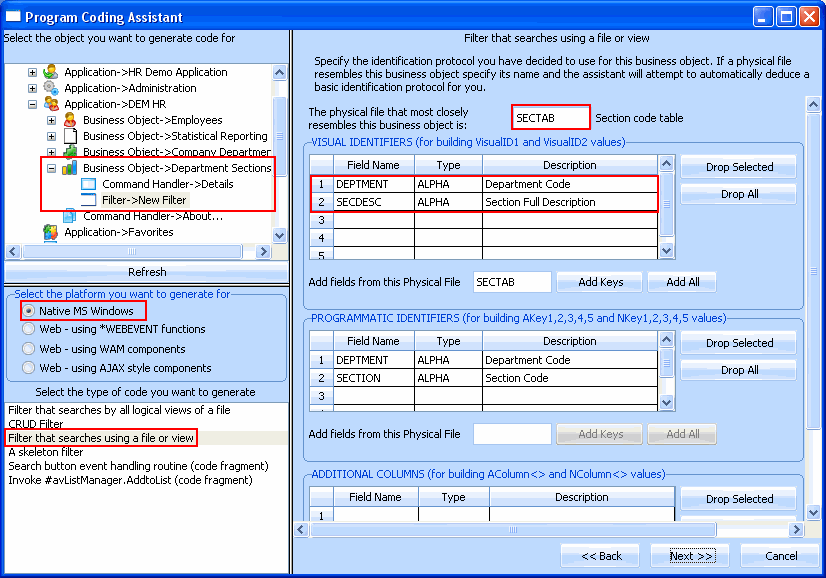
6. Start the Program Coding Assistant.
7. Select the Department Sections business object in the iii HR application.
8. Select New Filter, Windows as the platform and a Filter that searches a file or a view.
9. Click Next.
10. Specify SECTAB as the physical file, and DEPTMENT and SECDESC as the visual identifiers.

11. Accept the other defaults set by the Program Coding Assistant and click Next.
12. Specify DEPTMENT field as the key to be used for search operations.
13. Click Next.
14. Click Generate Code.
15. On the Generated Code page specify iiiCOM09 as the name of your filter and Sections Filter as the description. (iii are your initials. If you are using an unlicensed or trial version of Visual LANSA, you must always use the three characters DEM to replace iii).
16. Click Create. The component is displayed in the Visual LANSA Editor.
17. Compile the filter.
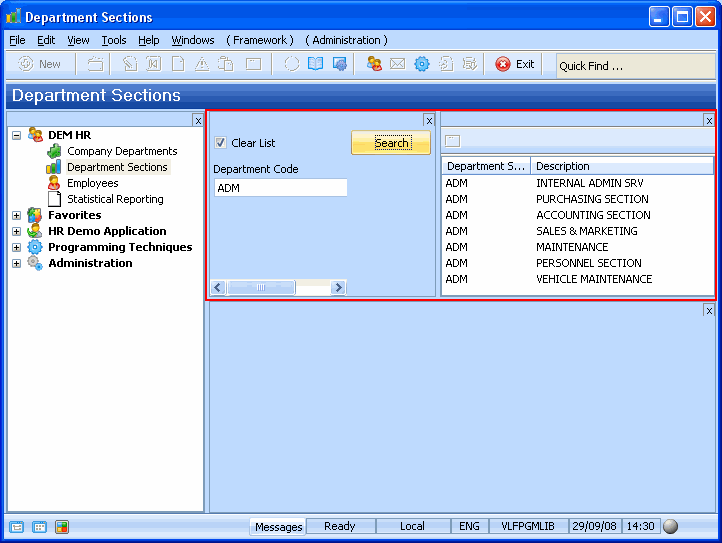
18. In the Framework, snap the filter in the Department Sections business object.
19. Test the filter.
