Step 1 Creating Your Real Command Handler
Step 1. Creating Your Real Command Handler
In this step, you will create a real command handler for the Details command.
1. Start the Program Coding Assistant.
2. In the list on the top left of the Program Coding Assistant window, select the iii HR application and then the Details command handler.
3. Select Native MS Windows as the platform and Basic Command Handler as the type of code.
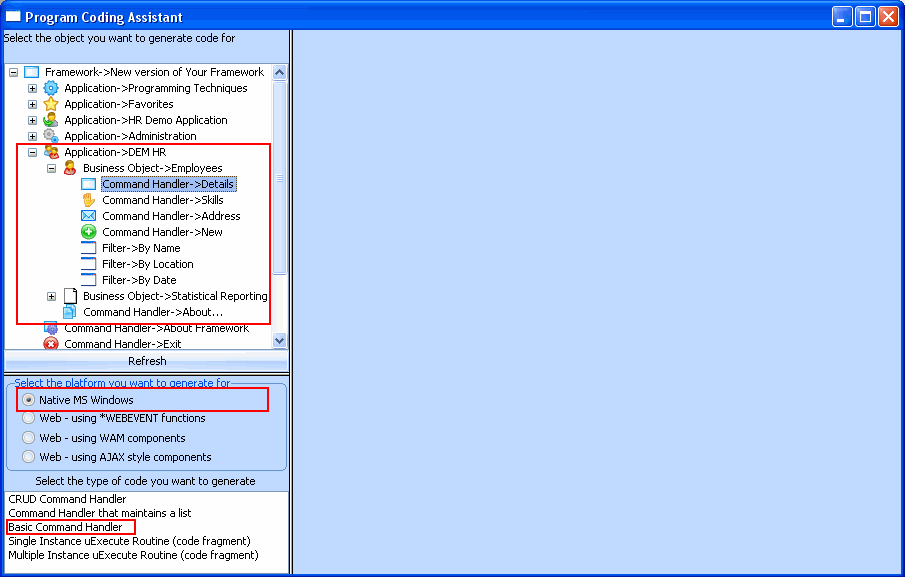
The Basic Command Handler is the most commonly used assistant as you typically want to create a command handler that displays your data. You then customize the page to meet your specifications.
The CRUD Command Handler is used in conjunction with the CRUD filter and only if the commands defined for the business object are New, Details, Copy, Delete.
The Command Handler that maintains a list allows you to generate code so that you can use just one command handler to view the details of the instance and a list of information about related data.
4. Click the Next button.
5. On the next page specify PSLMST as The physical file that most closely resembles this business object.
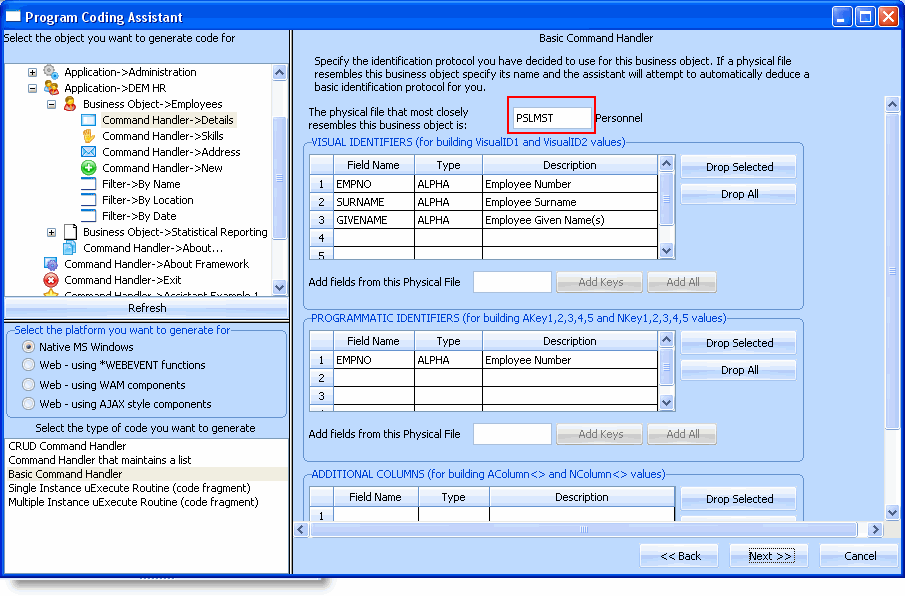
The Program Coding Assistant detects the Visual and Programmatic Identifiers required.
6. Click the Next button.
7. On the next page specify PSLMST in the field Add fields from this physical file in the section Fields that you want to appear at the top of your command handler.
8. Click on the Add All button.
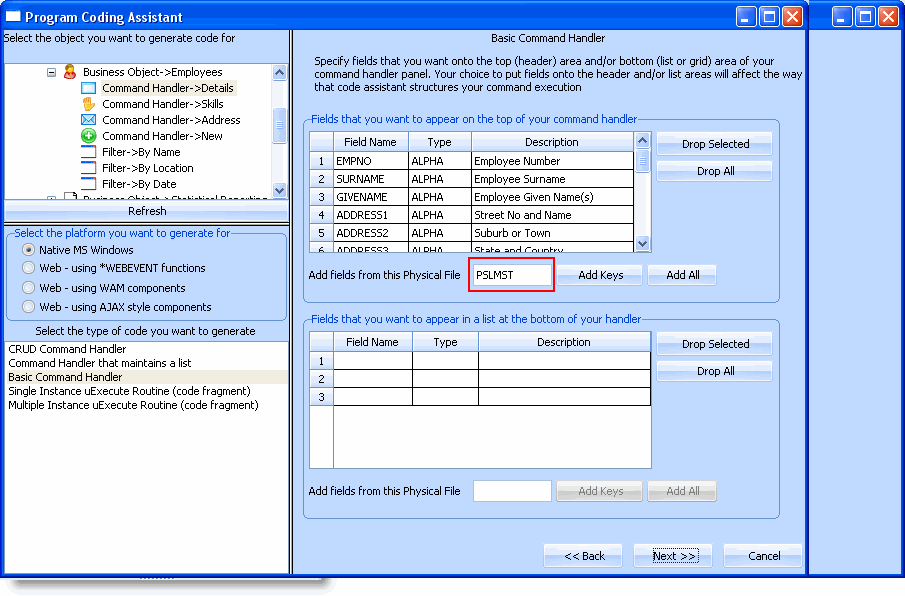
9. Click Next.
10. On the next page click the Generate Code button.
The next page, Generated Code, displays the source code for your command handler. You now need to create the component that will contain the code:
11. Specify iiiCOM03 as the name of your component (where iii are your initials) and Details Command Handler as the description.
12. Click the Create button to create the component.
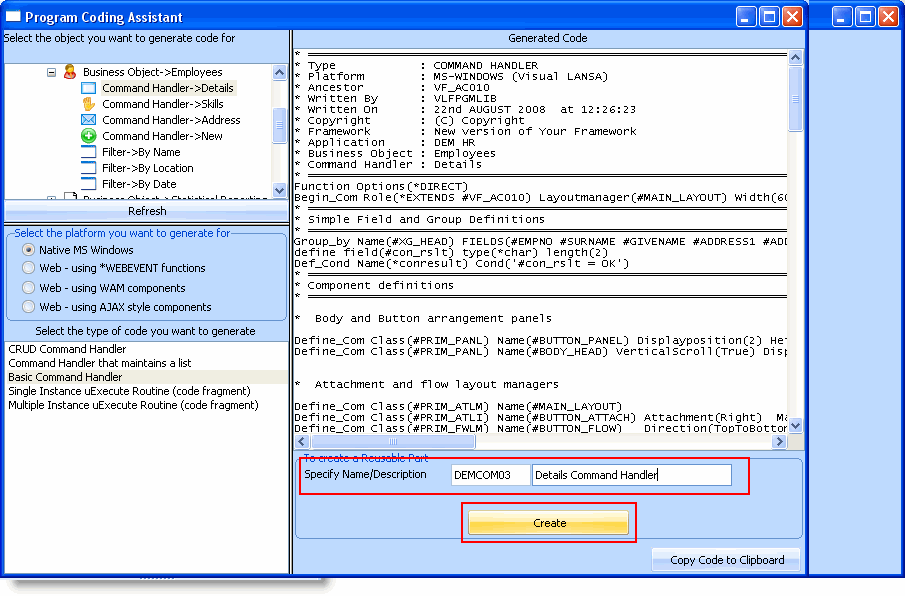
After a brief delay the command handler component is displayed in the Visual LANSA editor.
13. Display the Source code of your component.
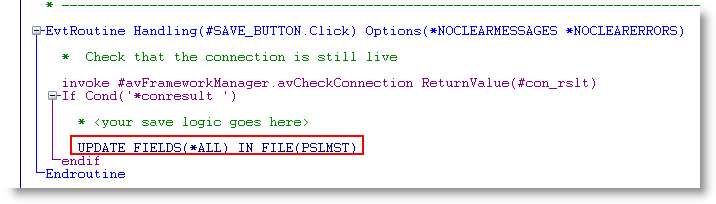
14. Locate the SAVE_BUTTON.Click event and add a statement to save any changes you make to the fields on the Details command handler.
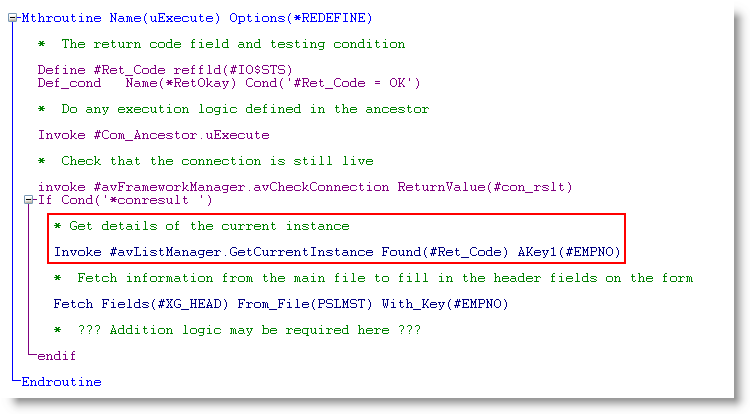
15. Locate the uExecute method. Notice that it calls the #avListManager.GetCurrentInstance method to get the key value of the currently selected item in the instance list and then uses this key value to fetch the details.
16. Compile your component.