Step 4. Create Transformation Map
LIC009 - Handle multiple requests via an email attachment
In this step you will create a transformation map which will do the following:
- Select records from the Employee file (PSLMST) based on the employee codes from the file iiiTUTEMPNO.csv. Your processing sequence will receive the CSV file as an email attachment
- Write the selected employee information to the file iiiTUTEMPDET.xml
1. In the Navigator, select
2. Use the  button on the toolbar to create a new with the following details:
|
ID |
iiiTUTMAP03 |
|
Description |
Employee details XML from CSV selection list. |
|
Map Type |
Unspecified Type |
|
Restartable |
Yes |
|
Status |
Active |
3. the transformation map.
4. Click the  button to open the mapping tool.
You may get a warning message stating that LANSA Composer supports a subset of mapping functionality.
Click to proceed to . You will see an empty map.
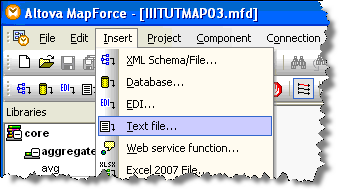
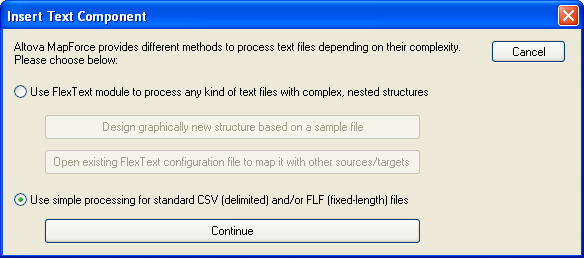
5. To insert the Request CSV file, choose Insert Text File using the menu. Then select Use simple processing for standard CSV ... and press the e button.
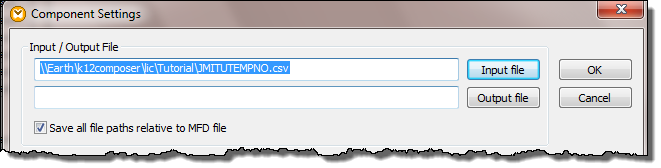
6. In the Text import / export window, click the Input file button. Use this dialog to navigate to select the file \\<SRV400>\LICComposer\lic\Tutorial\iiiTUTEMPNO.csv which you created earlier.
7. Check First row contains field names checkbox.
8. In the Text enclosed in radio button group, select Not. Your selection will look like this.
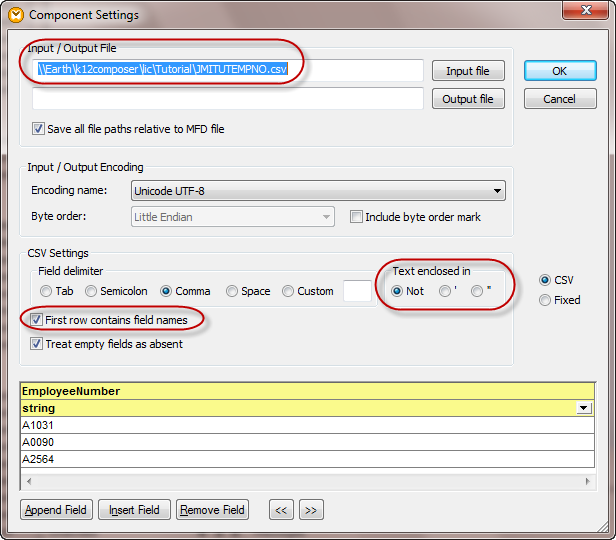
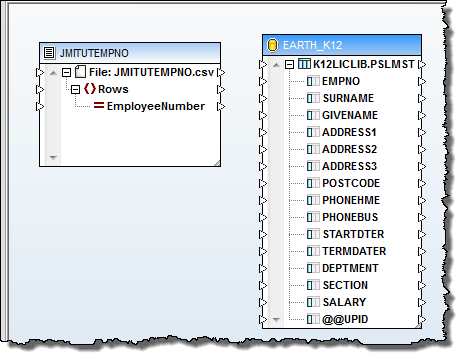
9. Press OK. Mapforce will display the file iiiTUTEMPNO.csv visualization.
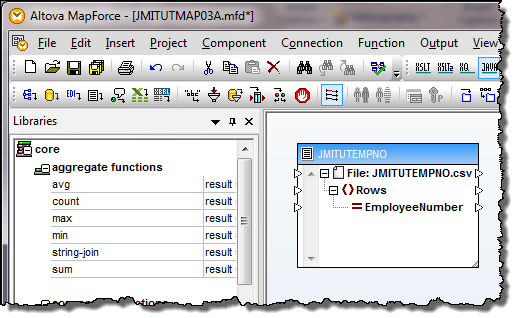
10.Insert the element using the .
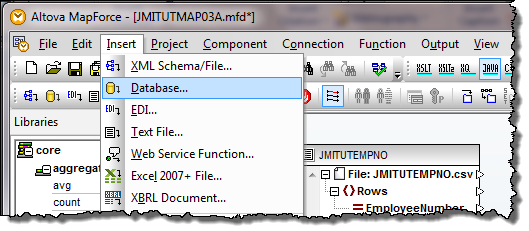
11.Use the existing which you created in an earlier module.
a. Login using your workshop IBM i and . You may be prompted for a number of logins.
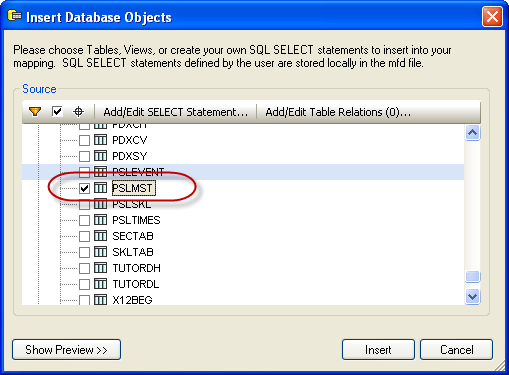
b. Upon successful connection to the database, you will get a Select Tables, Views to Insert dialog.
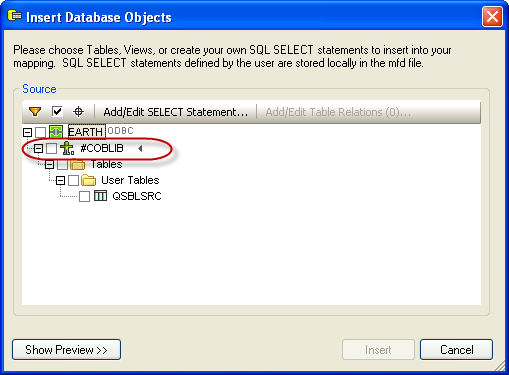
b. Expand the list of libraries, schemas or collections using the drop down menu next to the small arrow. After selecting the library, schema or collection containing the required file (for example, LICLICLIB or LC_DTA on a Windows server), locate the file PSLMST and select it using the check box.
Note: the library name should be the same one used in the database connection string used when creating the configuration previously.
jdbc:as400://<SRV400>/<LIBRARY>;naming=sql;errors=full;date format=iso;true;translate binary=true
12.Click to return to the main window. You will see the PSLMST table Visualization displayed.
13.From the , insert the
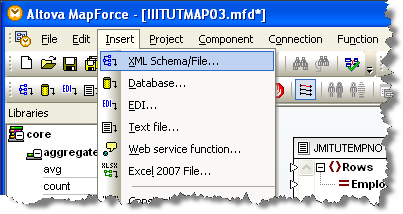
a. Use the Insert menu, XML Schema/File ... navigate to the . . . .\Tutorials folder and select schema file iiiTUTEMPDET.dtd file.
b.Use the button to select the XML file iiiTUTEMPDET.xml
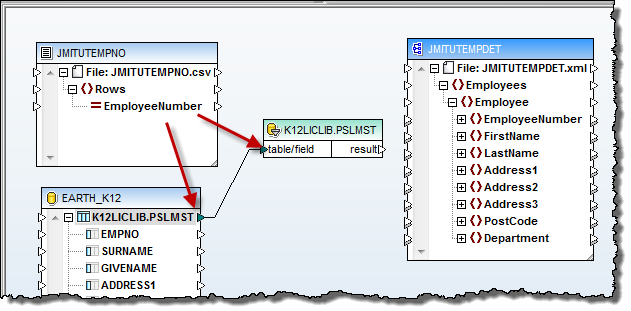
Your XML file structure will be displayed in the map.c . Rearrange your mapping screen to look like this.

The map functionality required will select Employee Details from the database only when the Employee Number is listed in the CSV file.
14. From the toolbar or menu, insert an SQL-WHERE Condition.
15. Connect the PSLMST table to the table input. This will open properties window.
16. In properties window, type in the select criteria:
EMPNO = :inEmpNo
Press OK
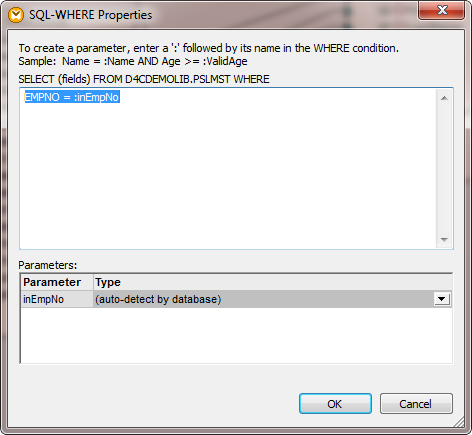
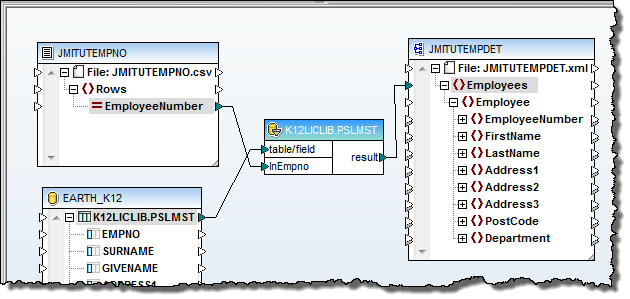
17.Connect the EmployeeNumber output from CSV file to the input inEmpNo of condition.
18.Connect the result output of to the Employee input element of the XML file. Your map should look like the following:
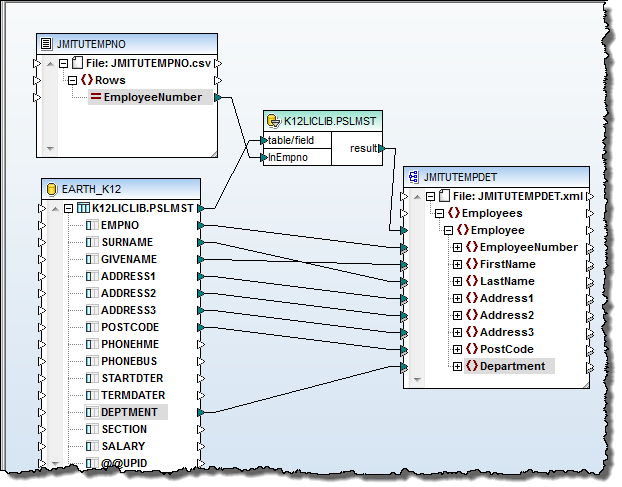
19.Finally, connect the data fields from the database outputs to the corresponding XML file inputs.
Your final map will look like this:
20. the map and close MapForce.
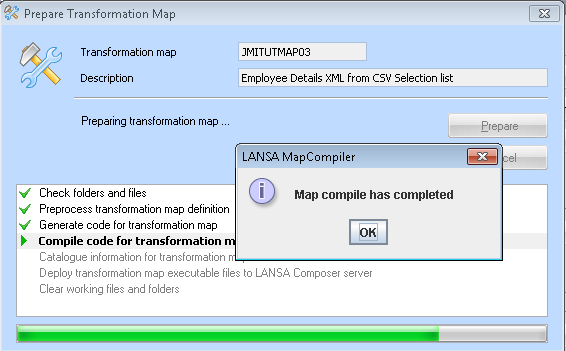
21.On the tab, click Prepare to generate the transformation map code.
Click on the dialog.
Remember to look for an which may be hidden by other windows.
Tip: Use Windows Task Manager to switch to the dialog.
Wait for the completion message and the dialog.