Create a Transaction
New transactions can only be created from the Main Explorer tab. There are three important points to keep in mind when creating transactions. First, new transactions must be assigned security or they will not be available in the OIPA application.
Also, transactions will not be displayed in the Activity drop down list in OIPA unless they have been added to the EligibleTransactionsByPolicyStatus EligibleTransactionsByPolicyStatus plan rule. This rule determines what status a policy must be in before the transaction can be applied to the policy.
And finally, a translation must also be assigned to the transaction. This is done through the Translation window that appears each time you check-in the transaction.
If the transaction being created runs valuation, refer to the valuation section for important configuration information.
Steps to Create a New Transaction
Transactions can be created at many different levels. Before creating a transaction, make sure you know the level (policy, plan, client, company) and the steps necessary to create it at that level. Refer to Transaction Levels in OIPA for an explanation of the various transaction levels and the corresponding creation points.
-
Expand the appropriate company folder in the Main Explorer window. Refer to the link above for transaction levels and where they are created.
-
Expand the appropriate plan folder.
-
Right-click the Transaction folder.
-
Select New Transaction and the wizard will open.
-
Enter a name for the transaction. The transaction name should not include spaces.
Transaction names are not case sensitive and the name can only be used one time. The application will not reuse a transaction name even if the case is altered.
-
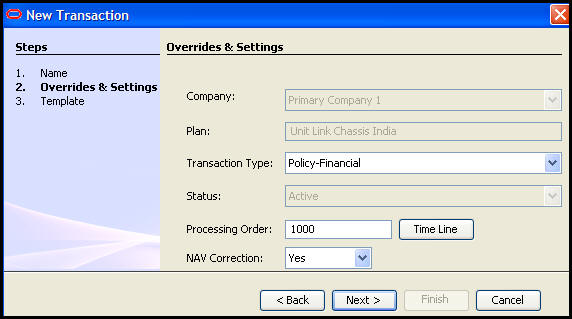
Enter the following items: (Refer to Transaction Type and Processing Order for further information.)
-
Select the transaction type.
- A plan type transaction, such as Plan-Financial, when processed will apply to all policies in that plan. The plan type transaction will reside in the Plan Transactions folder under Transactions in the Main Explorer.
- A policy type transaction, such as Policy-Financial, when processed will apply only to the policy it is added to. The policy type transaction will reside in the Policy Transactions folder under Transactions in the Main Explorer.
- Client transactions when processed will apply to the specific client and will reside in the Company | Plans folder in the Main Explorer.
- Client-Relationship transactions only apply to primary and secondary relationship types associated with the Customer that the transaction is being processed against. These relationship types are defined in the transaction in step 2 of the wizard.
- Cycle transactions are processed in a batch during scheduled cycle processing. They will reside in the Cycle Transactions folder under Transactions in the Main Explorer.
- Intake transactions...
-
Enter the processing order for the transaction.
-
Select Yes in the NAV Correction drop down box if the transaction is a financial transaction.
-
Click Next.
If a new Client-Import transaction needs to be added, create a new transaction from the Client Plan folder. All Client related transactions must be created on the Client level.
Step 2 of New Transaction Wizard
-
Select the configuration sections needed to create the transaction. Use an entire CopyBook or select only the configuration sections needed to create the transaction. A sample configuration of the sections selected will be given as a starting point when the transaction’s XML file is first opened. All panes are available for configuration regardless of whether the pane is checked or not. Not checking a pane simply means that the pane will be a blank slate.
-
If an entire Copybook is selected, a Copybook Lookup window will appear. Select the Copybook needed.
-
If a partial Copybook is needed, click No. Select the individual tags from the list. The tags that are selected will be added to the transaction’s general pane.
-
If sections are selected a sample of the configuration will be given as a starting point.
-
All panes are available for configuration regardless of whether the pane is checked.
-
Not checking a pane simply means that the pane will be a blank slate.
If this section is added, then at least one membership class must be added to the Membership section before the transaction can be checked-in.
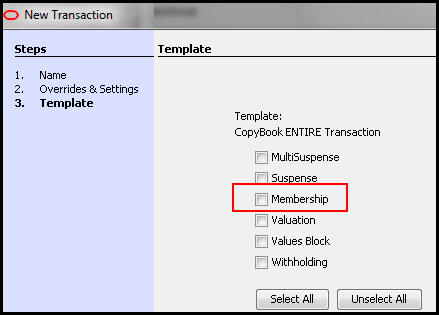
Transaction Wizard with Membership Highlighted
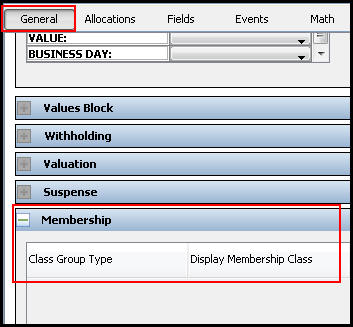
Transaction General with Membership Section
The Transitions feature is only available for Policy-Financial transactions.
-
Click Finish. The new transaction is created and displayed in blue (not checked-in).
-
Check-in the transaction. A translation window will appear.
-
Enter the correct translation for the transaction name for each language and click OK. If a locale value is left empty, then this window will appear every time the transaction is checked-in. At least one translation value MUST be given.
Let the Security Manager know when a new transaction is created. The Security Manager will have to add security to the transaction so that the appropriate users will be able to see it in OIPA.
Make sure all policy level transactions are in the EligibleTransactionsByPolicyStatus plan rule. This file controls when a transaction is available for use as an activity in OIPA.
Every new transaction automatically overrides and attaches the TransactionCosmetics and TransactionBusinessRulePacket business rule. Don't manually override and attach these business rules. These two rules are copied from the existing global rules. They are mandatory for the transaction to process and cannot be deleted from the transaction; however, the information may be edited.
Copyright © 2009, 2014, Oracle and/or its affiliates. All rights reserved. Legal Notices