Create a CopyBook Override
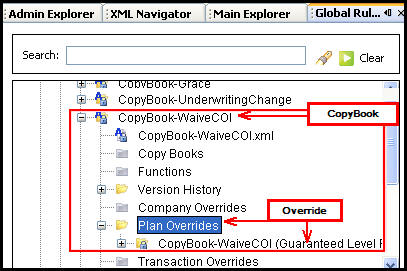
When a CopyBook needs to be updated to make it more specific for a particular plan, a CopyBook override can be created. From the Global Rules Explorer tab, open the Business Rules | CopyBooks folder. Right-click on any CopyBook to create the override. Once the override is created, it will reside in the corresponding Overrides folder. It will retain the original name of the CopyBook with the override level in parenthesis. So, an override for the WaiveCOI transaction for the Guaranteed Level Premium Term plan would be named CopyBook-WaiveCOI (Guaranteed Level Premium Term).

CopyBook and CopyBook Override
OIPA supports CopyBook overrides various levels. Refer to the CopyBook Override Levels section for details. The system will look for overrides at the lowest level and move up to global. When overrides are created, the Rules Palette Override Wizard limits the available levels according to what is supported in OIPA. Some rules have multiple contexts. The Rules Palette will not restrict those rules to any override levels.
Steps to Create an Override of a CopyBook
-
Go to Global Rules Explorer tab.
-
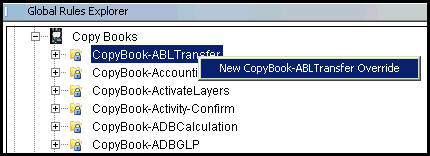
Locate the CopyBook and right-click on the CopyBooks folder.
-
Select New CopyBook Override.

CopyBook Right-Click Option
-
Select Next. The name is already provided.
-
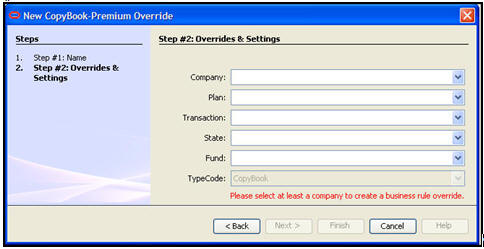
Select the appropriate override level and then select Finish.

Step Two of the CopyBook Override Wizard
-
Right-click on the CopyBook Override XML and select Check-in.
-
Right-click again and select Check-out.
-
Configure as necessary.
-
Right-click on the file and select Check-In to save the changes.
Copyright © 2009, 2014, Oracle and/or its affiliates. All rights reserved. Legal Notices