Countries
The Countries editor is an administration feature used to add and edit country information stored in the AsCountry table. Add and edit the relationship between a supported country and its applicable Taxable Currency value.
If additional currency code options are needed in the Taxable Currency Code drop-down box, they can be added through the Currency Editor. Once new currency codes have been added and saved through the Currency Editor, they appear as options in the Taxable Currency Code drop-down list.
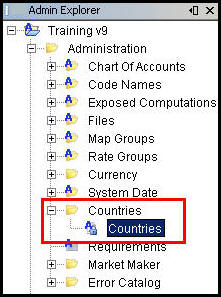
The Country Editor can be accessed from the Admin Explorer tab in the Administration folder.

Country Folder in Admin Explorer
Steps to Add Country Information
-
From Admin Explorer, open the Administration folder.
-
Double-click the Countries folder.
-
Right-click the Countries XML file and select Check-out.
-
Click Add Country. A new row will appear highlighted in blue.
-
Select a Country Code from the drop down list. The Short Name and Long Name fields will be automatically populated when a Country Code is selected. The codes and descriptions are stored in the AsCountry table.
-
Click the field of the Taxable Currency Code and select the correct currency code from the drop-down box. Additional codes can be added through the Currency editor.
-
Check-in the file to save the changes to the database.

Country Editor in Admin Explorer
Edit or Delete Country Information
When the Country file is checked out, changes can be made to the information. Click in a field to change the Short or Long Name or select an option from the drop down box to choose a new country code or taxable currency code. The field will appear highlighted in green and the Edit box for that row will be checked to indicate that the information has changed. Check in the file to save the changes.
If a row exists in the database, then the Country code and Short name cannot be modified. Those fields will be disabled when the Country file is checked out. If a user needs to change the Country code or Short name, then he must delete the row first and then add a new row with the updated information.
If a row needs to be deleted, click the Delete checkbox. The row will appear highlighted in red. When the file is checked in, the row will be removed.
Copyright © 2009, 2014, Oracle and/or its affiliates. All rights reserved. Legal Notices