Create and Configure a File
When working with File, there are two steps to perform in the Rules Palette. First, create a new file through the Rules Palette Admin Explorer tab. Then, check-out the new file and configure the XMLData and XSLT sections.
Steps to Create a New File
-
Click the Admin Explorer tab.
-
Double-click the Administration folder.
-
Right-click the Files folder.
-
Select New File.
-
Enter a File Name Format. This is the name of the new interface.
-
Select the Company from the drop down box.
-
Enter a File ID, which allows the caller to specify the file to use to process the request. A File ID is limited to three characters and should be an acronym or abbreviation for the calling or process.
-
Click Finish.
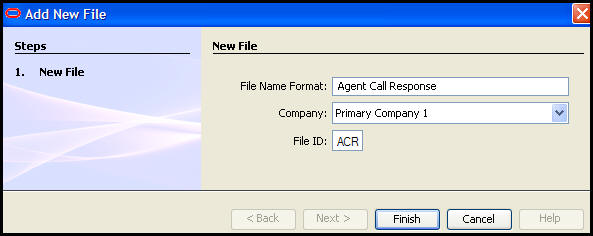
New File Wizard
A folder with the file’s XML is created. Use the XML file to configure the file accordingly. Checking-in the file inserts/updates the record in the AsFile table in the database. When the file is checked-out, edit the File Name and File ID using the fields at the top of the Configuration area. Refer to the Check-Out and Check-in Rules section for further details.
Steps to Configure File
-
Open the Admin Explorer window.
-
Double-click the Administration folder.
-
Expand the Files folder.
-
Open the folder containing the file to configure.
-
Right-click the XML file.
-
Select Check-out.
-
Configure in the XMLData section.
-
The <File> element must be the first tag in the XML section and its end tag last.
- Configure the <RequestType> element, if required, for Illustration type AsFile configruation.
-
Configure all necessary <Attributes> tags in-between the <AssignAttributes> tag.
-
Configure the two required <Attributes> elements, using its NAME and TYPE attributes. The value of <Attributes> is only populated if it is a requirement of the associated TYPE attribute.
-
After the closing </AssignAttributes> element, configure pre- and post- insert operations if there is a need to call other functionality in the application. Use the <PreInsert> and <PostInsert> elements to do so.
-
Configure in the XSLT section
-
Configure the XLS stylesheet.
-
Perform validations that occur prior to business processing. Validations can also be performed on requests that will not insert an activity record. In addition, validation can be performed before OIPA inserts any records into the database, using XSLT syntax.
-
Check-in the file, using the file’s right-click menu.
File XML Example
Copyright © 2009, 2014, Oracle and/or its affiliates. All rights reserved. Legal Notices