Fields Pane
The Fields pane is used to create fields that will display in the OIPA application. Drag and drop fields from the DataDictionary or use the SearchPalette window to add new fields. The DataDictionary can also be used to search for existing fields that may be used.
If a new field needs to be created, use the Palette, as it contains all the available fields for screen configuration. The Palette is included in the SearchPalette window. The Palette will automatically open when a transaction is checked out.
Field Placement
The Fields pane has a left and right column where fields can be placed. Drag a field to the left side of the pane to occupy the left column, or drag the field to the right side of the pane to occupy the right column. Fields can be expanded across both columns when the Expanded property is added to the field through the Field Properties window. Filler fields can also be added to provide a blank space to the layout. Fields will display in OIPA as they appear on the Fields pane.
Commenting Fields
Fields can be commented out using the Comment button at the top of the Fields pane. Once a field has been commented out, it can be uncommented using the Uncomment button.
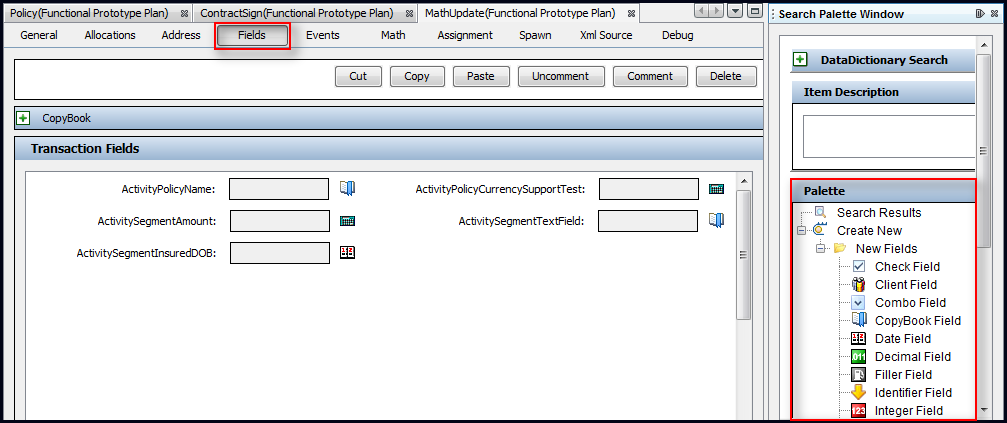
Fields Pane with Palette Window Open
Steps to Add a New Field to a Transaction
-
Check out a transaction.
-
Click the Fields pane in the Configuration Area. The SearchPalette window should open on the side of the screen. If it does not, click Window on the Main Menu and select Open Search Palette Window. This window holds all the available field types.
-
Click one of the field types and drag it into the Configuration Area. The new field will appear with a generic field name, such as Field 1.
-
Click on the name of the new field, which will highlight it in blue. This will open the FieldProperties Window so the field can be configured. If the FieldProperties Window does not open, click Window on the Main Menu and select Open FieldProperties Window.
-
Click inside a field property in the FieldProperties Window and type the field information.
Any field with the Required property set to Yes, will appear in OIPA with an asterisk. This lets the user know the field must contain a value. Make sure to add any error message text to the translation table when configuring required fields.
-
Check in the transaction when finished.
Fields can also be configured using CopyBooks instead of the Fields pane. Expand the CopyBook section on the Fields pane and then follow the steps listed below.
Insert Entire Field Section from CopyBook
-
Navigate to the transaction and click the Fields pane.
-
Expand the CopyBook section at the top of the pane.
-
Click the Include box.
-
Click lookUp and select the CopyBook from the CopyBook Lookup window.
-
Click OK. The CopyBook field information will be added to this pane.
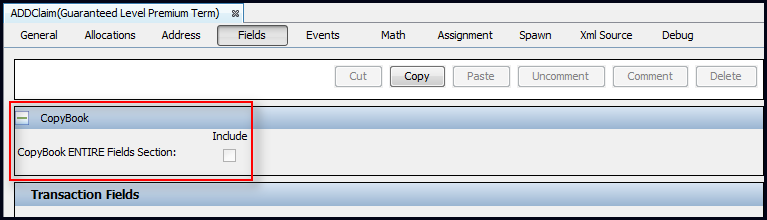
CopyBook section on Fields Pane
Cut, Copy and Paste Fields
The Fields pane supports the ability to cut, copy and paste fields. Fields can be pasted into either the same business rule from which they were cut/copied, or into the Fields pane of a different rule.
To cut fields:
- Check out the rule containing the field(s) to be cut.
- Select the field(s) to cut. Use the Ctrl key to select multiple fields at once.
- Click the Cut button or press Ctrl-X on the keyboard. The selected field(s) will be removed and copied to the system's clipboard. The field immediately preceding those just cut will be highlighted.
To copy fields:
- Select the field(s) to copy. Use the Ctrl key to select multiple fields at once. The rule does not need to be checked out to copy fields.
- Click the Copy button or press Ctrl-C on the keyboard. The selected field(s) will be copied to the system's clipboard.
To paste fields:
- Check out the rule to which the field(s) will be pasted.
- Click the Paste button or press Ctrl-V on the keyboard. Fields can only be pasted into other Fields panes—an error message will be displayed if the user attempts to paste fields into a different configuration section.Fields will be highlighted after being pasted.
Actions within the Fields pane can be undone by using the keyboard shortcut Ctrl-Z.
Delete Fields
If a field needs to be deleted, select the field and click the Delete button at the top of the Fields pane. This will remove the field from the Fields pane and also remove the XML from the XML Source pane. Multiple fields can be deleted by using the Ctrl key to make multiple selections before clicking Remove. Alternately, the XML can be removed directly from the XML Source pane.
Copyright © 2009, 2014, Oracle and/or its affiliates. All rights reserved. Legal Notices