Security for New Companies, Plans and Transactions
When a new transaction, plan or company is created, it must have security applied to it or it will not be visible in OIPA. Configurors will be able to see the new item in the Rules Palette and can edit it if necessary. OIPA users will not be able to view the new item until the Security Manager assigns security to it.
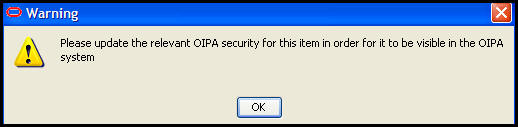
Warning Message to Update Security
The Security Manager must be notified each time a new item is created so that security can be added.
Steps to Assign Security to a New Item
-
Open the Admin Explorer tab in the Rules Palette.
-
Open Security | Application Security | Security Groups.
-
Right-click on Security Groups node and select Refresh. This will update the folders with the new item that was added. Make sure any security changes previously made are saved before performing refresh.
-
Open the folder for the security group that should receive access to the new item.
-
Open the folder that corresponds to the type of item added. If it is a new company, open the Company Security folder. If it is a new plan, open the Plan Security folder. Likewise, if it is a new product, open the Plan Security folder, as transaction security is defined for each plan within the product. If it is a new transaction, open the Transaction Security folder.
-
Locate the new item in the folder structure. Double-click on the name to open it in the Configuration Area.
-
Click the check box at the top to grant security to all pages, buttons and fields or expand the individual sections to add security to individual buttons or fields.
-
If assigning security to a transaction, and if masking was added to a text field in the transaction, expand the Masks section and select a security level for the mask.
- If assigning security to a transaction, and if overridable errors are configured in a ValidateExpressions or PostAssignmentValidateExpressions business rule attached to the transaction, set the overridability of each error by selecting Override Allowed or Override Not Allowed from each Security drop-down box. By default, all errors will be set to Override Allowed for all security groups.
-
Repeat steps 3 through 9 for all security groups that need access to the new item.
-
Check in all security group files to make sure the changes are saved to the database.
Copyright © 2009, 2014, Oracle and/or its affiliates. All rights reserved. Legal Notices