Step 2. Check in the Department File and Fields
REP012 - Check In Objects
In this step you will check in your Department File (iiiDepartments) and its fields. When you check in a file you should always consider whether there are any fields or system variables which it depends on, which need to be checked in at the same time.
1. Display your dynamic list iiiList on the Favorites tab. It contains all fields, files and forms beginning with your initials iii.
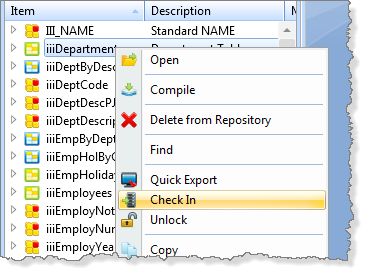
2. Select the file iiiDepartments and right click to display the context menu.
3. Choose the check In option
4. In the dialog, expand the node and select the file iiiDepartments.
5. Click on the button  on the toolbar to include the fields used by this file.
The dialog is displayed. This shows all objects referenced by file iiiDepartments and its dependents.
The file must be compiled locally to generate the Local Cross Reference information.
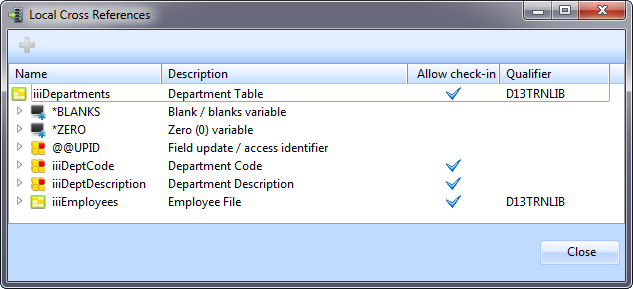
You do not need to check in system variables and standard fields which will already be defined in the master repository.
Notice that the column highlights the objects which could be checked in.
6. Select the fields iiiDeptDescription, iiiDeptCode and iiiTotalSalaryPJF.
7. Click on the in button  to add these fields to the check in.
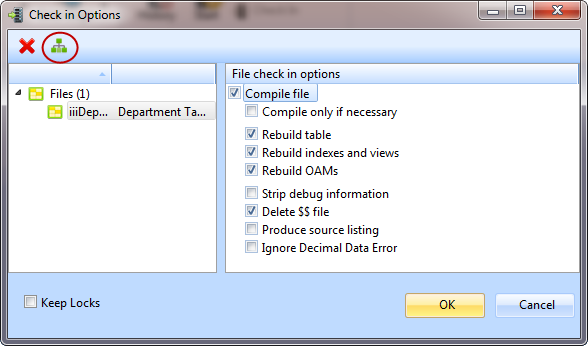
The Options dialog now shows all the selected objects. Note that the check in options available depend on the type of objects being checked in.
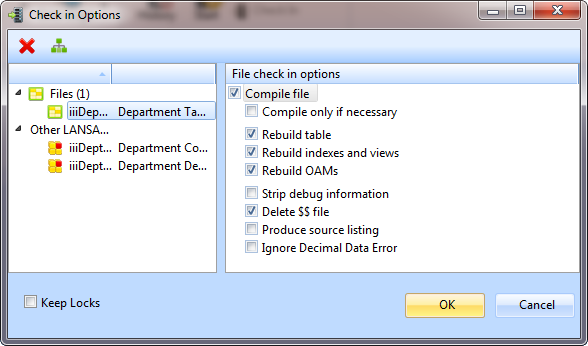
In this case you are checking a new file to the master repository. The option shown, will build table, indexes and OAM for the new file.
When checking in a changed file you should select the appropriate rebuild options.
Delete $$ file is required when rebuilding a file, so that LANSA can rename the existing file and map data from old file to new.
Depending on the user id and task tracking settings in your system, a Keep Locks option may appear on the bottom left of this dialog. Selecting this option ensures that any new or modified objects checked into the master will remain locked to the Task ID you are using. For further information, refer to Unlock Objects in Task Tracking in the .
8. Press to start the check-in.
The Check In tab shows the progress of the check in.

9. Wait for the check in to complete and verify no errors occurred.
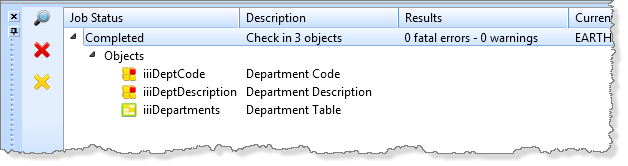
10.Notice that with your check in selected in the tab, you can click the icon  to see a more detailed log.
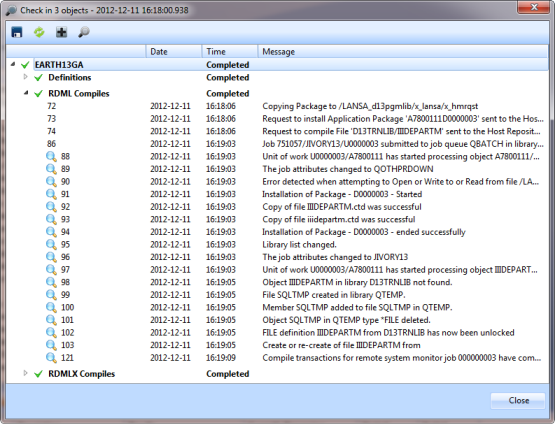
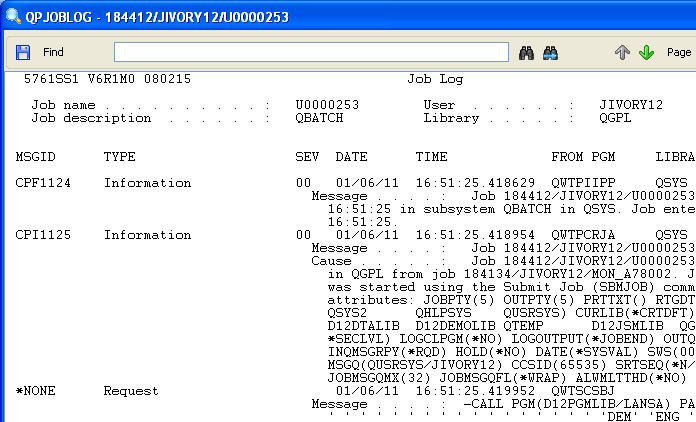
11.Notice that with any of the log detail lines beginning  you can click the Show IBM i joblog icon
  to show the joblog from the server.