Step 3. Add Push Buttons and Click Event Logic
FRM025 - Insert a Database Record
1. On the tab, select the group of controls. Drag and drop two onto the bottom right hand side of the form.
2. Use the tab to set up the two push buttons as follows:
|
|
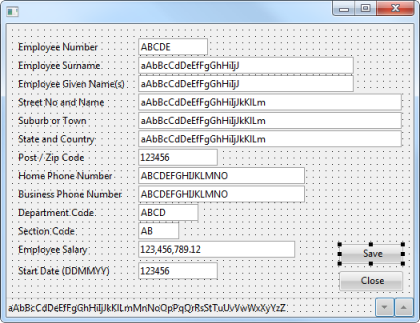
Your form should look like the following:
3. Use the tab to create a Click event for each button.
4. Add code to the CLOSE Click event to close the form. Your code should look like the following:
Evtroutine Handling(#CLOSE.Click)
#com_owner.closeForm
Endroutine
5. Define a GROUP_BY to include all fields on the form. Your code should look like the following
Group_By Name(#empdata) Fields(#EMPNO #SURNAME #GIVENAME #ADDRESS1 #ADDRESS2 #ADDRESS3 #POSTCODE #PHONEHME #PHONEBUS #DEPTMENT #SECTION #SALARY #STARTDTE #TERMDATE)
Notes:
- Group_by statements are usually defined at the top of the program, following the component definition. This makes these declarations easy to find, when maintaining a program.
- You should always use the to complete this type of statement, where a set of field names is required.
- Use the and use the settings to set to
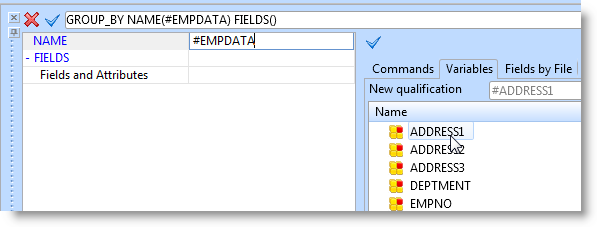
6. Type GROUP_BY and press .
a. In the , enter the name of the Group_by #EMPDATA.
b. Position the cursor in the parameter.
Note: You may prefer to float and resize the Command Assistant tab so that it easily shows more information.
7. Select the tab and enter PSL in the :
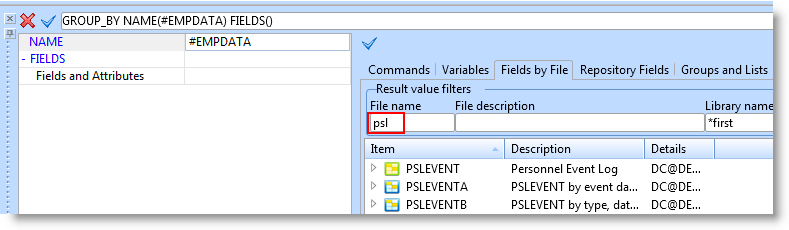
8. Expand the file PSLMST and hold down the key, select EMPNO and then PHONEBUS and press Enter. Your Assistant dialog should now look like the following:
9. Position the cursor in the empty entry below PHONEBUS.
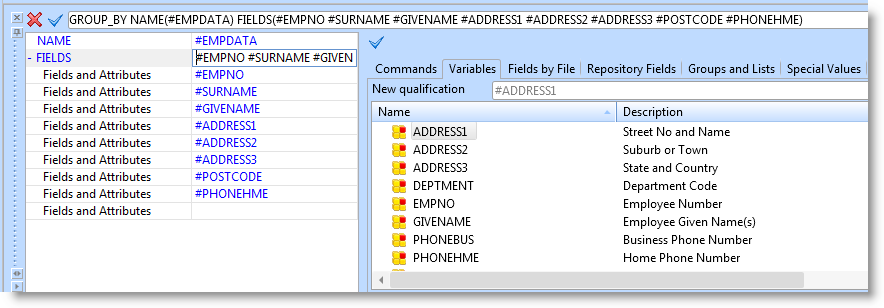
10. Select again and select the group of field from DEPTMENT to STARTDTE and press enter. Your dialog should now look like the following:
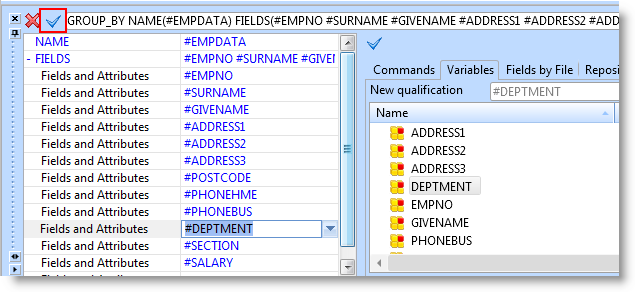
11. Click on the tick highlighted above and close the . Your Group_by should look like the following:
Group_By Name(#EMPDATA) Fields(#EMPNO #SURNAME #GIVENAME #ADDRESS1 #ADDRESS2 #ADDRESS3 #POSTCODE #PHONEHME #PHONEBUS #DEPTMENT #SECTION #SALARY #STARTDTE)
12. Add an INSERT command to the SAVE.Click event routine. This should insert the Group_by EMPDATA to the file PSLMST. Your event routines code should look like the following:
Evtroutine Handling(#SAVE.Click)
Insert Fields(#EMPDATA) To_File(PSLMST)
Endroutine
13. Compile your form and execute it.
14. Without entering any data, click the button; Your form should look like the following:
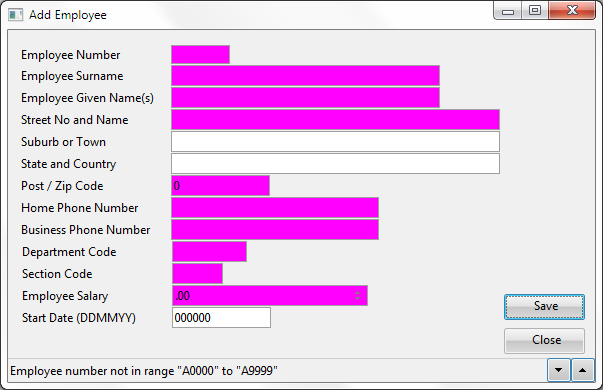
15. Click on the  down icon on the to see all the validation error messages.
Having completed the module you should know that the error messages have been generated by the file OAM.
Error messages are automatically routed to the . Fields with validation errors are automatically highlighted.
16. The INSERT command has a default parameter VAL_ERROR(*LASTDISPLAY). In a form this will branch to the ENDROUTINE for the event or method routine. To demonstrate this point, add the following MESSAGE command after the INSERT command in the SAVE.Click event routine.
Message Msgtxt('This message only displayed on successful INSERT')
Recompile your form and retest "add a blank record". Scroll to the end of the status bar messages. The above message will not be shown.
In your applications, you will often change the validation error parameter on I/O commands to , so that your own logic can handle error conditions.
17. Insert valid data to add a new employee. Employee numbers in the series starting A2000 should be available.
Note: Post/Zip code must be in the range 2000 to 7999 (Australian). Department codes ADM, FLT, GRP, MKT and SLS should exist with Sections codes of 01, 02 and 03.
Observe that your "This message displayed on successful INSERT" is now displayed.
Note also that at this stage the fields have not been re-initialized.
18. Change the message following the INSERT command as follows:
Message Msgtxt('Employee number ' + #EMPNO + ' has been added')
Note that RDMLX enables this style of code to be written.
In your own applications you will usually use a message file message for this type of feedback.
19. After the INSERT, add code to reset the employee fields to their default values, using the :
#EMPDATA := *default
20. Recompile your form and retest it by adding another employee record. All field values should be reset to their default values as defined in their field definitions, in this case they are all blank or zeroes.
Note that your new message Employee number A9999 has been added is displayed in the status bar.
21. With your form still running after the successful insert, try to insert another blank record. Review the status bar messages and note that the "Employee number A9999 has been added" has been cleared.
An event routine has an OPTIONS setting with default values as follows:
Evtroutine Handling(#SAVE.Click) options(*CLEARERRORS *CLEARMESSAGES)
Each time an event routine is executed, by default, it clears field errors and messages.