Step 1. Create Your Real WAM Filter
In this step, you will create your own filter by creating a WAM which will be snapped into the Visual LANSA Framework.
1. Make sure that the option in the tab is selected. In the Visual LANSA editor check that you can create new WAMs (the option is available if your system is enabled for Web).
2. Start the in the Framework using the menu. The window is displayed.
The window allows you to create different types of components that can be plugged into your filters, instance lists and command handlers. It is strongly recommended that you use the when you first start using the Framework. Initially you will most likely use filters that generate a component that can be executed e.g. (Create/Read/Update/Delete), . As you progress you might only use a skeleton filter or simply copy from one that is similar to one that you want to create.
3. If you are using a non-English system, click on then in the top-left tree view. The option appears at the bottom. Select this option and set your preferences.
4. Select the iii HR application and then the filter.
5. Choose as the platform and .
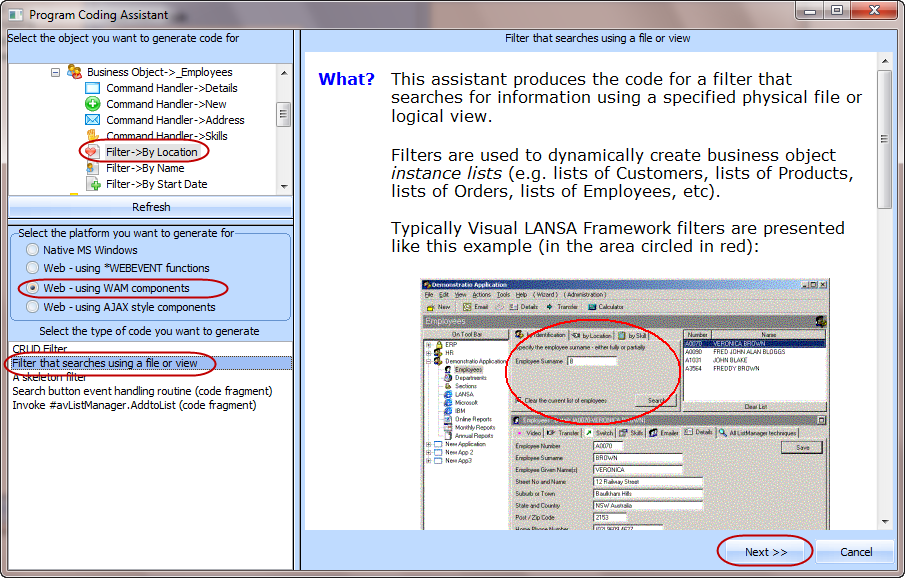
6. Click the button.
7. Specify PSLMST as the Physical File that most closely resembles this business object
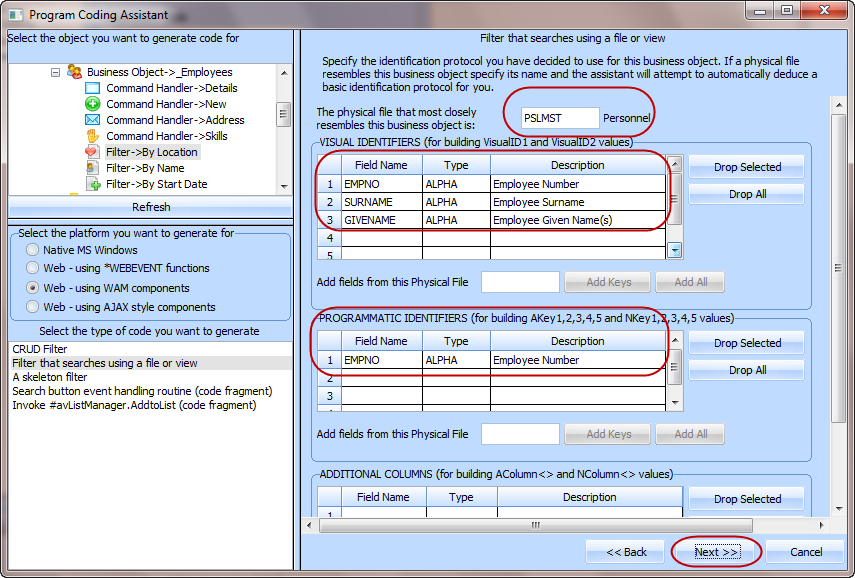
The detects the Visual and Programmatic Identifiers required.
8. Click the button.
9. On the next page specify PSLMST2 as the view to be used for searching/filtering operations.
10. Specify SURNAME as the Key of the selected view to be used for search operations.
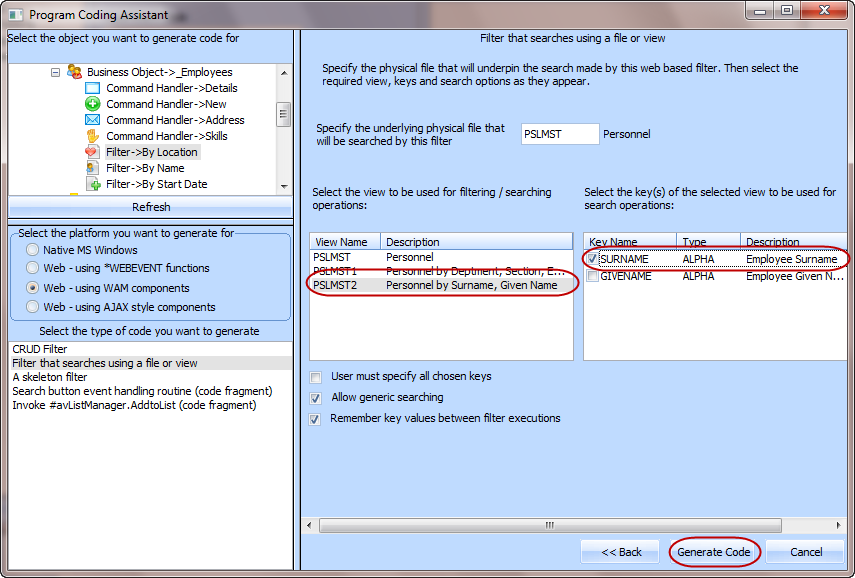
11. Click the button.
The next page, , displays the source code for your filter. You now need to create the component that will contain this code:
12. Specify iiiWAM100 as the name of your real filter and By Name Filter as the description. (iii are your initials If you are using an unlicensed or trial version of Visual LANSA, you must always use the 3 characters DEM to replace iii).
13. Click the button to create the WAM.
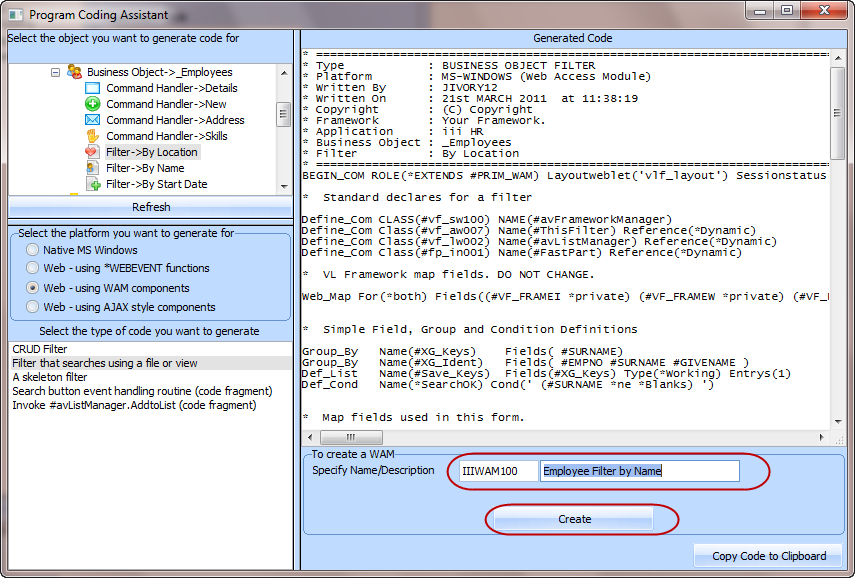
After a brief delay a message is shown indicating the WAM has been created.
14. Switch to the Visual LANSA editor. Your filter is displayed in the Visual LANSA editor.
15. Use the GoTo tab to find the event routine #avFrameworkManager.uWAMEvent_1
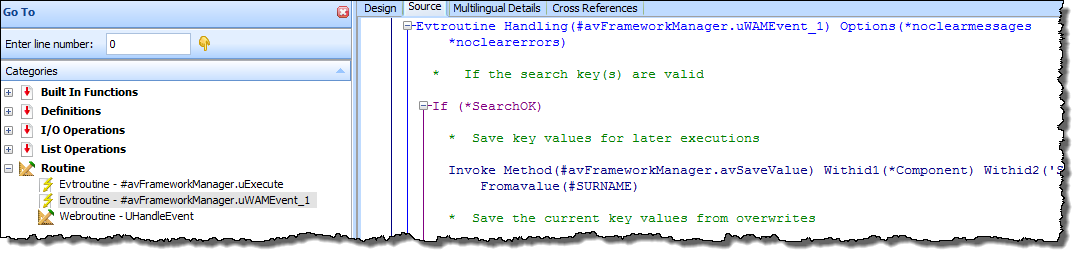
Examine the code:
This statement tells the Framework that new entries are about to be added to the instance list:
Invoke Method(#avListManager.BeginListUpdate)
This statement clears the instance list:
Invoke Method(#avListManager.ClearList)
This statement reads the records that match the surname entered by the user:
Select Fields(#XG_Ident) From_File(PSLMST2) With_key(#XG_Keys) Generic(*yes)
Nbr_Keys(*Compute)
This statement sets up the visual Identifier(s)
#UF_VisID1 := #EMPNO
#UF_VisID2 := #SURNAME
Use BConcat (#UF_VisID2 #GIVENAME) (#UF_VisID2)
This statement adds the data to the instance list
Invoke #avListManager.AddtoList Visualid1(#UF_VisID1) Visualid2(#UF_VisID2)
AKey1(#EMPNO)
VisualId1 will be shown in column one of the instance list and VisualId2 will be shown in column two of the instance list. Akey1 is the key that uniquely identifies an employee (in this case the field is alphanumeric, so it's Akey1, not Nkey1).
This statement tells the Framework that you have finished adding entries to the instance list:
Invoke Method(#avListManager.EndListUpdate)
You may want to read in the to learn more about how WAMs are structured.
16. Select the option on the ribbon.
17. Ensure the compilation was successful.
18. Close your WAM in the editor.
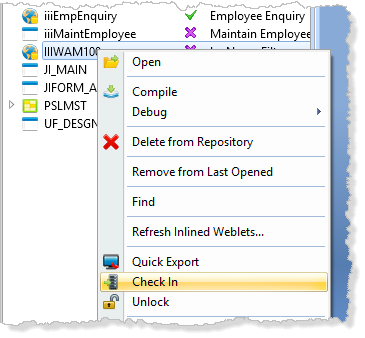
19.Select your WAM on the tab. Right click and use the context menu to select .
20.On the dialog, expand the list of objects. Note that the WAM layout as well as the WAM has been selected for Check in.
a.Ensure that the option is selected.
b.The and checkboxes should also be selected.
c.In the example shown below, is set up to release the lock against PC Name when checking in. If the option is selected, this PC will retain a lock, which would allow subsequent changes to be made.
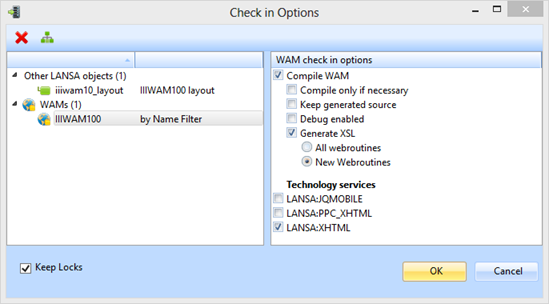
d. Click to check the changes in.
e. Wait until the compiles have finished.
Note that VLF WAMs use a common VLF layout, which already exists on the server.