Step 1. Add a Logical View to Department File
REP006 - Logical Views
In this step you will create a very simple logical view over the file iiiDepartments created in the last exercise. This logical view will sort all records in the file by the iiiDeptDescription field.
1. Use your dynamic list, iiiLIST to open the iiiDepartments file in the Editor.
2. Select the tab. It will list all of the defined views for the file (there are none yet).
3. Select the button on the ribbon and select from the list.
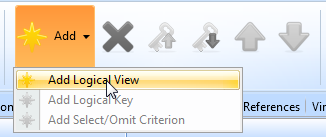
A new logical definition is added for the file. You need to specify the logical view details and key fields.
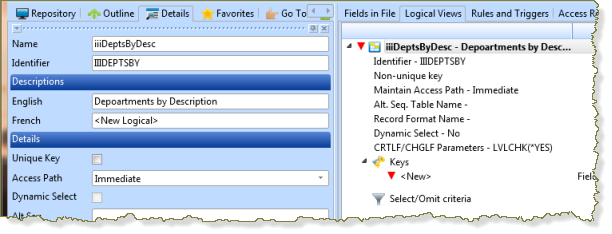
4. The Details tab should already be displayed. Enter the following details:
|
Logical view name |
iiiDeptsByDesc (where iii=your initials) |
|
Description |
Departments by Description |
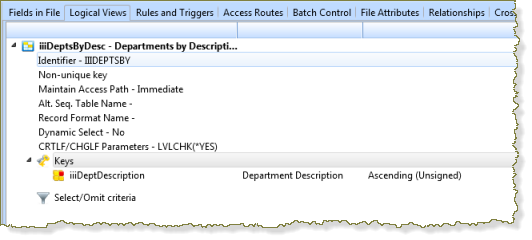
Your tab should now look like this:
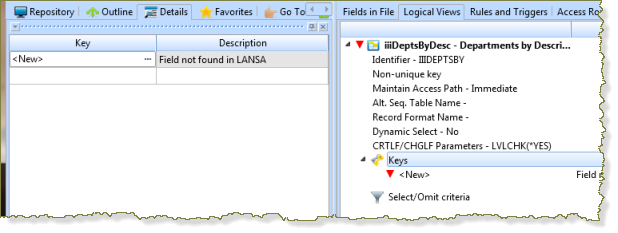
5. Click on under the group so that you can specify the key for the logical view.
a. Place the cursor in the Field name field in the tab.
Note: A simple way to add key fields is to use the prompt. The prompt will show the dialog with all valid fields that can be used as key fields shown:
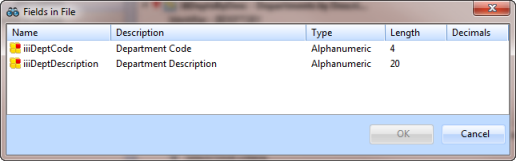
b. Select the iiiDeptDescription field, and click OK
Your completed logical view will appear like this:
6. Compile the file to make it operational. Remember that you have already compiled the file to build the table and OAM and have added data. Display the dialog. Check that your compile options are set as shown:
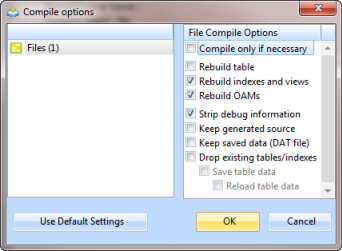
Note:
- Because you added a Logical View to the file, you have selected to and
- In other situations, such as when a new validation rule is added at field level, you will need to select the required options ( in that particular case).
- If you have changed the fields in the file and need to rebuild the table, the compile is capable of saving and restoring the data to the new file.
7. Check that the compile completed successfully.
8. Close the file.