Step 1. Create Form – Using Lists
FRM065 - Using List Components
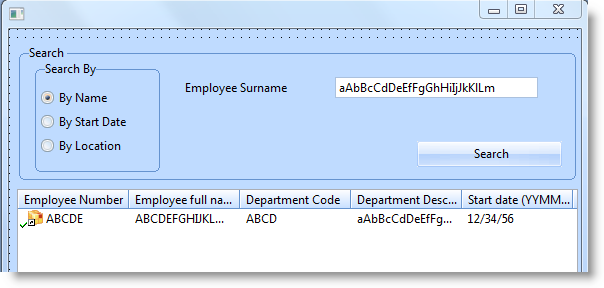
The form will contain at the top, a "Search" group box, with radio buttons to select "search type". The required search field (e.g. SURNAME) will be displayed based on the radio button selected. A Search button will populate a list view with employees.
1. Start by creating fields in the Repository which will be used for search values.
- Field iiiSRCDTE, Start Date reference field iiiStartDate
- Field iiiSRCDEP, Department Code, reference field iiiDeptCode
- Field iiiSRCNME, Employee Surname, reference field STD_NAME
Note: Field iiiSurname has a reference field of STD_NAME. Field iiiSurname can therefore not be used as a reference field itself.
2. Create a : . Make the form RDMLX enabled.
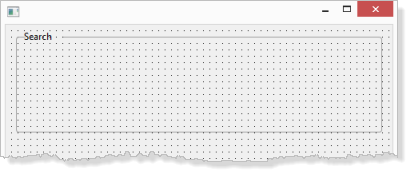
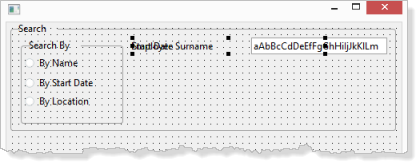
3. In the tab, from , drop a at the top of the form. Change its to Search and resize it to occupy the full width of the form. Your form should look like the following:
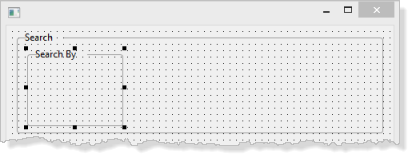
4. Drop another into the Search group box. Change its to Search by and resize it and place it on the left hand side. Your form should look like the following:
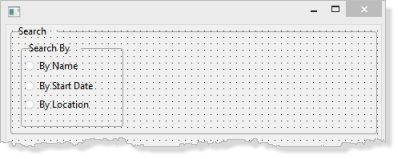
5. Drop three Radio Buttons into the Search by group box.
a. Set up their properties as shown:
|
Button |
Property |
Value |
|
RDBN_1 |
ButtonChecked |
True |
|
|
Caption |
By Name |
|
RDBN_2 |
Caption |
By Start Date |
|
RDBN_3 |
Caption |
By Location |
b. Align your radio buttons using the dialog on the ribbon..
Your form should look like the following:
Note: are grouped according to the "container" which they belong to, in this case a . Only one radio button can be selected. Other containers such as or the itself can be used. A is usually used because the interface makes it clear to the user, that the radio buttons are a set.
6. Save your form.
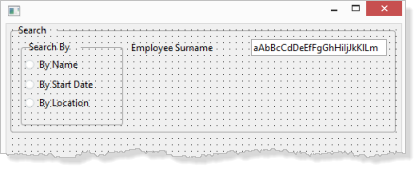
7. In this step you will place three fields into the Search group box and position them on top of each other. The form will make one visible at any time.
a. Drop field iiiSRCNME onto the form. Position the field as shown. Reduce the width of the field. The quickest way to do this is to change the property to a smaller value and then lengthen the field again if necessary. Try 320. Resize the form and Search group box if necessary.
b. Drop the field iiiSRCDTE on to the Search group box. Change its property to false. Change its property to False.
c. Hold down the key and use the cursor keys to position the file iiiSRCDTE on top of the field iiiSRCNME. Your form should look like the following:
Hint: You can use the e tab to select components.
d. Drop the field iiiSRCDEP on to the Search group box, and change its property to False. Use the keys to move it on top of field iiiSRCNAME.
8. Drop a on to the Search group box. Change its to Search, change its to SEARCH and position it as shown.
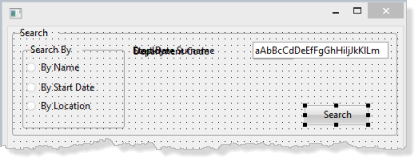
9. Save your form.
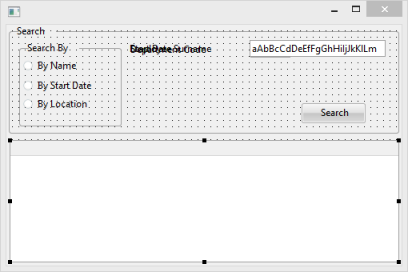
10. Make the form longer and drag a onto the form and resize it as shown. Change the list view property to EMPLOYS.
Hint: To position and size the list view:
a. Drag its handles to resize it to approximately the required size
b. Hold down the Control key and use the left cursor key to slide it to the left hand side of the form
c. Hold down the Shift key and use the right cursor key to stretch the list view to the required position at the right hand side of the form.
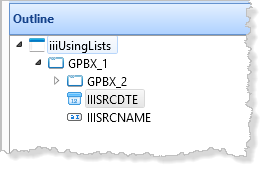
11. From your tab, expand the file iiiEmployees and add the fields iiiEmployNumber, iiiDeptCode, iiiDeptDescPJF and iiiStartDate to the list view. From add field FULLNAME to the list view.
12. On the tab change the of the FULLNAME column to 2.
Your form should look like the following:
Tip: In a real application you would probably change the column heading property for each column and change its to Caption. You could also change the column properties to size and space them as required.
13. Lengthen the form slightly and drop a onto the form, from the tab / view. It will attach to the bottom of the form.