Step 15. Using Component Properties
FRM015 - Getting Started with Forms Programming
1. Drag and drop a Check box to the top of your form. Note it is automatically named CKBX_1.
2. Set up the Check box properties as follows:
|
Property |
Value |
|
Caption |
Allow Uppercase and Reverse |
|
ButtonState |
Checked |
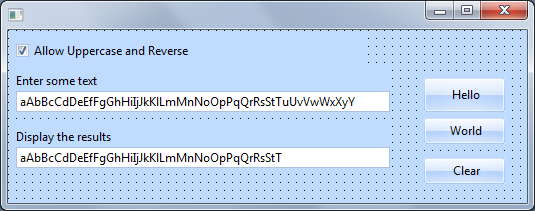
Your form should look like the following:

3. Change the STD_TEXT Changed event to execute the assign command, if the check box is Checked. Your code should look like the following:
Evtroutine Handling(#STD_TEXT.Changed) Options(*NOCLEARMESSAGES *NOCLEARERRORS)
If (#CKBX_1.ButtonState = Checked)
#STD_DESCL := #STD_TEXT.Uppercase.Reverse
Endif
Endroutine
Your IF expression is a Boolean expression which "GETs" the property ButtonState for component CKBX_1.
4. Compile and test your form. The results field will not be populated, if the Check box is unchecked.
5. In the view select the button and change its property to False.
6. Make the following changes to your form logic:
a. Change the Hello click event to SET the Clear button to Enabled=True
b. Change the World click event to SET the Clear button to Enabled=True
c. Change the STD_TEXT field Changed event to SET the Clear button to Enabled=True
d. Change the Clear button click event to SET the Clear button to enabled=False
For example, the Hello Click event should look like the following:
Evtroutine Handling(#HELLO.Click)
#STD_TEXT := #STD_TEXT + 'Hello '
#CLEAR.enabled := true
Endroutine
This uses the ASSIGN statement to SET a property.
A longer form of this code could be used to set a component's property:
Set Com(#CLEAR) Enabled(true)
7. Compile and test your form. The Clear button should initially be disabled. The Clear button should be enabled whenever the Hello or World buttons are used, or when text is typed into the "Enter some text" field.