Step 3. Create Department Maintenance Form
REP005 - Creating Files
In this step you will create a test form which will allow you to add, change, delete and display the data in the department file you have just created.
1. Create the Department Maintenance form.
a. Create a new form with the following characteristics:
|
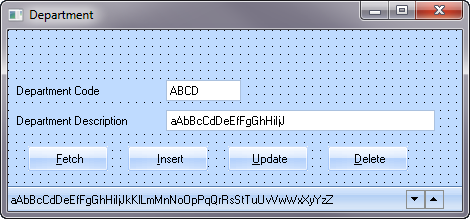
Your should look like this:

The form will open in the Editor.
b. In order to use a template, you need to know the for the file iiiDepartments. Templates do not recognize long names.
On the tab, expand the width of the tab. If necessary, use the right mouse menu on a column heading to show the column.
Make a note of the file iiiDepartment's Identifier. For example iiiDEPARTM.

c. With your new form selected in the editor, click the button on the ribbon
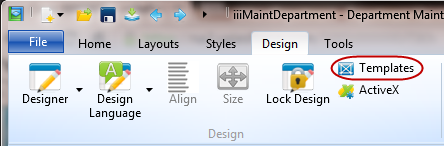
Press the button  in the ribbon to display the dialog.
d. Select the template and press the button.
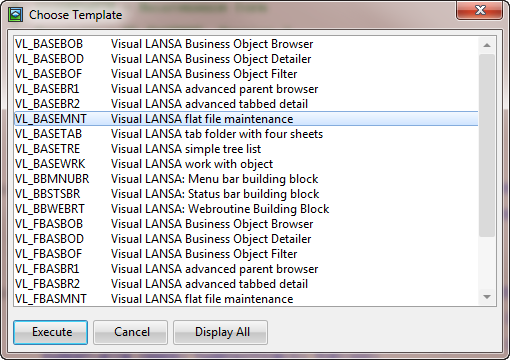
e. Answer the template questions as shown in the table below. (Remember to replace iii with your 3 character identifier.)
|
The template will display Identifiers for your fields.
f. Press the button once you have answered all questions.
The template replaces the default code in your new form. The form is complete and ready for compilation. It is not necessary to change the source RDMLX.
g. Select the view. Reposition the buttons (select as a group and use Ctrl+Cursor keys.) and resize the form.
2. Next, compile your form.
a. Select the ribbon if necessary.
b. Press the  button. Compile will automatically save the form.
c. Review the tab to ensure that the compile completed successfully.