Firelight Technologies FMOD Studio API
Getting Started
Requirements
Before beginning, make sure you've already:
- Gotten a build of UE4
- Downloaded and installed FMOD Studio
- Downloaded the FMOD UE4 integration
Normally you will just need one copy of the UE4 integration. If you develop for multiple platforms at once, you can copy multiple integrations over the top of each other.
Installing the integration
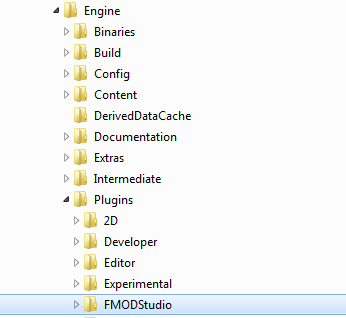
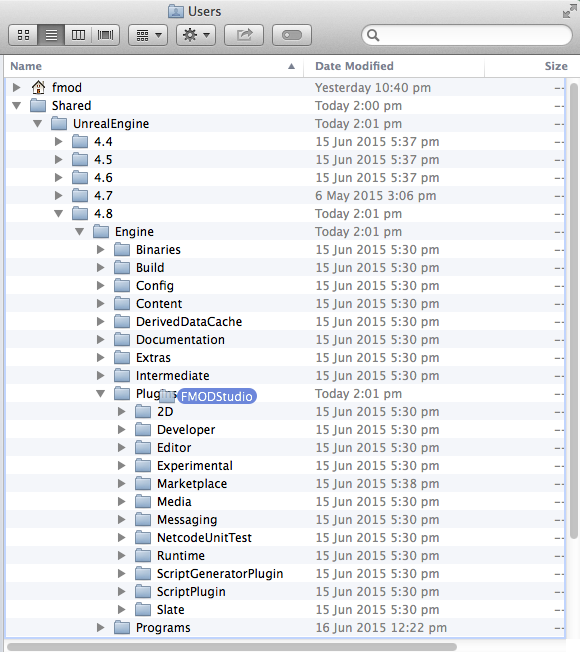
The first step is to install the FMOD Studio UE4 integration. The integration consists of a single FMODStudio folder which can be placed in either the Engine/Plugins directory or your UE4 game's Plugin directory. The next steps show how to install it into your Engine directory, so it will be available for all projects using UE4.
For Windows: Browse to your UE4 Engine folder and unzip FMODStudio into the plugins directory.
For Mac: Use Finder to browse to your /Users/Shared/UnrealEngine/4.X/Engine directory and drop FMODStudio into the plugins directory.
Note: If you have trouble getting the plugin working on a certain platform, then try putting FMODStudio in your game's Plugins directory instead of the engine.
Making sure the plugin is installed
Next time you open UE4, you should see a shortcut to the manual is available under the help menu. That means the plugin is in the right place and has been enabled.
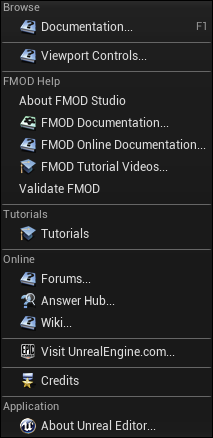
Note: If you see the FMOD Help in the manual, then the plugin installed correctly. If you don't see FMOD help, it isn't installed.
Setting up your project
To begin adding sounds to your UE4 project, you'll first want to create a project within FMOD Studio. For the purposes of this tutorial, we are going to create a copy of the Examples project that ships with Studio.
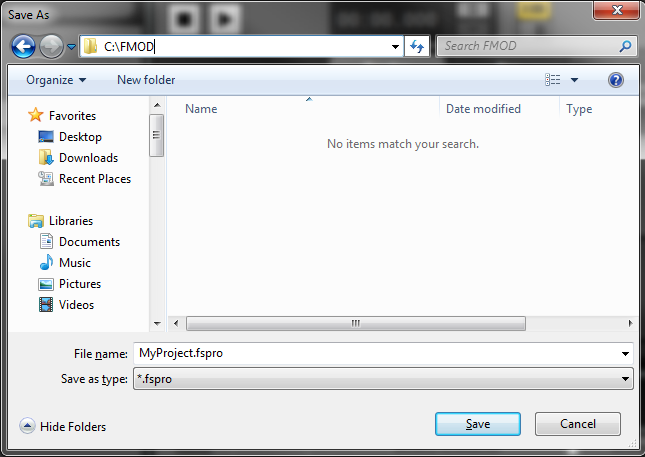
To do this, open FMOD Studio, select File > Open..., select the Examples.fspro file in the file browser dialog, then select File > Save As.... From here, select a destination to save the file to. Studio will create a new folder containing all of the project files necessary. The directory can be under your UE4 game's directory, or it could be anywhere on disk.
Now that you have a project to work with, we can set up to export bank files into your game's content directory. To do this, select Edit > Preferences... (FMOD Studio > Preferences... on Mac) and select the Build tab. Set your Built banks output directory to a directory called FMOD under your game's Content path.
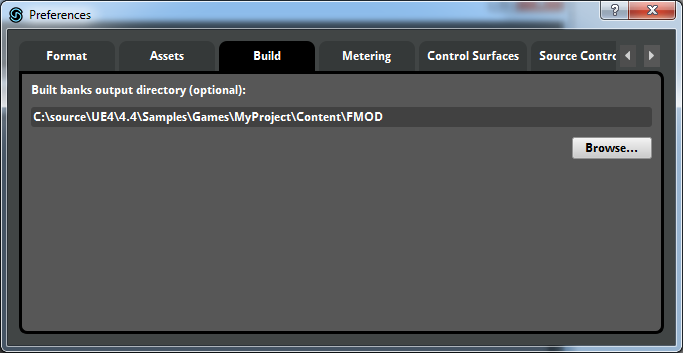
Now select File > Build. This will build bank files for events that have been assigned to banks. You should do this whenever project data has been modified.
Now, open UE4 and look at the content browser. The plug-in defaults to looking in Content/FMOD directory for banks, so if you have exported banks there, assets should appear in the content window automatically. These represent items in your Studio project which update automatically when banks are built.
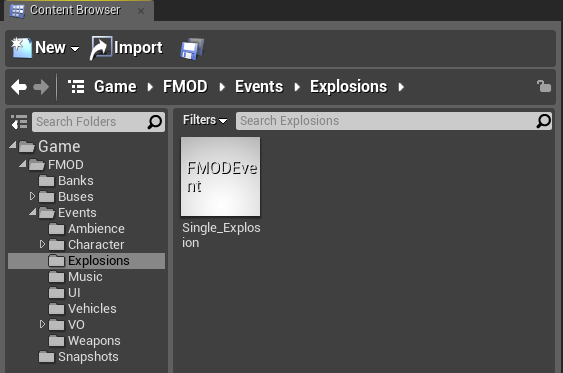
For more information about banks, see the Banks page.
Setting up the project automatically
You can run the "FMOD Validate" option in the UE4 Help menu. It finds and fixes common issues, and can automatically set up your FMOD Studio project for you!
It will check the following:
- You are running the right version of FMOD Studio
- Your FMOD Studio bank export path is correct
- Banks have been exported
- Studio events have been added to the banks
- Any plugins have been added to the plugin list
- FMOD has been added to the packaging settings for deployment
If you have any trouble setting up your project, just run this!
Making sounds
The FMOD Studio UE4 integration provides multiple ways in which Studio events can be played.
Ambient Sounds
The simplest way to play a looping ambience, is to drag and drop an event from the Content Browser into a scene Viewport.
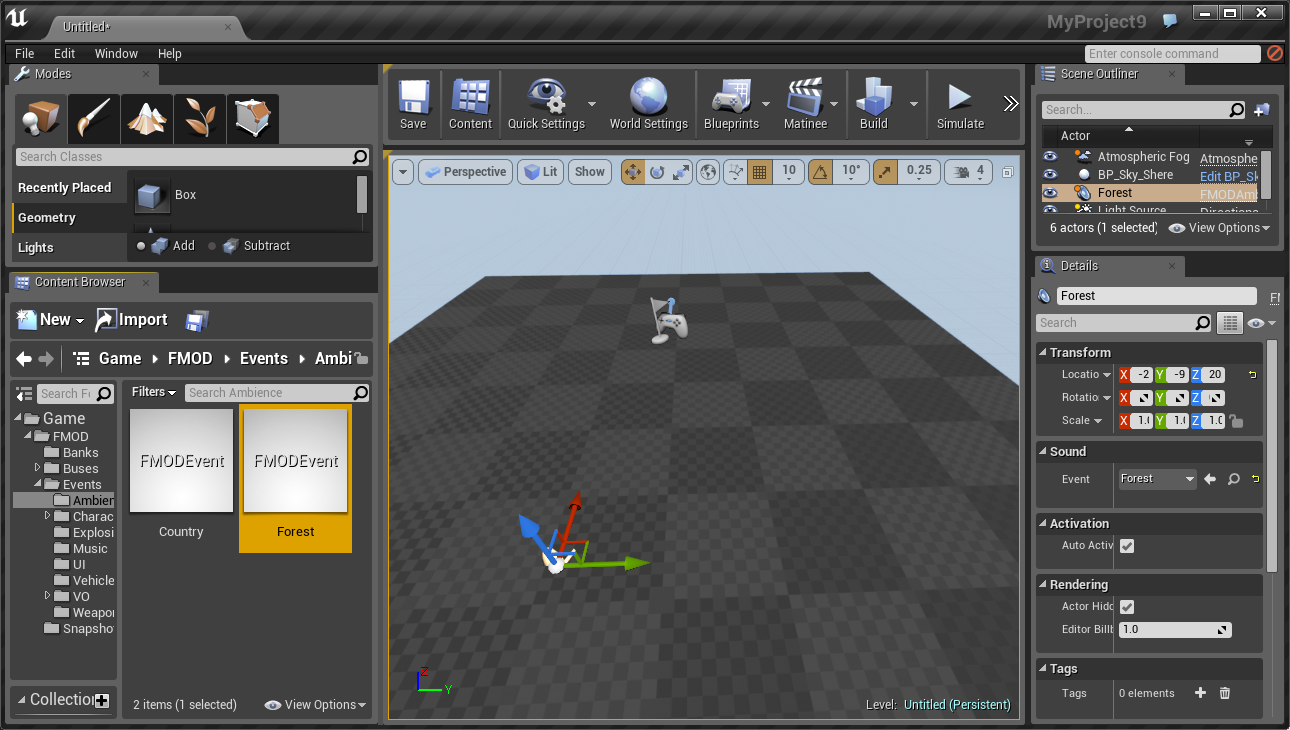
For example, try dragging the Game/FMOD/Events/Ambience/Forest event into a level. This will create an FMODAmbientSound. Hit Play to begin playing in editor, and you should immediately hear the Forest ambience.
Note: Make sure you drag an event into the main viewport. Dragging a bank into main viewport won't do anything.
Playing Sounds From Blueprint
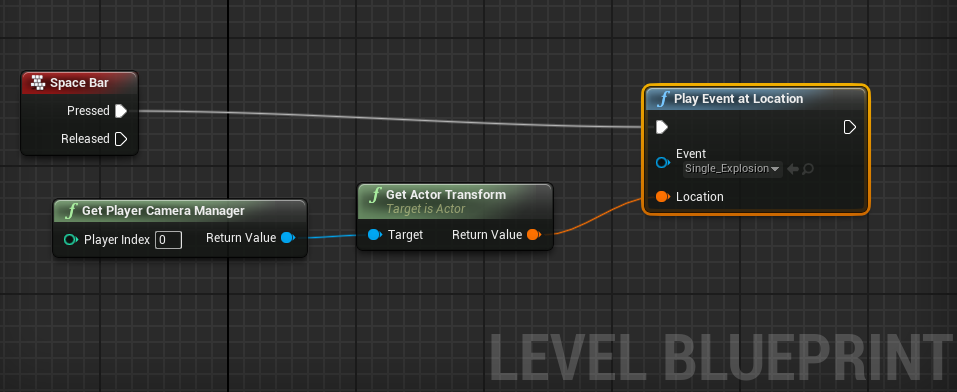
Another easy way to trigger a sound is via Blueprint. You can use the Play Event at Location function to quickly trigger any given event.
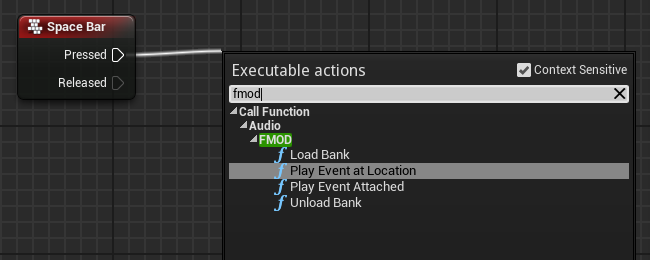
In the example shown below, the Single_Explosion event is triggered at the location of the camera, every time the spacebar is pressed.
Other avenues
Keep in mind that more advanced control is also available from Blueprints. There are graph functions for playing and stopping events, setting parameters, and loading or unloading banks. You can also add FMODAudio components to Blueprints, allowing you attach audio directly to an object.
Compiling the plugin (Optional)
If you want to recompile the plugin, you can drop the plugin into a code project under your game's Plugins/FMODStudio directory, then re-generate the project. This might be useful if you want to use the plugin with a different version of the engine, such as a new pre-release of UE4. You can also do this if you want to get the plugin from github.
To recompile the plugin after downloading it from FMOD, do the following:
- Delete the FMODStudio/Intermediate directory.
- Delete the FMODStudio/Binaries/Platform/UE4*.* files. Leave the fmod libraries in the binaries directory!
- Create a new code project using UE4.
- Copy the plugin into YourGame/Plugins/FMODStudio.
- Regenerate the game's solution or xcode project.
- Build the game for "Development Editor".
- Build the game for whatever other configurations you need.
To compile the plugin after downloading the source from github, do the following
- Add FMOD dynamic libraries into the FMODStudio/Binaries/Platform/ directory. The libs can be obtained in the Programmers API download or from the UE4 integration download.
- Create a new code project using UE4.
- Copy the plugin into YourGame/Plugins/FMODStudio.
- Regenerate the game's solution or xcode project.
- Build the game for "Development Editor".
- Build the game for whatever other configurations you need.
Note: When rebuilding the plugin inside a code project, make sure you haven't also left it in the engine directory as well!
Deployment
For information about preparing your game for deployment, see the Deployment page.