After creating a new OpenCL or DirectX Folder, an empty Folder would be listed in the Explorer Tree:

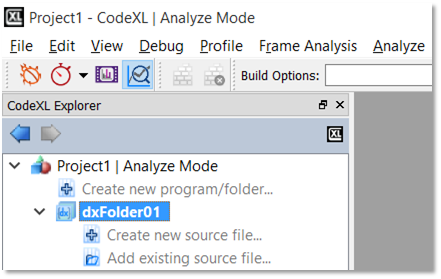
To create a new source file, and automatically add it to the Folder, double-click on the “Create new source file item…” item of the folder:

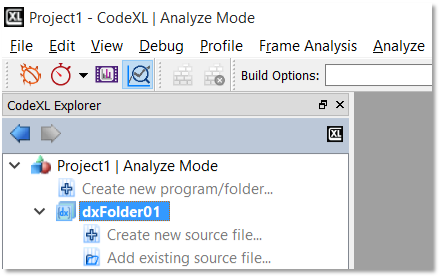
To add an existing source file, and automatically add it to the Folder, double-click on the “Add existing source file item…” item of the folder:
 |

To configure the build properties of a source file under a specific Folder, click on that source file and use the Analyzer toolbar’s Type and Entry point drop-down lists. The first sets the type of the shader and the latter specifies the specific target shader (among the shaders in the source file). This configuration is Folder-specific. That is, the same source file can be set with different properties under different Folders. CodeXL will remember those configurations for you.
To configure the build properties of the Folder, click on the Folder and adjust the enabled items in the Analyzer toolbar. For CodeXL 2.0, this is only relevant to the DX Shader Model property of DX Folders:


Once set, the DX Shader Model value will hold for all the shaders in the selected Folder. For example, if you choose 5_0 as the DX Shader Model, any D3D vertex shader in that Folder will be compiled using shader model vs_5_0.
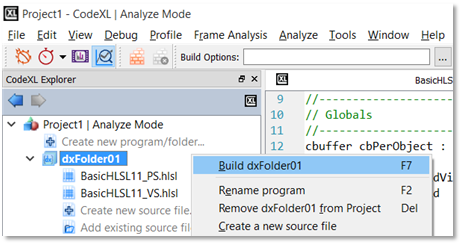
To build the whole Folder, right-click on it and select the Build item:

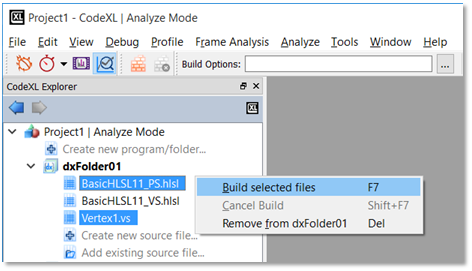
Unlike the case with Programs, Folders are more flexible as they allow you to build selected source files, without being required to build the whole Folder. To build selected source files, click on the selected source files under the program, while holding the Ctrl key. Then, right-click on one of the selected files and select the build option: