

To start profiling their application, you must create a new CodeXL Project and set the appropriate settings. The following steps explain how to create a new CodeXL Project.
1.
Once CodeXL is launched, click on Create
New Project link in the main pane, or select File > New Project...
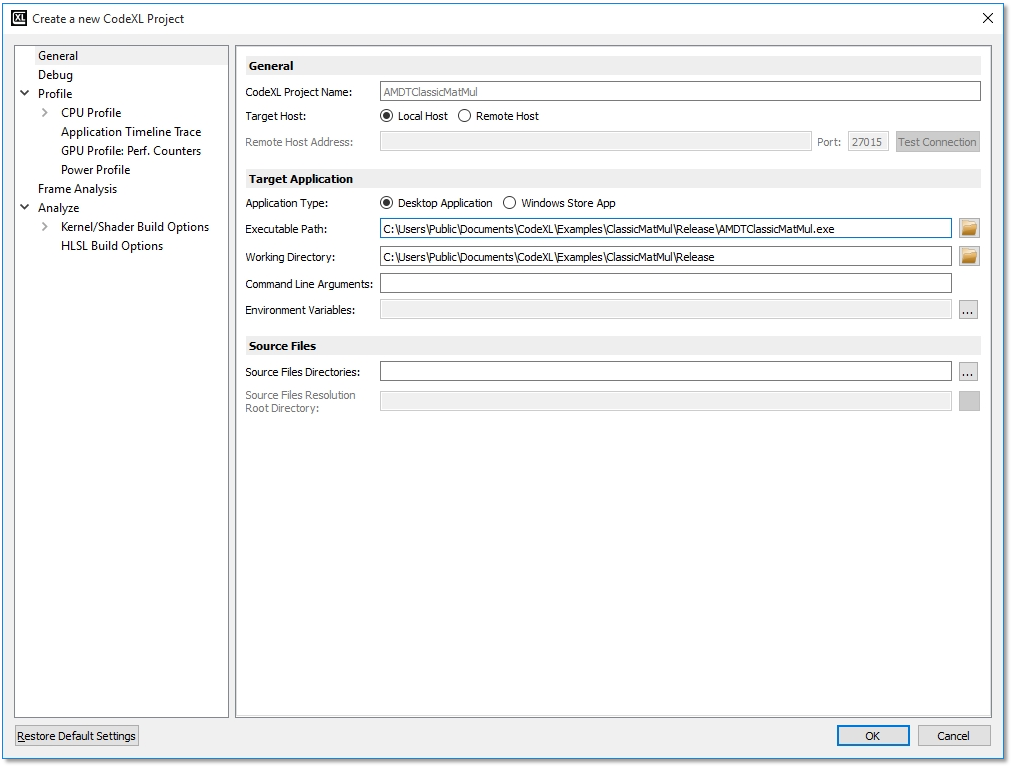
The Create a new CodeXL Project dialog box is displayed.
2. Select the General tree node on the left pane.
3. In the Executable Path box, click Browse, and select the application to be profiled.
4. By default, CodeXL uses the name of the application as the project name. To modify the project name, edit the CodeXL Project Name box.
5. Edit the other boxes that are required for executing the application to be profiled.
· Working Directory
· Command Line Arguments (optional)
· Environment Variables (optional)
· Source Files Directories (optional)
6.
Click OK.
A new CodeXL project is created and displayed in the Session Explorer window.