13 4 2 Template Option Values and Appearance
13.4.2 Template Option Values and Appearance
Each option in the Control Panel can be configured to have a specific default value and to indicate how or even if the option is displayed.
Similarly each subset of options in the Control Panel can be configured to indicate how, or even if, the whole subset is displayed. Refer to 13.4.3 Template Subset Appearance for more information.
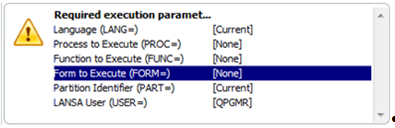
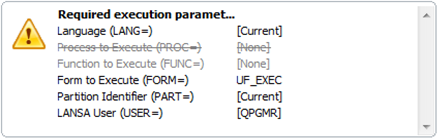
The default values for installation options are enclosed in square brackets; for example, Language (LANG=) has a default value of [Current]. DO NOT enclose your installation option values in square brackets. If you do, they will be ignored and Deployment Tool's default value will be used for that option.
|
Step |
How to do it |
|
1. Modify Template Installation Option(s) |
Create or open a template. Double click a Template Installation Option to review the definition. For example, double click the option Form to Execute:
Refer to 13.4.1 Template Installation Options for information on specific options. |
|
2. Set up the Values default |
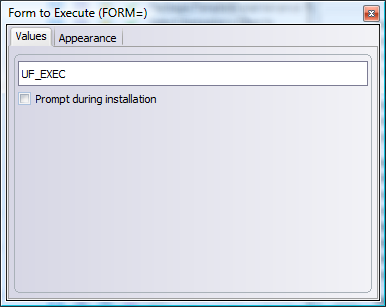
The tab allows you to specify a default value to be applied for an option when the template is used. If the option is a free-form entry, like Form to execute (FORM=), an edit box will be displayed. Change the value to the default value you want to be applied each time the template is used to create a Version.
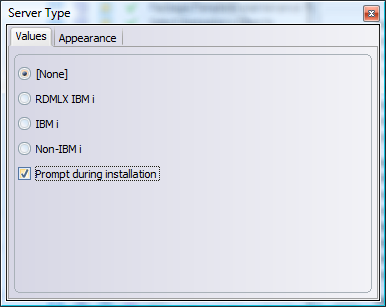
In this case you can also decide if you want this value to be prompted, thus enabling it to be changed during the installation process. Where relevant, some options also include Prompt during X_START for selection. Prompt during Installation When installing the Package using Windows Installer you will be prompted to enter or confirm the value for this option. Prompt during X_START When running the application using an X_RUN (typically from a desktop icon) you will be prompted for X_START values when the application is launched. The values entered will be used as default values on the X_START prompt. When the option has a predefined list of values, a series of radio button is displayed in the values tab.
|
|
3. Review the Appearance default |
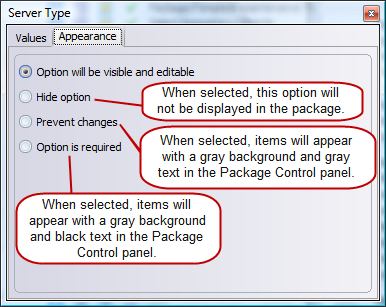
The tab allows you to control how the option or subset of options will be displayed when the template is used. Option will be visible and editable The option will behave as normal and will be selectable and editable. Hide option The toolbar icon for the option will be disabled. Any value associated with the option in the Template will be applied to the Package but access to these values will be denied. Prevent changes The option can be seen but cannot be changed. Any corresponding Toolbar icon will be available on the toolbar, but the button in the dialog will be disabled. Any changes attempted will be ignored. Option is required option is displayed with a gray background to indicate that it should be considered before the Package is built.
|
|
4. Save Values and Appearance settings |
To save the Values and Appearance settings simply close the dialog. The template interface will indicate the appearance applied to each option.
|
|
5. Set up Template Subset Appearance |
Refer to 13.4.3 Template Subset Appearance for more information. |
|
6. Set up other Package settings and options |
Set up any other default information required in the template by reviewing the various options and settings available in the toolbar. For example, the template may be set to use your Company's Icon as the default Application Icon. Refer to Package Options and Settings for more information. |
|
7. Save the Deployment Template |
Save the template definition using the Save You can also Save and Exit in one step from the File menu or using the shortcut key Ctrl + E. To Exit without saving use the Exit option from the File menu, the shortcut key Alt + X or just close the Template Control Panel dialog. |