Step 2. Define Version 1
DTE050 – Create Version 1
You defined your Personnel System application and Version 1 in the deployment tool in exercise DTE010 – Set Up the Deployment Tool. You will now complete the definition of this Version 1 package and then build the package.
Note: In DTE010 – Set Up the Deployment Tool you must have created your Version 1 package using the XALONE template.
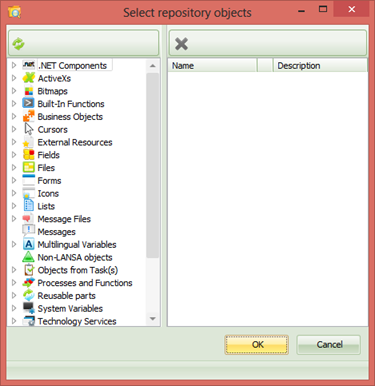
1. Open the from the ribbon. Double click on the package for the Personnel System application, to open the dialog.
2. Click on the  button on the toolbar.
3. Expand the group, then the alphabetic group for your initial. Add your copy of the JI_MAIN form to the package. Notice that the entry shows a tick, meaning that cross reference is enabled for this component type.
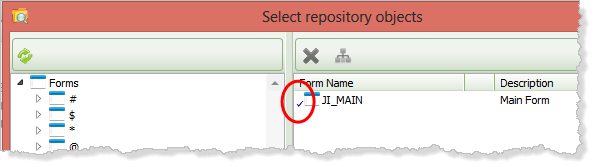
Since the option is selected in the cross reference defaults, it is only necessary to include this top level form to create a complete installable package. Of course depending on the design of your own applications, you may need to include a number of top level components in order to define a complete application package.
4. Expand the group and then files beginning P. Add file PSLMST to the package.
5. Select the file PSLMST and click the  tool bar button.
6. Select the option, so that files which the employee file depends upon are included in the package. For example file look up rules or predetermined join fields will mean that the OAM for file PSLMST accesses other files such as DEPTAB and PSLSKL.
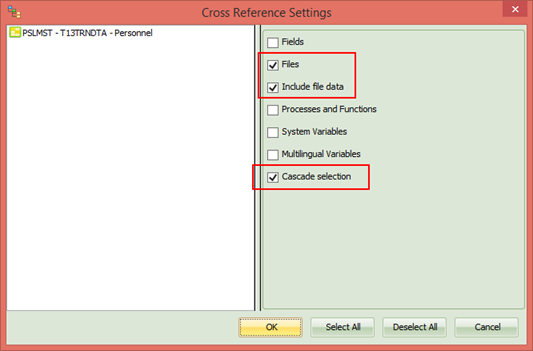
7. Also select and . This means that file data will be included for the additional files which are included due to cross referencing. The option will mean that other files which the cross referenced files depend on, will be included.
8. Click to save this setting.
9. Notice that another toolbar button, the button, enables files to be deployed including their data.
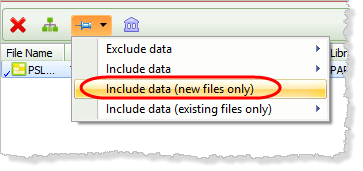
This exercise will deploy to a new database. This means it is essential to deploy the files with data.
10. Select the option: .
Including the files in the package means that the OAMs for the files will also be added to the package.
11. Click to close the dialog.
12. Save the package.