20.1.3 Using a Single Availability Zone (AZ)
The default stack created by the LANSA templates is to create EC2 instances in all the (AZ) in the current Region. Once the stack has been created you may easily alter it to use a Single AZ. Using multiple AZs provides better fault tolerance but this comes at the expense of slower access to the database server from the AZ which the database server is not in. When the Sydney Region is used, there are 2 AZs. Benchmark tests achieved a 20% speed increase. This is because the network speed between AZs is slower than the network speed within an AZ. So, you may choose to lower your costs by choosing to use a Single AZ instead. The costs are lower because you may require 20% less resource to be running to support a particular workload.
This issue is exacerbated in Regions which have more AZs. For example the Virginia Region has 4 AZs. In this case 3 out of 4 of the AZs are not the AZ of the database server. Hence 3 out of 4 (75%) transactions are slower, as compared to 1 out of 2 (50%) of the transactions in Sydney. Given that the redundancy provided by 4 AZs is probably unnecessary, AZs need to be removed. The same procedure below may be used to reduce the number of AZs from 4 to 2. When removing AZs from the Auto Scaling Group, leave 2 AZs rather than just the 1.
When you create the stack, do not specify extra web servers. Leave it set to the default of 0. Once the stack is fully operational you may make these changes. That is, use the application and test that it's working.
1. Navigate to the RDS AWS console page.
2. Locate the and identify the it is running in, say ap-southeast-2a. This is the AZ that all the EC2 instances will need to be created in.
3. Now navigate to the listed on the EC2 AWS console page. You'll notice that both are in multiple AZs:
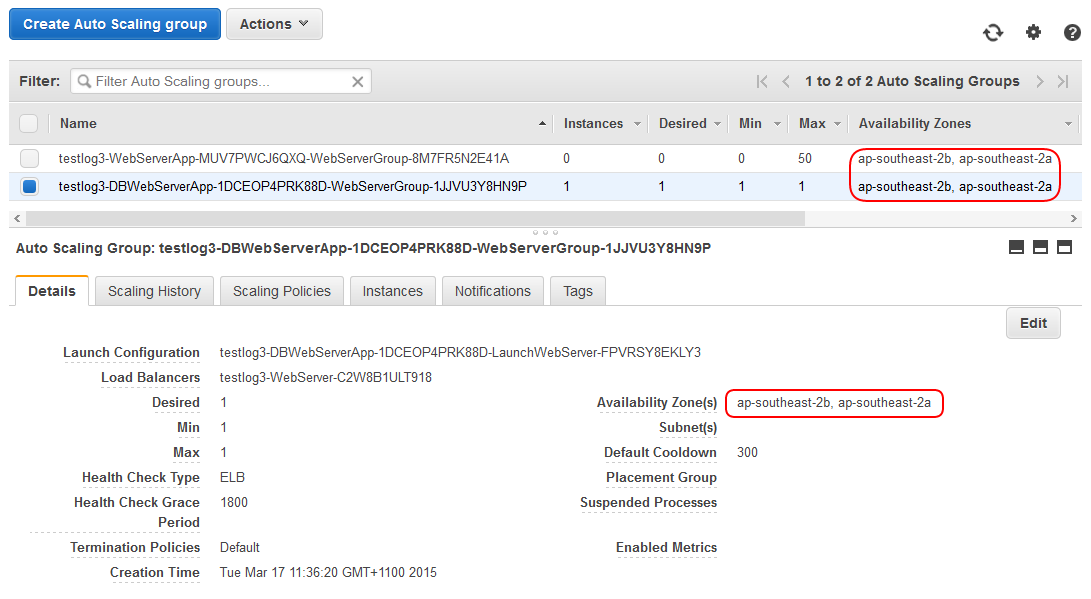
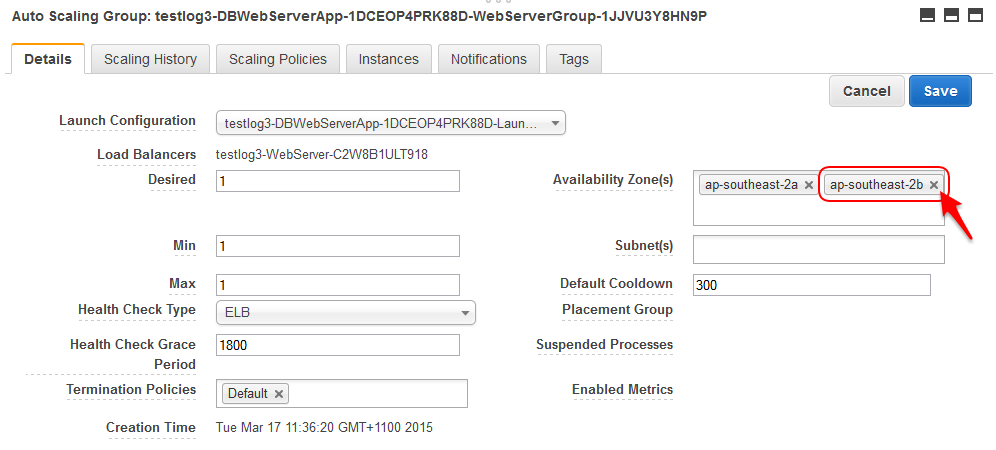
4. Choose the DB Web Server and edit the Auto Scaling Group details. Identify the AZ you need to remove (e.g. ap-southeast-2b) and click the 'x'. Save the Auto Scaling Group
5. Check the instance tab. If the instance is in the correct AZ, for example ap-southeast-2a, then you may continue to the next step. Otherwise you will need to wait for a new instance to be created in ap-southeast-2a and for it to be fully operational before you may continue.
6. Do not continue if the DB Web Server instance is being re-created in the new AZ.
7. Now modify the other in the same manner. At the same time you may alter the Desired, Min and Max settings to create some web server instances in the single AZ.
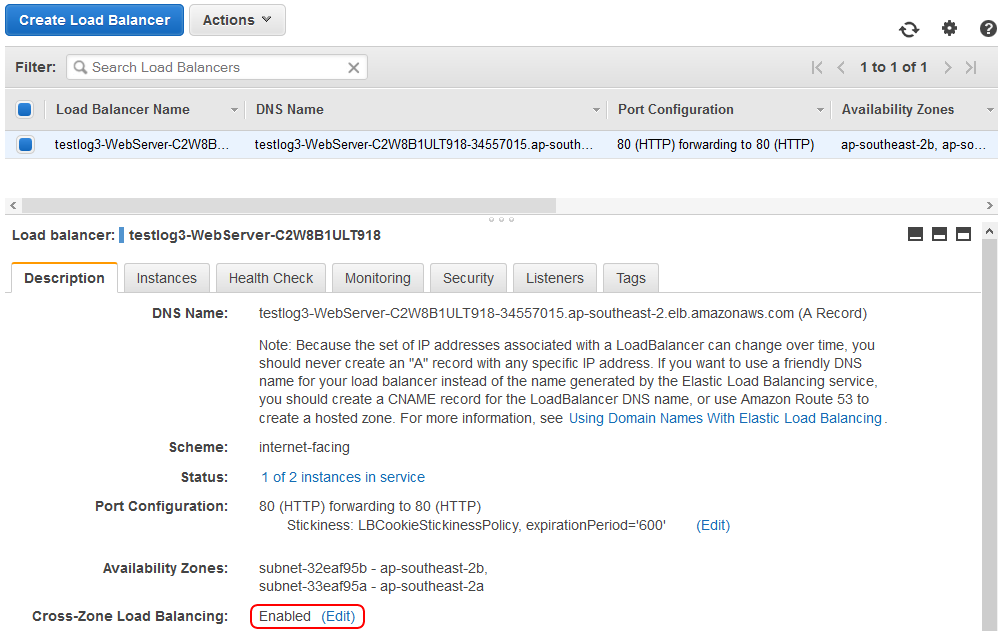
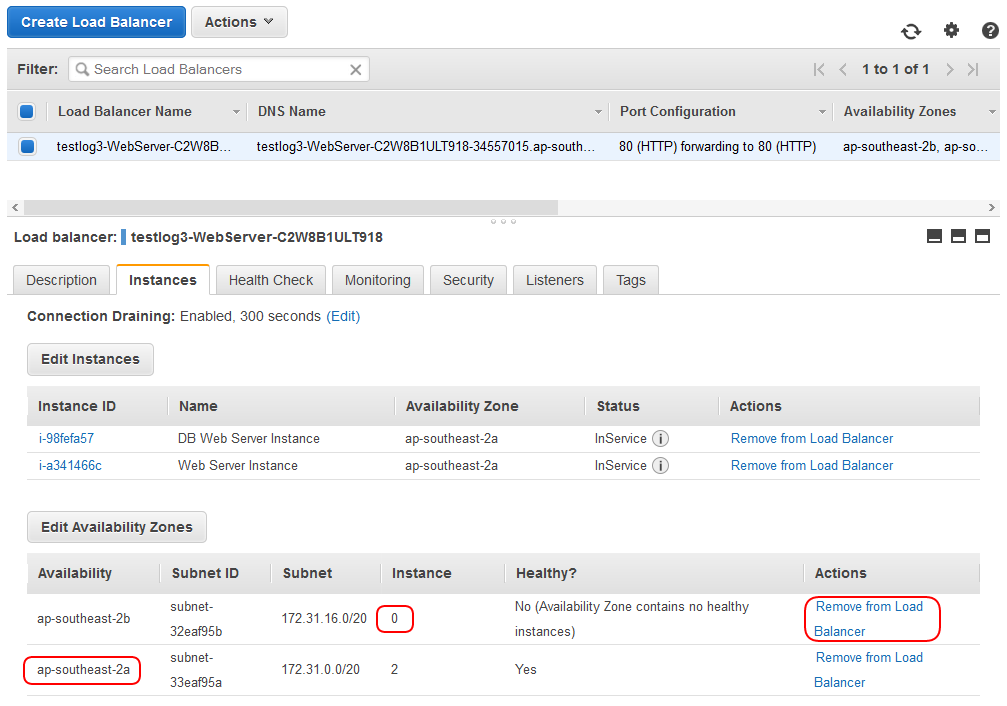
8. Alter the by removing the unused AZ from the , in this case ap-southeast-2b. Click on the tab. ap-southeast-2b will probably have 0 instances. If it doesn't, check that you have the correct AZ. It may be in the process of removing instances from it. Click the action
6. Finally, alter the so that is disabled: