Step 10. Review Windows Server Installation
DTE095 – Create a Windows Server Installation
1. Switch to that was used in an earlier step.
2. On the menu, select the option. This should refresh the view on the left hand side. If this function seems unreliable, close and re-open the Management Studio application.
3. Expand the database that you created earlier and expand the group.
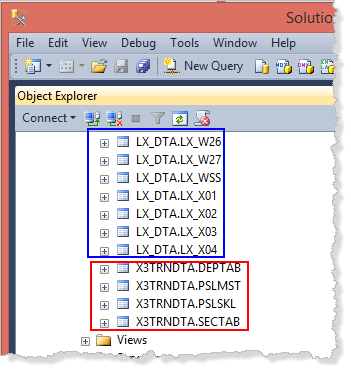
You should find a large number of tables prefixed LX_DTA which is the schema name for LANSA repository tables.
The second group of tables prefixed by X3TRNDTA (schema name) in the sample shown are the application tables. Your schema name will depend on your LANSA partition file library name. Schema name is limited to eight characters so that LANSA shortens the library name if necessary. The library name was T13TRNDTA in this example.
4. Right click on the table PSLMST and select .
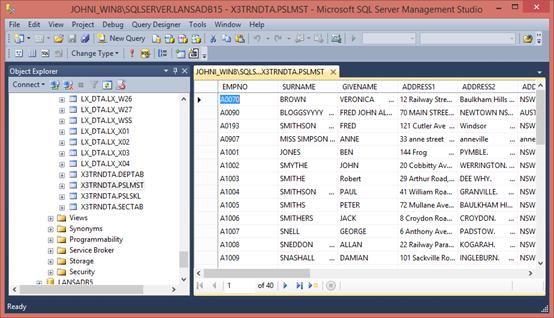
The file data should be displayed on the right hand side.
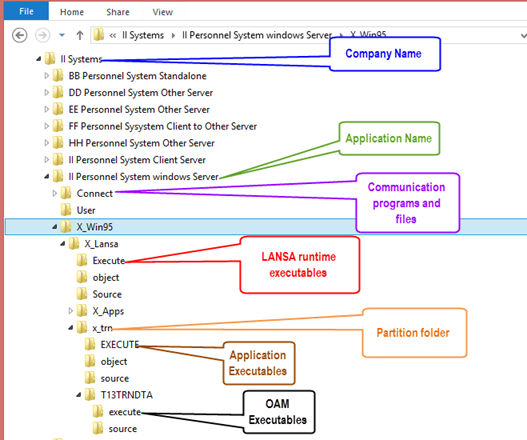
5. Open and navigate to the path, where <company name> and <application name> are your values for the Windows Server install:
C:\Program Files (x86)\<company name>\<application name>6. The following image shows the main contents and the organisation of the installed folders: