Step 2. Install Version 1 of Employee Application
DTE055 – Install Version 1
1. The installer must be able to update the SQL Server database.
For Windows 7, your user profile must be in the Administrator group. You can then install by double clicking on the MSI file.
For Windows 8, start a using .
Position to the folder: C:\Program Files (x86)\LANSA\x_win95\x_lansa\x_apps\IIPERSON.
2. Enter the following command and then press the key.
msiexec.exe /I II
where II are your initials.
The MSI file name will be completed for you. Your command should now look like this:
Msiexec.exe /I IIPERSON_V1.0.0_en-us.msi
Press Enter. The dialog will be displayed:
3. Click to continue.
4. The dialog is displayed
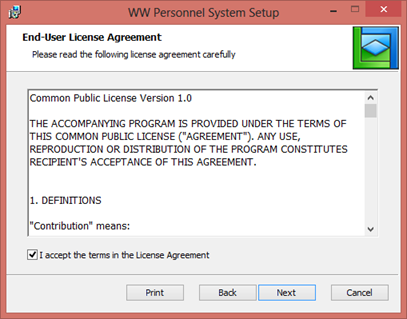
a. An example license file is supplied in folder:
…\x_apps\x_Wix\Content\license.rtf
b. You should edit or replace this file to implement your company licensing terms if necessary.
5. Select the "I accept …." check box and click to continue:
6. You can now select the . Select .
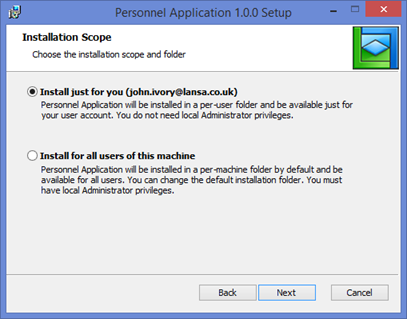
Both options will be shown in Windows 7 provided the installer is an Administrator and in Windows 8, provided the installation was started from a using .
7. Click to continue. The dialog will be shown:
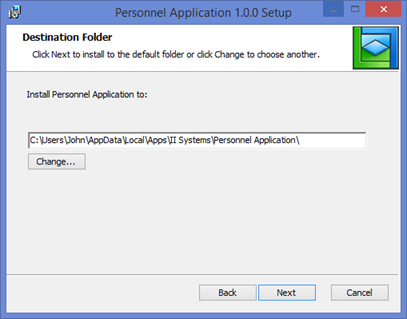
The button allows an alternative folder to be selected.
Notice that the suggested path includes the Company Name and Application Name:
. . .\II Systems\II Personnel System Standalone\
8. Click to continue. The dialog is displayed.
Notice that the parameters which were set to "prompt during installation" could be changed if required.
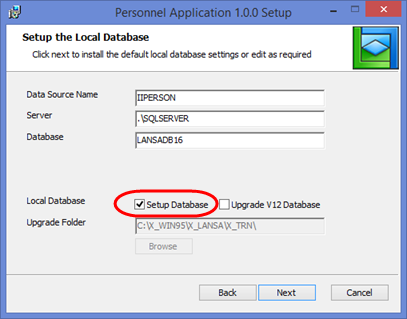
This installation must update the database to define the required application files and insert the file data. This means that the check box must be selected.
An ODBC DSN entry is created named IIPERSON, pointing to the database server and database name defined by the package.
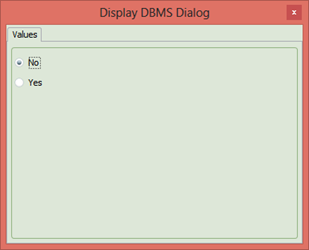
There is an option to suppress this dialog in the package definition. But it is rare that you would not need to offer the choice to Setup the Database. If needed you can suppress this dialog by changing to No:
9. Click to continue. The dialog is displayed:
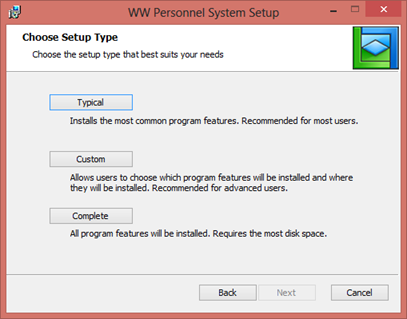
10. Select any option to continue. Cuurently, all setup types install the complete package.
11. Click to continue.
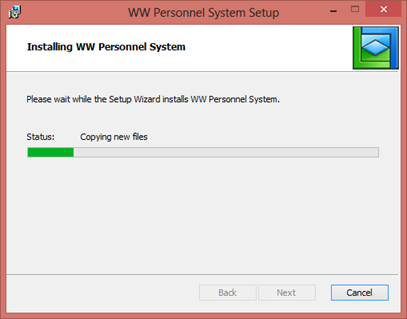
The dialog will show progress with messages and a progress bar:
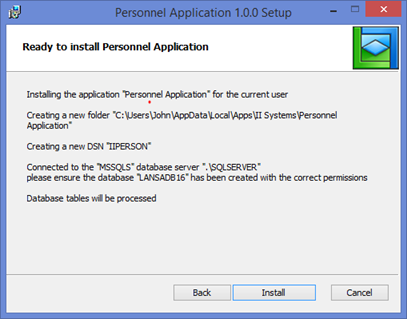
12. Click to complete the installation:
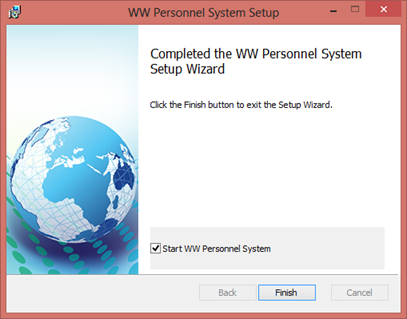
Note that the check box is selected.
The form will run the standard Employees Application as a Stand Alone Windows application.
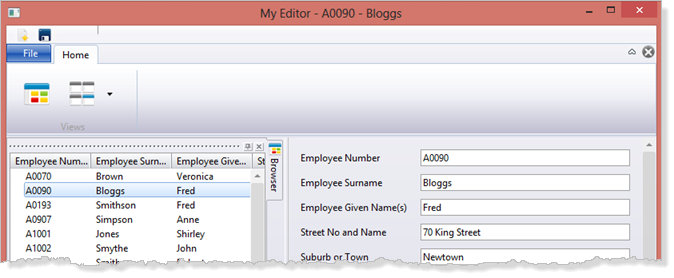
13. As per the application you tested earlier, you can now edit and save an employee record or create a new employee. Double click an employee in the browser list to open it in the editor. A number of employees may be opened, each in their own editor component instance.
14. Select for the stand alone and click the  toolbar button. Version 1 can now no longer be opened or changed.
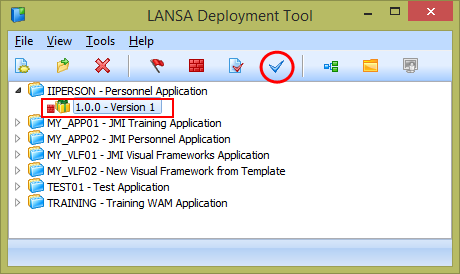
The  toolbar button enables and in the package to be reviewed.