Step 3 Allow the Auto Scaling Group to Scale In
Step 3. Allow the Auto Scaling Group to Scale In
CTE050 – Watch the LANSA Stack Scale In
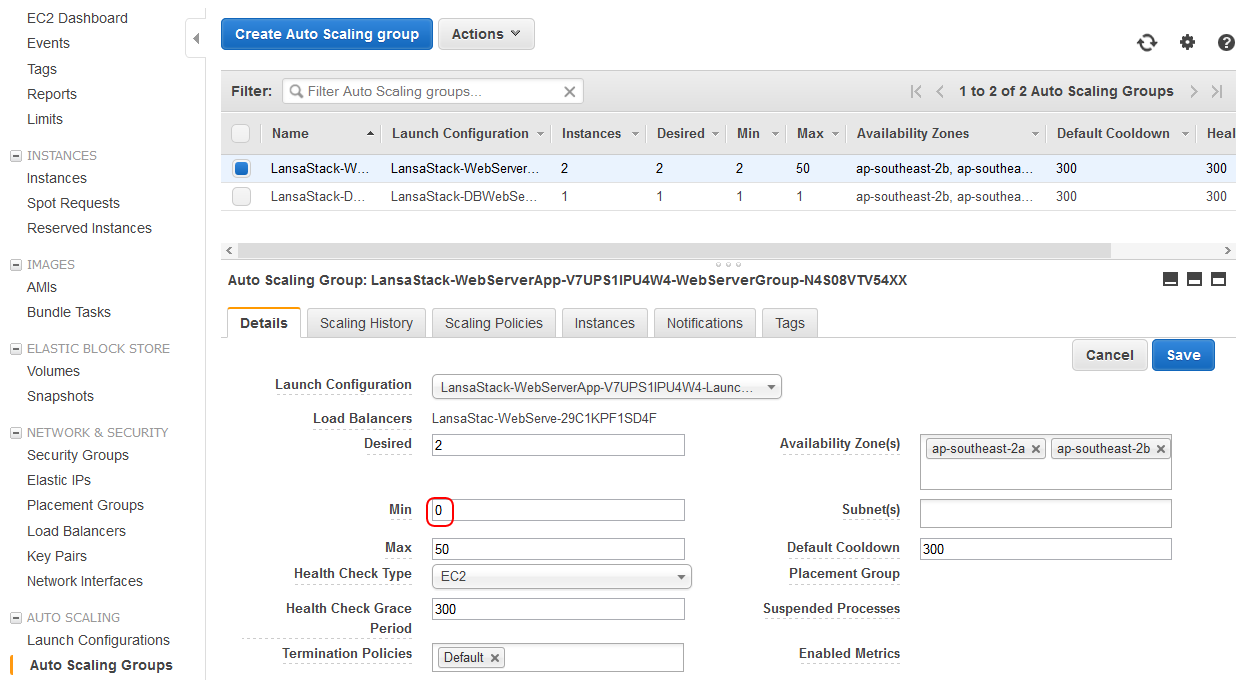
1. Navigate back to the Auto Scaling Group window. Select the Auto Scaling Group LansaStack-WebServer, click on the Details tab and click Edit. This is just the same as you did for Step 1.
2. Change Min to 0. This will allow the Auto Scaling to reduce the number of running instances (Desired setting) below 2 if the Scaling Policy is satisfied. Save the change.
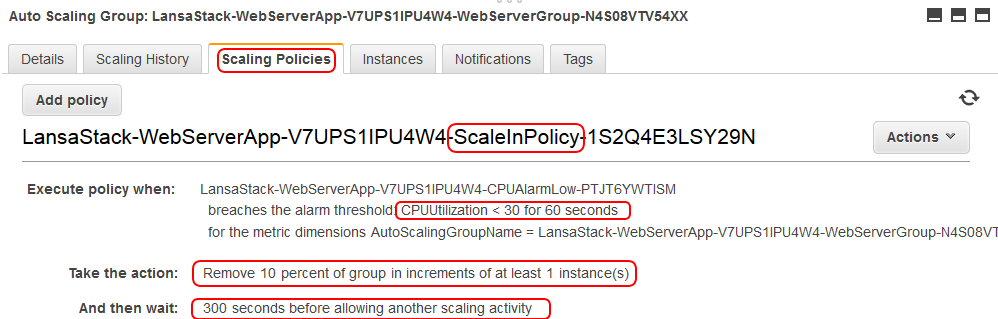
3. Click on the Scaling Policies tab. The policy names are quite lengthy. In the centre of the name you will see a policy named ScaleInPolicy. This policy is set to execute when the CPU Utilization drops below 30% for 60 seconds. When that occurs, I instance will be removed from the Auto Scaling Group. Then there will be a pause of 5 minutes before another scaling activity will be allowed. This is to stop thrashing of instances constantly starting and stopping. In fact in a production system the execution policy is more likely to average over a longer period so that dips of inactivity are averaged out.
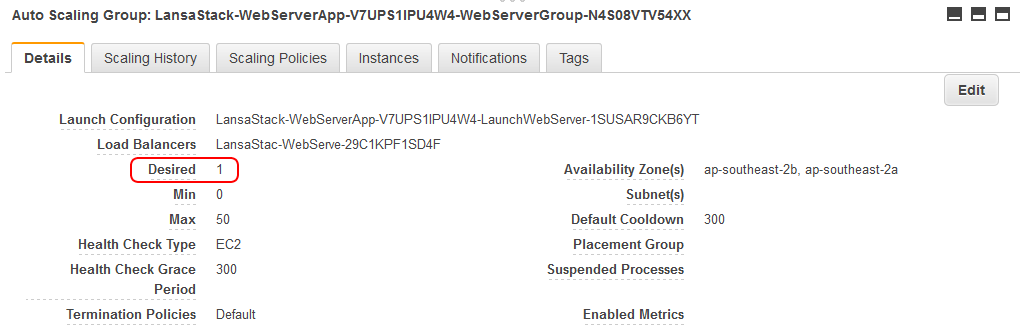
4. If you click refresh you will probably see that the Desired setting has been automatically decremented to 1.
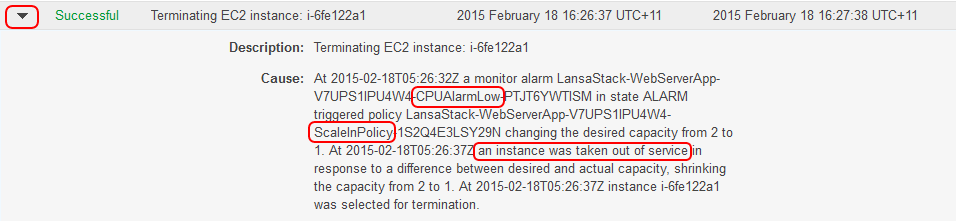
5. A scaling activity has occurred. Click on the Scaling History tab and expand the message using the arrow on the left. You can see the cause of this scaling activity.
6. 5 minutes later another scaling activity will occur and reduce the Desired number of instances to 0, triggering the last instance in this Auto Scaling Group to be removed from service.
7. You may peruse the other scaling activities that have occurred and see your user request to force the creation of the 2 web server instances to Scale Out the ASG and then the 2 automatic scaling events to Scale In the ASG.