Step 1. Run the Client to Windows Server Application
DTE100 – Execute Client to Windows Server Installation
1. Double click on the II Personnel System icon on your desktop. The application's main form immediately opens the SuperServer connect form:
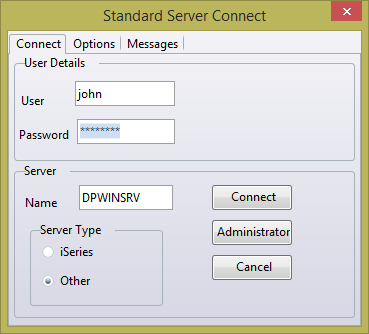
2. Enter your Windows user id and password.
3. Enter the Partner LU Name for your Windows Server installation. You can use the button to run the to check for the name you gave this connection.
4. Select the option for of server.
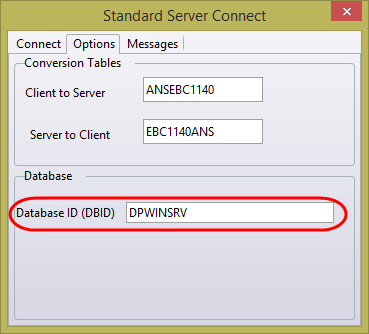
5. Select the tab and enter the you defined in the group when defining the package. This defines a System DSN entry in the ODBC configuration file. To check this, see your Visual LANSA folder / .
6. Click the button. The main form should now load the browser panel on the left hand side, with all employees from the file PSLMST.
The client server connection tables are not used by the Windows DEFINE_SERVER built in function and will be ignored.
DTE100 – Execute Client to Windows Server Installation