Step 2. Install the JIT Server Installation
DTE075 – Create a Just in Time Server Installation
For you own JIT Server installation, you would install to a Windows server which is part of your office network and accessible for all-user desktops. For the purposes of this exercise you will install to your desktop.
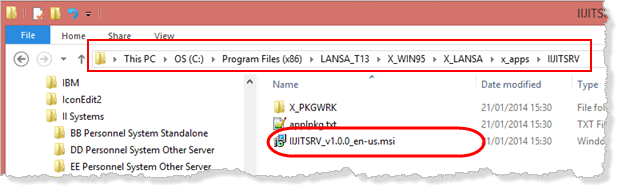
1. In the Deployment Tool main dialog, select the JIT Server application Version 1 and use the  toolbar button to open in the …\x_apps\IIJITSRV folder within your Visual LANSA folder. For example:
C:\Program Files (x86)\LANSA_T13\X_WIN95\X_LANSA\x_apps\IIJITSRV
2a. For a Windows 7 PC, double click on the MSI file to start the installation. Your Windows profile must be a member of the group.
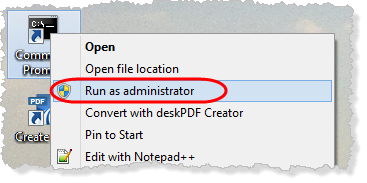
2b. For Windows 8 PC, start a command prompt using :
3. Navigate to the IIJITSRV folder, for example:
C:\Program Files (x86)\LANSA\X_WIN95\X_LANSA\X_APPS\IIJITSRV
4. Enter msiexec.exe /I II (where II is your initials) and press . The MSI file name will be auto-completed. For example:
msiexec.exe /I IIJITSRV_v1.0.0_en-us.msi
5. Then press .
6. The Microsoft Windows installation program will runq, processing the MSI file. A series of messages and dialogs will be displayed.
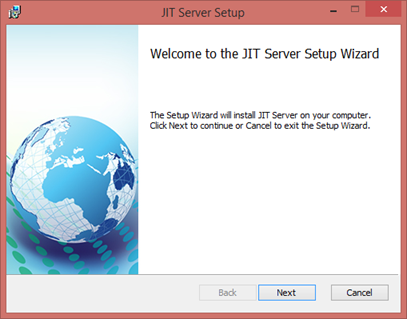
7. Click to continue:
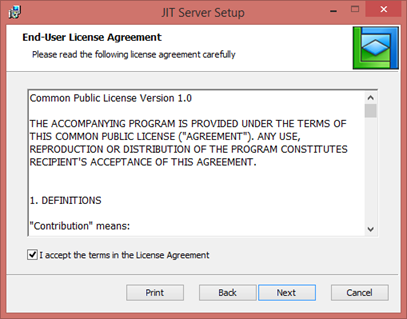
A sample RTF file is provided, containing a licence agreement. If required you can edit or replace this file to suit your company requirements.
8. Select the "I accept . . ." check box and click to continue.
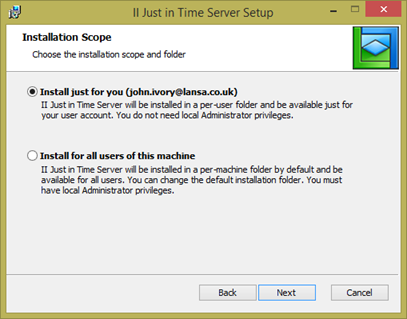
9. Select the setting, . This is suitable for training purposes.
Note: Your own JIT server install would be to a Windows server and would need to be installed for all users.
10. Click to continue:
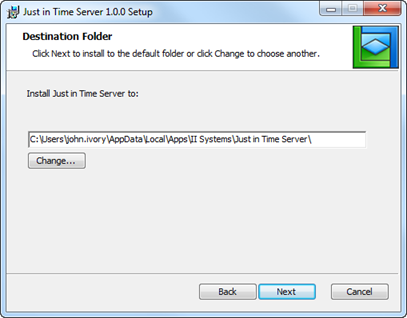
If required, the install path could be changed by using the button to select a different folder.
11. Click to continue:

12. The dialog will be prompted for the JIT Server Listener. This is always prompted and overrides the value entered in the package definition.
Enter a suitable value for your PC.
13. Click to continue:
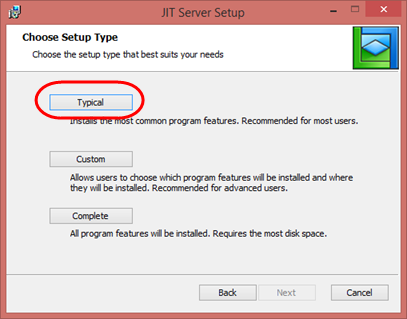
14. Select and then click to continue.
If required the back button could be used to return to a previous dialog.
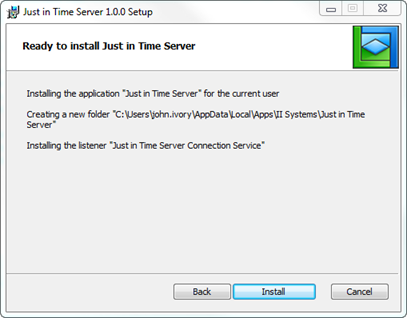
15. Click to start the installation.
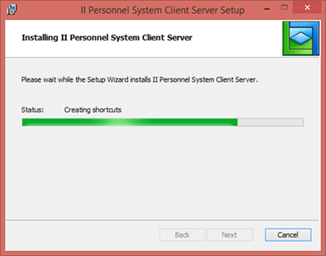
A status bar is displayed while the installation continues.
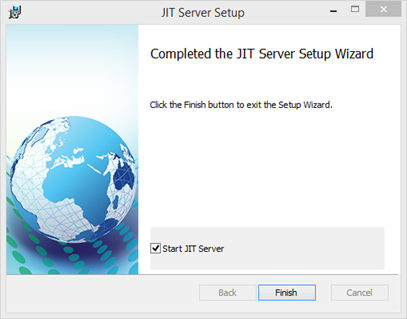
16. When the install is completed, click the button to close the install program.
With the checkbox selected, the application will be started.

The JIT Server requires a single user SuperServer licence to operate. Use the tab to install a licence if you already have one. A License can be obtained via your LANSA vendor. See the LANSA Support web site for details on product licensing. (http://www.lansa.com/support/licensing/)
The X_CPU utility in your Visual LANSA, folder is used to generate a licence request.
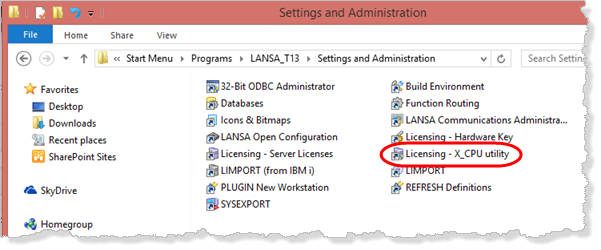
The licence is supplied as an XML file, which is loaded via the tab in the program. The licensing program records where the licence is installed so that it is accessible for any LANSA install on this machine.
The licence is only valid for the machine matching the X_CPU folder details .

17. Your Just in Time server installation is now ready to be used.
18. In the main window, select Version 1 for the IIJITSRV Just in Time Server application and click the  toolbar button. The package objects may now be viewed using the
  toolbar button, but the dialog may not be opened.