Adding/Editing an Advanced Queue
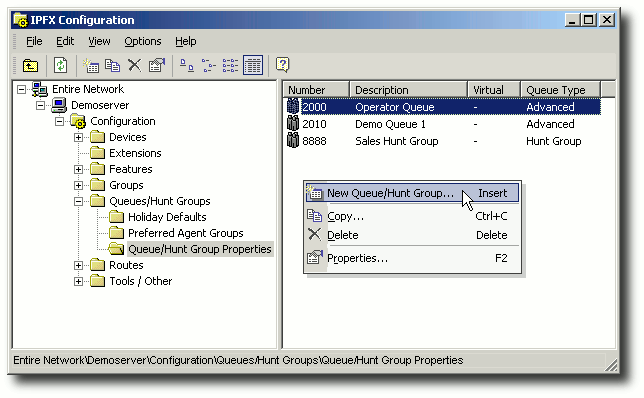
To add or edit a queue, click the Config button in your client's toolbar and navigate to the folder Configuration > Queues > Queue Properties.
To create a New Advanced Queue
- Right Click in the right side of the screen to display the short cut menu, shown below.

- Select New Queue
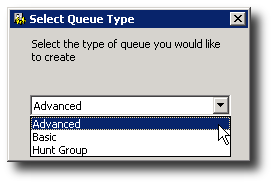
- You will be shown the options in the screen below:

- Select Advanced.
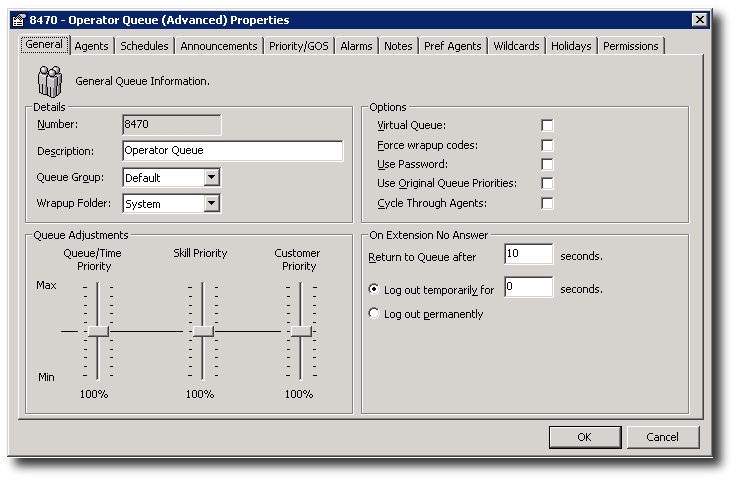
- The Advanced Queue Properties screen appears:

Note: An LCD tab and Register button will also display on this screen if installed on an IPFX for NEC platform.
Note 2 To copy a queue, right click on the required queue and select copy - a copy of the queue properties screen will appear on your screen. Enter the new Queue Number for the copied screen, Click OK.
To Edit a Queue
- Double Click on the required Queue to display the Queue Properties Screen, or right-click to display the short cut menu and select Properties.
- Enter amendments as required.
- Click OK.