Deleting a Queue Group
To delete a Queue Group
- Select the Queue Group you want to delete.
- Right-click to show the Shortcut Menu.

- Click Delete.
- You will be prompted with a confirmation box.

- Click Yes to remove or No to cancel.
Regions
All extensions are grouped by regions. 'Local' is the default.
This feature is used primarily to specify a time zone for an extension or group of extensions, the Codecs and available bandwidth for inter-regional calls.
i.e. Extensions in Sydney are in a time zone 2 hours behind Auckland. This means that any time related activity, i.e. Voicemail means local time for that extension.
Use the path Configuration/Groups/Regions. The IPFX Configuration screen will display.
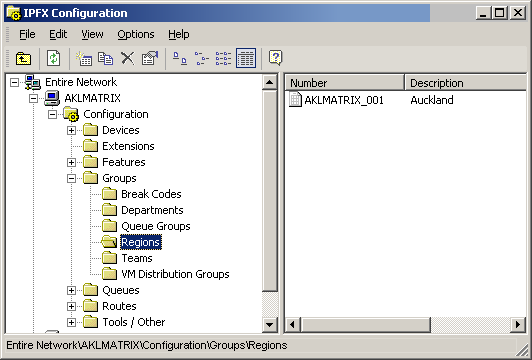
How to set up a New Region
- Right click in the right side window to display the Short Cut Menu.

- Select New Region...
- The Regions screen will display.
General Tab
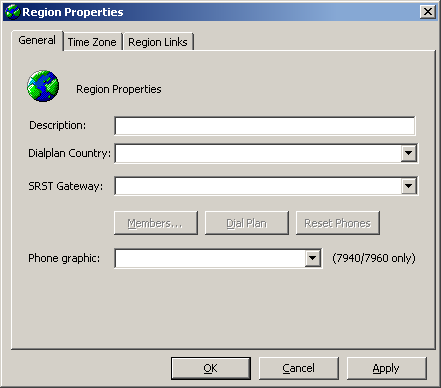
- Description - Enter the Region description to be viewed in the Directory listing, i.e. Sydney office, Local etc.
- Dialplan Country - Enter your country details
- SRST Gateway - Select the Router/Gateway require for SRST
- Members - This is the quickest method for associating extensions with regions.
- Click the Members button. The Select extensions screen displays.
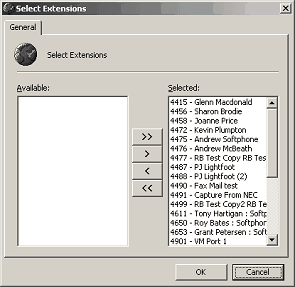
- Use the Move arrow buttons to select/deselect extensions.
- Click OK.
Note: The region is now set up and can be viewed in the Directory listing available to all users.
- Dial Plan - enter the dial plan associated with the region
- Reset Phones - resets the phones in that region.
Do not do this unless you wish all phones in this region to reset. They will lose calls that are connected.
- Phone Graphic - select for 7940/60 phones.
Time Zone Tab
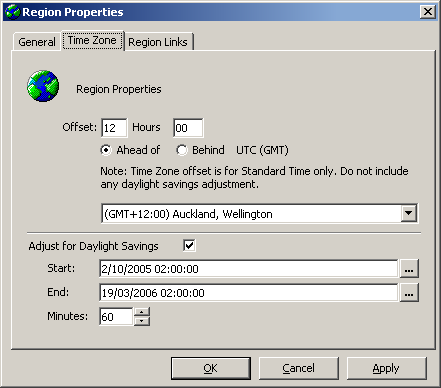
Region Properties Offset - enter the relevant times for that region in Hours and Minutes and select either Ahead Of or Behind UTC (GMT); or you can select a region's default settings from the drop- down box.
Adjust for Daylight Savings - check/uncheck the box as required (if you check the box, enter the Start and End dates and Minutes from the drop-down menu.
Region Links Tab
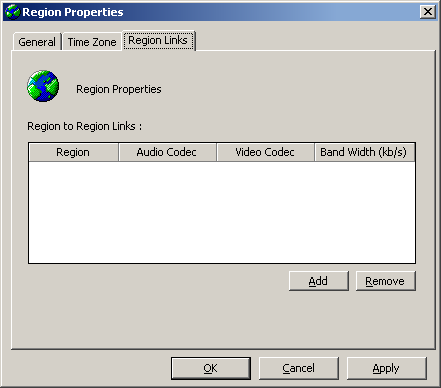
This area describes the inter-regional call paths. Multiple regions can call each other using one IPFX server or multiple networked IPFX servers using only a network connection.
If you specify your own region you can then specify the Codec used for calls within your region. The Region dropdown menu contains a list of all available regions both on the local IPFX server and remotely advertised regions linked by networking.
If you do not have multiple regions this section is not mandatory.
- Click the Add button.
- A new line will display across all fields.
- Select Region, Audio Codec and Video Codec from the drop-down menus.
Note: Due to the similar bandwidth requirements of the a-law and u-law codecs, a link configured to use a-law will also pass calls based on u-law, and vice versa. Whether a call using a particular codec can be successfully completed depends on the configuration of the organisation's router.
- Enter Bandwidth.
- Click Add again if required and enter new item.
- Click OK.
How to Delete an Existing Region
- Select the required item.
- Click the Remove button to delete.
How to Edit an Existing Region
- Double Click on the required Region to display the Regions Properties Screen shown below.
- Make alterations as required.
- Click OK.