About Company Directories
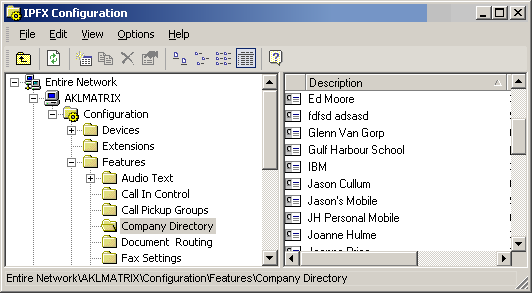
This shows the Company Directory which each user has access to in IPFX.
Click on the Config button on the top menu.
Click on Features.
Open the Directories Folder.

To Add a new Contact
- Right click on the right side of the screen to display the shortcut menu.

- Select New Contact.
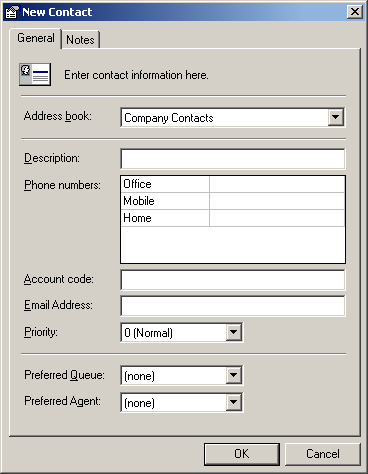
The New Contact screen displays The General Tab displays by default.
- Select Company Contacts from the Address Book drop-down menu.
- Enter Description.
- Enter Phone Numbers.
- Enter Account code.
- Enter Email Address if required.
- Select Priority from the drop-down menu, i.e. 1 being the highest and 9 being the lowest priority.
- Select Preferred Queue from the drop-down menu (this feature only available if the IPFX Preferred Agent and Queue Routing module is purchased)
- Select Preferred Agent from the drop-down menu (this feature only available if the IPFX Preferred Agent and Queue Routing module is purchased)
- Click OK.
To edit an existing Company Directory item
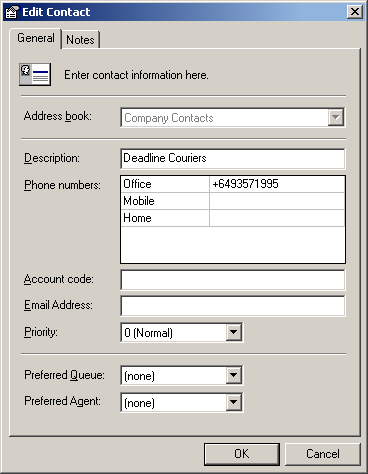
- Double click on the selected contact.
- The Edit Contact screen displays.

- Enter the new or altered contact information as required on this screen.
- Alter any fields with drop-down boxes as required.
- Press OK to finish.
For further information on Adding/Editing a Contact, please refer to the IPFX for Outlook, IPFX for Lotus Notes, IPFX Live Desktop or IPFX Live Toolbar User Guides.
For information on Preferred Agents, please refer to Preferred Agent Groups.