Configuring Document Queuing
From IPFX Administrator
Configuring Document Queuing
IPFX Queuing checks the folders that have been publicized by the Document Queuing Service and routes the documents to the relevant Queues or addresses.
To do this you need to set up a Document Routing for each relevant publicized folder.
To access the Document Routing function
- Click on the Config button in the top menu bar.
The IPFX Configuration screen displays.
- Open the Features folder.
- Open the Document Routing folder.
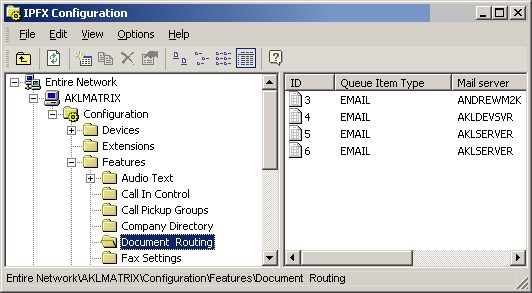
Your existing Document Routings are displayed in the right-hand pane. The columns display -
- the type of document being routed (FAX, EMAIL),
- which Mail Server received the document and
- in which publicized folder the document was found.
To create a new Document Route
- Right-click on the right side of screen to display the shortcut menu:
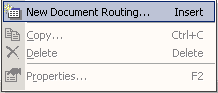
- Select New Document Routing.
A complete list of all available publicized folders that DO NOT ALREADY have a Document Routing established will be displayed.
Note: This screen shows the type of document that may be received (EMAIL, FAX), then the mail server that will receive it, and finally the folders that the server is publicizing.
- Select the relevant publicized folder and click Properties. The Document Routing details will be displayed.
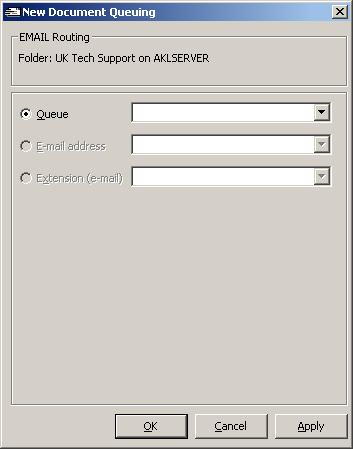
An EMAIL Routing will display as follows:
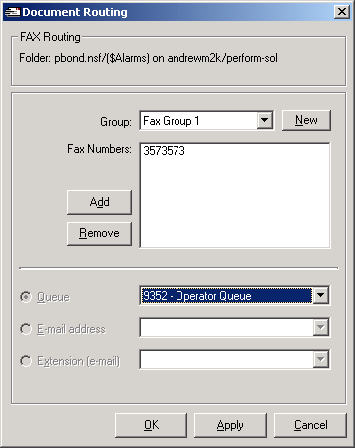
A FAX Routing will display as follows:
Configuring an EMAIL Routing
- From the Queue dropdown, select the Queue you wish to deliver the document to.
- Click OK to close the dialog and save your changes.
Configuring a FAX Routing
- To send the document to a Queue, select the Queue from the Queues dropdown.
- To send the document directly to an e-mail address, select the address from the e-mail address dropdown.
- To send the document directly to the e-mail address associated with an Extension, select the Extension from the Extension dropdown.
- Click OK to close the dialog and save your changes.
To edit an existing Document Routing
- On the Configuration screen displayed above, double-click on the Document Routing you wish to edit.
The Document Routing details will be displayed exactly as described above for creating a new Document Routing.
View or make changes and click OK to close the dialog box.
Note: You can have many publicized Folders set to route to a single Queue, eg: Support E-mails and Sales E-mails may all route to the Customer Services Queue 404.
Documents routed to a Queue are presented to Agents who are logged into the queue in the same way a normal phone call would be within the queuing environment.
When the agent within the queue is free, the document will deliver to them and the Accept/Decline Popup will appear. If the agent Declines or does nothing for a period of time, the document will return to the queue and deliver to another agent who is logged in.
If the agent accepts the document, the document is then delivered to the agent's Inbox who should respond accordingly.
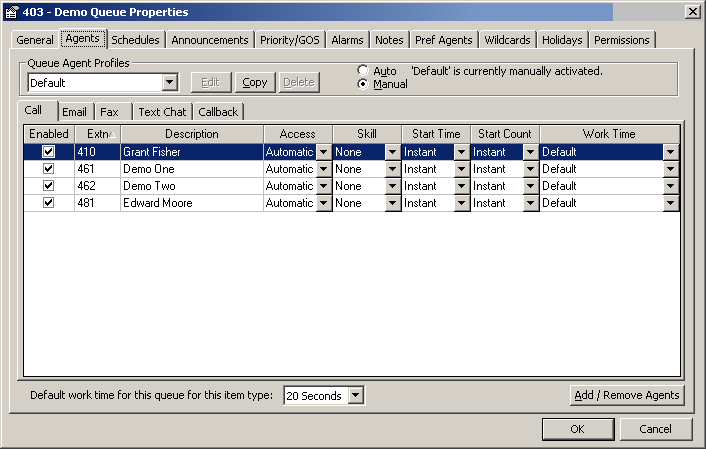
To ensure your agents can receive documents you must enable access in the Queue/Agents Tab, shown below.
Fax Settings
Setting which email accounts receive faxes
Pre-requisites
- A Windows 2003 Server License is required for the Fax Integration Module.
- The Fax Server must have the Document Queuing Module enabled to deliver incoming faxes and/or be able to use Fax Queuing.
- Please ensure that the Fax Server Module has been set up before starting the Client Configuration.
Follow the steps below to set which email accounts receive faxes:
- Click on the Config button from your Main Toolbar.
- The IPFX Configuration screen displays.
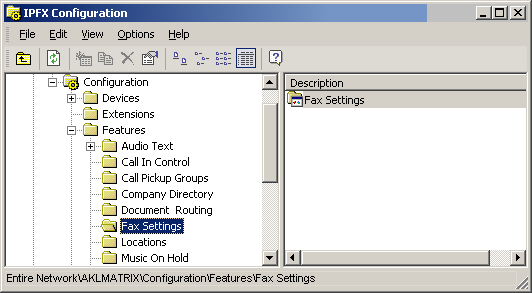
- Select Features/Fax Settings.
- The Fax Server Screen displays.
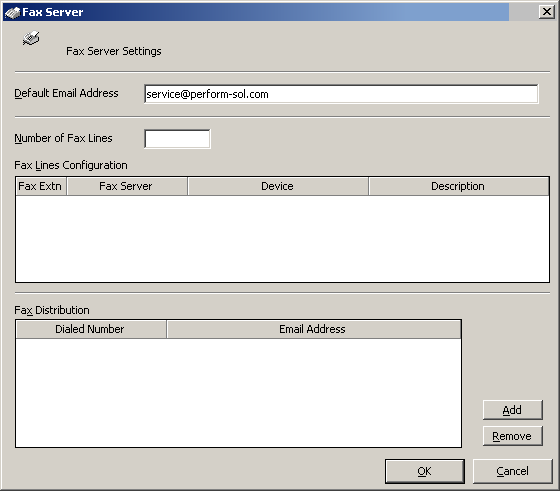
- Check the details in the Default Email Address field are correct.
- Enter the Number of Fax Lines.
- Click OK.
To enable the extra fax line, click in the field and type in the required number.
This will only need to be changed when you add a new fax card or modem.
Fax Lines Configuration
Fax Extn field enter the number of the extension that the fax line is plugged into.
Fax Server - enter the name of the Fax Server or IP Address of the Fax Server.
Device enter the new Device from the drop-down menu.
Description - enter the fax line number.
Enter all the details of the new line and/or select 'Device' from the drop- down menu
Fax Distribution section
Click the 'Add' button to add a new line.
Dialled Number - Enter the company Fax Dialled Number as it is presented to us from the Router DNIS.
Email Address - Enter the email address for faxes to route to from the Dialled Number.
Note: If for Document Queuing module, the Email Address Field would be the public folder that the Document Queuing module is monitoring.