Adding / Editing a Queue Group
From IPFX Administrator
Adding / Editing a Queue Group
- Click on the Config. Button on the top menu bar.
- Open the Groups Folder.
- Open the Queue Groups folder.
- The IPFX Configuration screen displays.
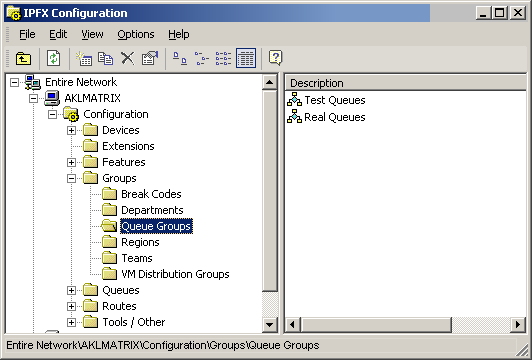
- Right click in the right side of the screen to display the short-cut menu.
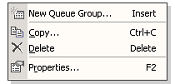
To add a new Queue Group
- Select New Queue Group from the short cut menu shown above
The Queue Group Properties form will display.
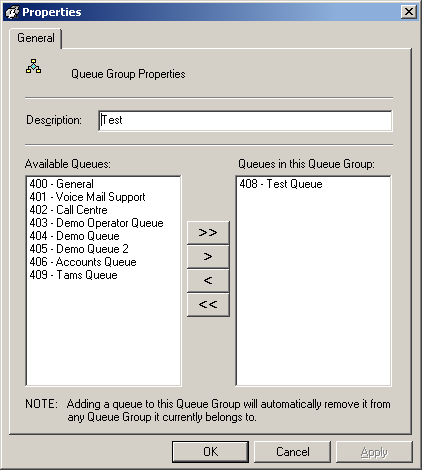
- Enter Description.
- Select required Queues.
- Use Arrow Move buttons to move from Available Queues to/from Queues in this Queue Group.
- Click OK.
To edit an existing Queue Group
- Double click on the selected item.
- A populated Queue Group Properties form will display.
- Make any necessary amendments.
- Click OK.
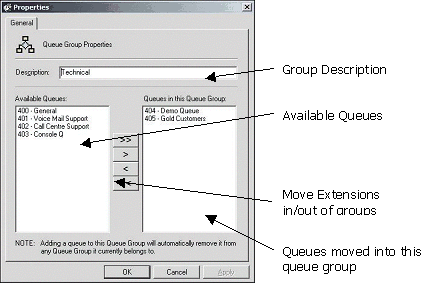
Descriptions of the available fields are set out below.
Description
Enter a description that matches the intention of the Queue Group for easy reference.
Available Queues
Queues that are available to be placed into the group.
Queues in this Queue Group
The queues that have already been added to the queue group.
Move Buttons
![]() Move all queues from Available Groups to Queues in this group.
Move all queues from Available Groups to Queues in this group.
![]() Move one queue at a time from Available Groups to Queues in this group.
Move one queue at a time from Available Groups to Queues in this group.
![]() Remove one queue at a time from Queues in this group.
Remove one queue at a time from Queues in this group.
![]() Remove all queues from Queues in this group.
Remove all queues from Queues in this group.
Note: A queue can only be in one group. Adding a queue to another queue group will automatically remove it from any Queue Group it currently belongs to.