Step 1. Create Repository Field Definitions
WAM085 - Enhancing the User Interface
Field Visualizations
Fields defined in the Repository may also have Field Visualizations defined.
- These visualizations are able to define the field's appearance in Windows desktop applications and / or in web applications built using WAMs.
- For web, field visualizations are weblets.
- Fields may have a number of visualizations for Windows and web.
- One field visualization must be defined as the default visualization, which will be the appearance option that is automatically selected.
- For web, just one weblet visualization should be defined, since at design time there is no way to switch between visualizations, except by deleting one and adding another.
- Fields may have a static picklist defined which defines a set of descriptions (or captions) and values. Weblets such as a combo box or radio button group will use this picklist to populate the selection options in the web page.
- Field visualizations are compiled into the web page at design time. A change to the definition of a field's visualization in the Repository, for example changing a radio group to a combo box, or adding or removing entries in the picklist, can only be reflected in the web page by removing that field from the web page and re-adding it. It follows that field visualizations defined in the Repository with a static picklist, are only useful for very static data that is unlikely to ever change, such as "male or female" or "married, single or divorced".
- Note also that field types such as Date, DateTime and String will probably always benefit from having a weblet such as datepicker, so their automatic visualization definitions in the Repository are always useful.
- There are other field visualization options that only apply to Windows desktop applications, that are not discussed further here.
- See the Visual LANSA Developer Guide for more information on field visualizations.
1. Create new field definitions in the Repository:
|
Name |
Description |
Type |
Length |
Input Attribute |
|
iiiDATE |
Start Date |
Date |
10 |
|
|
iiiDTETME |
Last Updated |
DateTime |
25 |
|
|
iiiNOTE |
Comments |
String |
512 |
LC |
|
iiiGENDER |
Gender |
Alphanumeric |
1 |
|
|
iiiTIME |
Create Time |
Time |
8 |
|
|
iiiCUREMP |
Current Employee |
Alphanumeric |
1 |
|
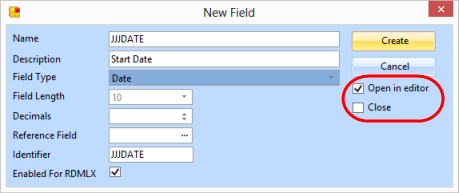
Use the New Field dialog, to open each field in the Editor and for the dialog to remain open. Fields will be automatically flagged as RDMLX when a type such as Date is selected:
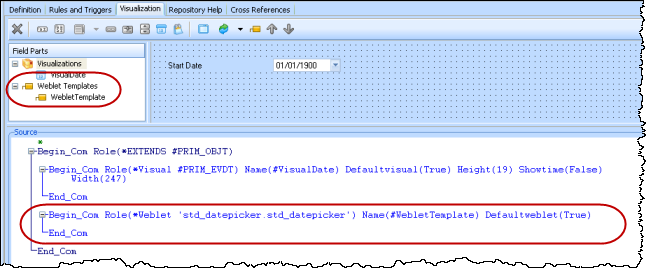
2. Review the Field Visualization for the fields iiiDATE, iiiDTETME, iiiTIME and iiiNOTE. They each have been given a suitable weblet visualization.
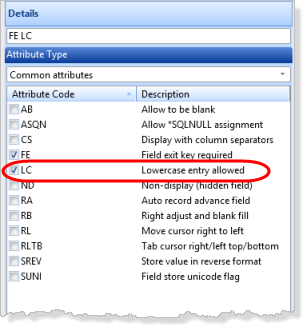
3. Ensure that the Input attribute of field iiiNOTE allows lower case:
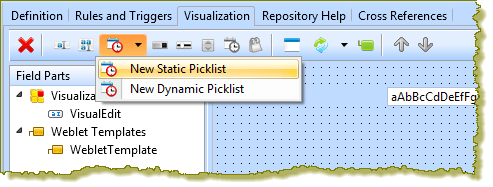
4. Switch to the Field Visualization definition for field iiiGENDER. Add a Static Picklist using the toolbar button:
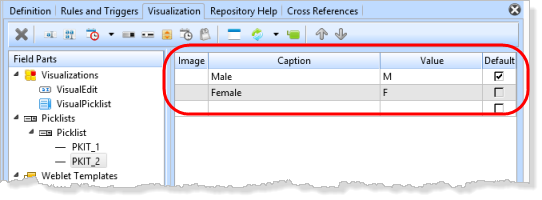
5. Define the static picklist with two entries as shown:
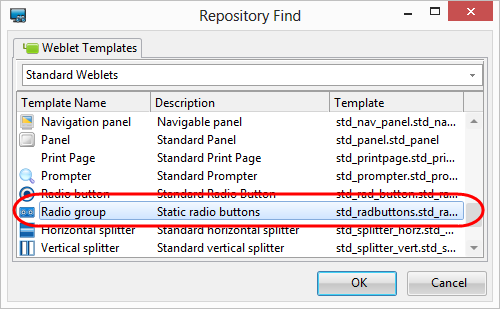
6. Open the Repository Find dialog using the  insert Weblet Template toolbar button.
a. If necessary, in the Repository Find dialog, select Standard Weblets in the dropdown.
b. Add a Radio Group weblet.
7. Save the field definition.
8. Switch to the Visualization tab for field iiiCUREMP. Use the  toolbar button to add a Checkbox weblet visualization.
The Checkbox weblet will return, by default, values of Y and N which are correct values for field iiiCUREMP. In this case a static picklist is not required.
9. Save the field definition.