Step 4. Add buttons to the WebRoutine
WAM010 - Using WEB_MAPs
In this step, you will learn how to add a row to the generated table and then create the buttons that will invoke this WebRoutine. A reentrant WebRoutine is designed so that from the web page that is presented to the user, after the WebRoutine ends, navigation elements are provided that will allow the WebRoutine to be initiated once again. Data on the page will be used in the WebRoutine to control the logic performed by the routine. This technique is used to reduce the number of WebRoutines required for a particular application.
1. Add a new row to the table:
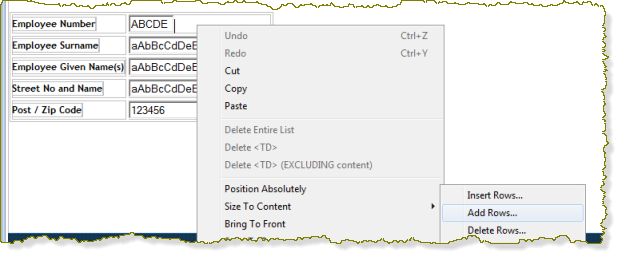
a. Right click in the table that contains the data entry fields. For example click to the right of the Employee Number field input box and then right click.
b. Select the TableItems menu item and choose the Add Rows…option from the pop-up menu. Click OK. A row will be added to the end of the table.
2. This step adds the Read button:
a. From the Favorites / Weblet Templates tab, drag and drop a Push button weblet into the leftmost cell of the newly added row.
b. Click on the empty space of the cell containing the button.
c. Select the Details View.
d. Set the align property to left.
3. Set the Read button properties:
a. Select the new button in the Design View.
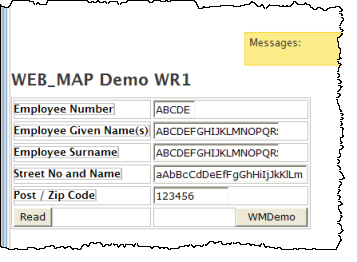
b. Set the caption to Read.
c. Set the on_click_wrname to WMdemo.
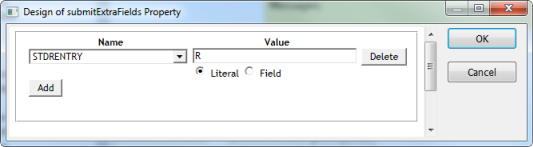
d. Click in the Value column for the submitExtraFields property and use the Ellipsis button to open the Design of… dialog. In the Name column select STDRENTRY from the dropdown list. In the Value column enter R and leave the checkbox as Literal. Click OK to close the dialog and save your changes. The button click will return the field STDRENTRY with a value of R.
4. Add the button to reload the WebRoutine:
a. From the Weblet Templates tab, drag and drop a Push button weblet into the rightmost cell of the newly added row.
b. Click on the empty space of the cell containing the button.
c. Select the Details View.
d. Set the align property to right.
5. Set the button's properties:
a. Select the new button in Design View.
b. Set the caption to WMDemo.
c. Set the on_click_wrname to WMdemo.
d. Click in the Value column for the submitExtraFields property and use the Ellipsis button to open the Design of… dialog. In the Name column select STDRENTRY from the dropdown list. In the Value column enter ' ' and leave the checkbox as Literal. Click OK to close the dialog and save your changes. The button click will return the field STDRENTRY with a blank value.
6. Save the changes to WMdemo.