Step 3 Add a new menu to the application s menu bar
From LANSA Client
Step 3. Add a new menu to the application's menu bar
To give you a quick start with your new query, you are provided with a ready to use menu bar containing menus and commands. These are the basic commands, such as File, Print and so on and they are listed in the Generate Application's Menu box when it is opened. You cannot modify these commands.
For each query packaged in your application, you will need to add a command to your menu bar in order to start the query. In this tutorial, these commands will be added to a new item in the menu bar.
1. Add a new menu to the menu bar by placing your mouse pointer on any item in the box and pressing the button.
Do you see the additional blank entry that has been added above the Options item in the Menu box? This will become a menu on your application's menu bar.
2. Give the new menu a name, by entering &Queries in the entry box.
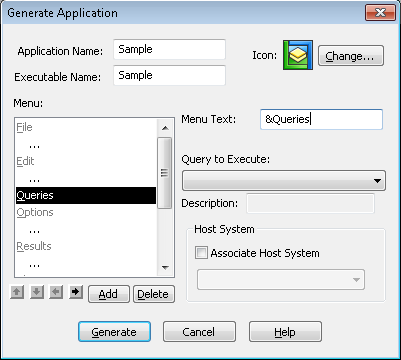
What you have done is added a menu item called Queries to the menu bar with Q as its short cut key. The '&' character does not appear, but it causes the Q character to be underlined.
Now add some commands to your new menu, as described in Step 4. Add Commands to the new Queries Menu