LCL001 - Start LANSA Client
1. Select the LANSA Client menu from the Windows Start menu.
2. Click on the LANSA Client icon in the LANSA Client list to start LANSA Client.
If you can connect to more than one host system, the dialog box will be displayed.
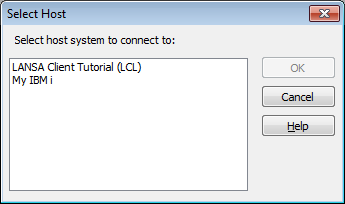
3. For this tutorial, select LANSA Client Tutorial (LCL) from the list and press the button. Alternatively, you could simply double-click on LANSA Client Tutorial line.
If you only have one host system to connect to, this selection step will be bypassed.
When a connection between the PC and the host you have selected is established, the is displayed, otherwise the LANSA Client Alternate Window is displayed.
4. When the is displayed, go to LCL002 - Run a Simple Shipped Query.
About the LANSA Client Main Window
Start all LANSA Client functions, such as to create a query, run a query and so on, from the LANSA Client main window.
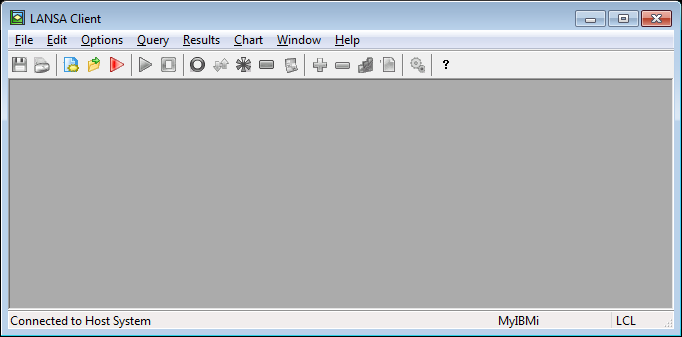
The LANSA Client main window, as with all other LANSA Client windows, has standard Windows facilities which include:
- Maximize and minimize buttons in the top right corner.
- The system menu icon in the top left corner.
- A title bar across the top of the window.
- A menu bar just below the title bar.
- A tool bar just below the menu bar.
- A status bar at the bottom of the window. The status bar is used to display:
- information about the file you have selected
- the host system and partition you are currently connected to
- the status of your query, when it is running.
LANSA Client Alternate Window
If a connection cannot be established to the host, the alternate window is displayed. In this case, you will need to restart the signing on process, after you have investigated the reason for not connecting to the host.