1 6 A WAM Example Beginning to End
From LANSA WAM
1.6 A WAM Example - Beginning to End
Let's walk through a simple two-page web example in order to reiterate what happens at key points in the execution of a WAM.
The initial page, when displayed in a browser, looks like this:
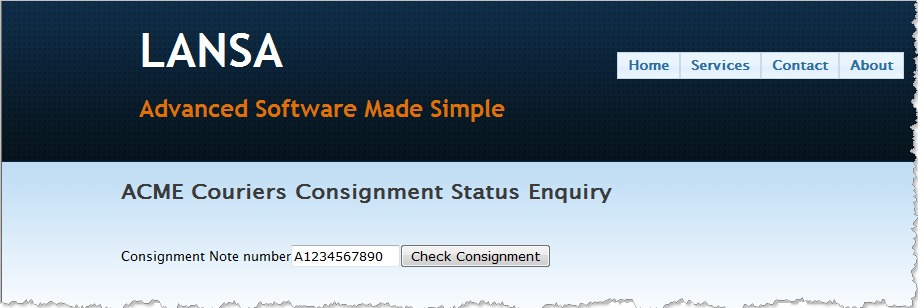
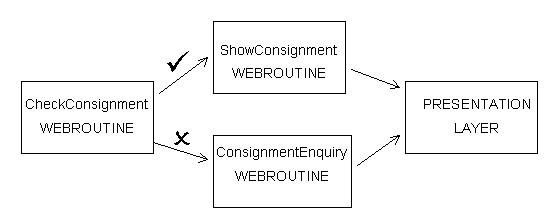
As you can see, it's a Consignment Status Enquiry. It provides for a Consignment Note Number to be entered. The Check Consignment button can then be clicked to retrieve the information from the database and display the status of the Consignment. So, we have three steps. To keep it simple, we'll have a Webroutine for each step:
- one to show the initial page, as above (ConsignmentEnquiry),
- one to receive and validate the Consignment Note Number (CheckConsignment),
- and one to fetch and show the data from the database (ShowConsignment).
To begin with, how do you display the initial page? You may enter a URL:
![]()
Note the webapp=WDWAM01 and webrtn=ConsignmentEnquiry parameters. These indicate the name of the WAM (WDWAM01) and Webroutine (ConsignmentEnquiry) to be executed.
Or you may execute this from some other part of a bigger WAM application, perhaps by clicking on an Anchor (or Hyperlink), by pushing a button or by selecting a menu item. Regardless of the method, the mechanism is the same: a Webroutine, sitting inside a WAM, is executed.
So, what does the underlying code for our initial Webroutine look like? Here it is:

The key here is the web map for the WDCONSIGN field. It is defined as , meaning that its value will be read in at the start of the Webroutine and written out when the Webroutine ends. Remember, when you compile the WAM, LANSA will create some XSL to display WDCONSIGN on the web page.
It won't, however, give you a push button. So, you right-click on the Webroutine and open its page in the LANSA Editor. Drag and drop a push button Weblet onto the design and set its properties:
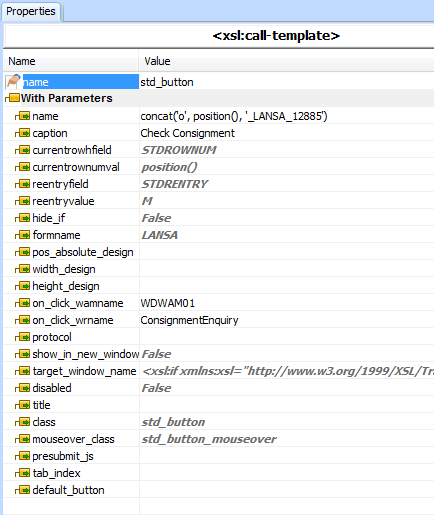
Note the caption, on_click_wamname and on_click_wrname property settings. The on_click properties executes the Webroutine in the WDWAM01 WAM when the button is clicked.
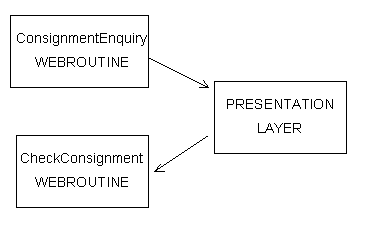
So far, then, the flow of this little application looks like this:
Now, back in the LANSA Editor, enter the following RDMLX code for the Webroutine:
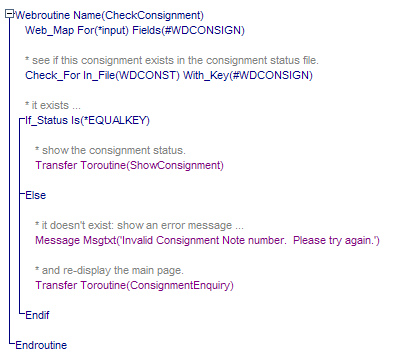
Again, note the web map. Its For() setting means that WDCONSIGN is mapped into the Webroutine when it's invoked – by the user clicking the push button, in this instance.
The Consignment status file is checked to see if the entered Consignment Note Number exists. If it does exist, control is transferred to the Webroutine. If it doesn't exist, an appropriate error message is issued and control is transferred to the original Webroutine.
Note that the Webroutine never ends, and so never displays a web page. It always transfers control to either the or Webroutines.
The flow for this part of the WAM, then, looks like this:
Now have a look at the code for the Webroutine:
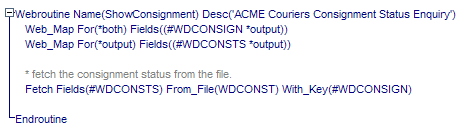
Again, note the Web Maps. The Consignment Note Number (WDCONSIGN) comes in courtesy of the web map.
The status field, WDCONSTS, is fetched from the database using the Consignment Note Number as a key.
The Webroutine ends. The Consignment Note Number and Status fields are mapped out of the Webroutine.
Control is transferred to the Presentation Layer, which displays the Consignment Note Number and Status. Note too the attributes on the fields, which means they will be displayed as output-only.
Let's run the WAM from the beginning, assuming a valid Consignment Note Number has been entered:
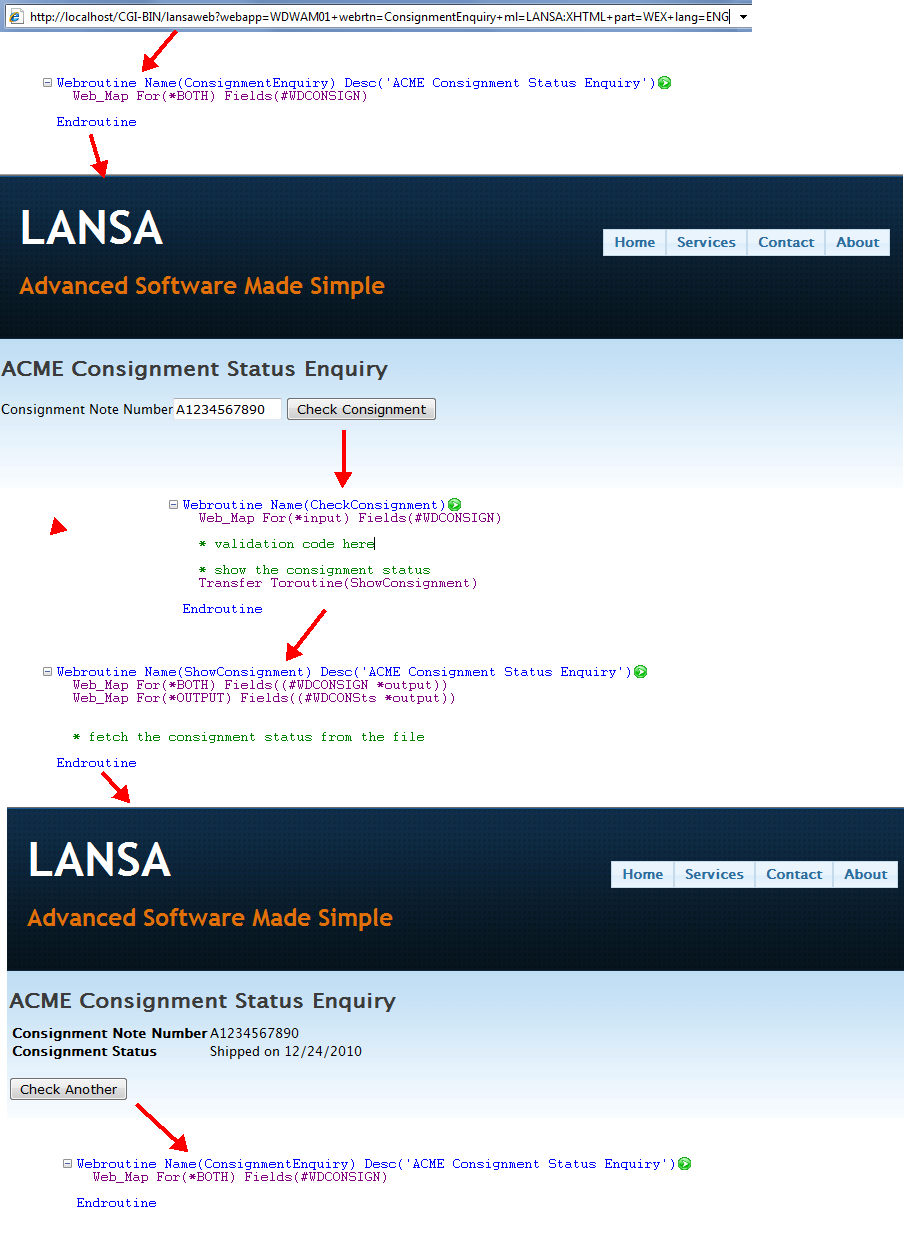
Note the push button. It simply takes us back to where we started by re-executing the Webroutine.